Change the default audio player in Windows 10
The default audio device is the device that Windows uses to play sound. When connecting speakers, headphones, Bluetooth headsets or other audio devices to your PC, you can choose which device you want to use by default.
This guide will show you various ways to change the default audio output (output) device in Windows 10.
Change the default media player from the Volume icon on the Taskbar
1. Click the Volume icon in the notification area of the Taskbar.
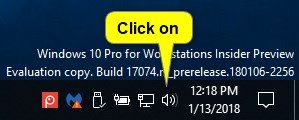
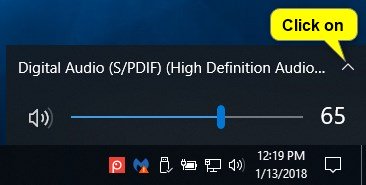
2. Click the expand arrow above the volume control.
Note : You will not see an extended arrow if there are not many audio players.
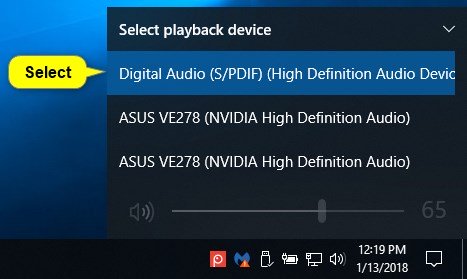
3. Click the transmitter you want to use from the menu. Windows will switch to it.
Change the default audio device from Settings
Note : This option is only available starting from Windows 10 build 17035.
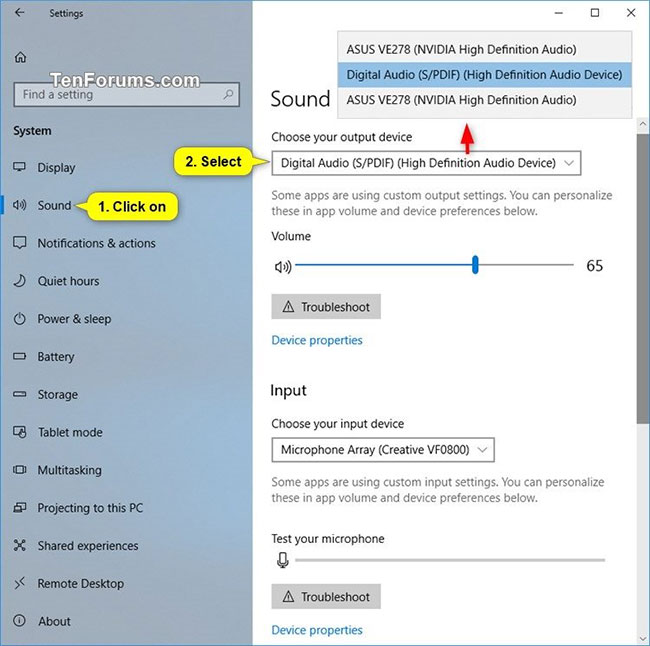
1. Open Settings and click on the System icon .
2. Click Sound on the left side and select the desired output device from the Choose your output device drop-down menu on the right.
Note : You will not be able to choose if there is only one audio player.
3. When done, you can close the Settings if desired.
Change the default audio device from Control Panel
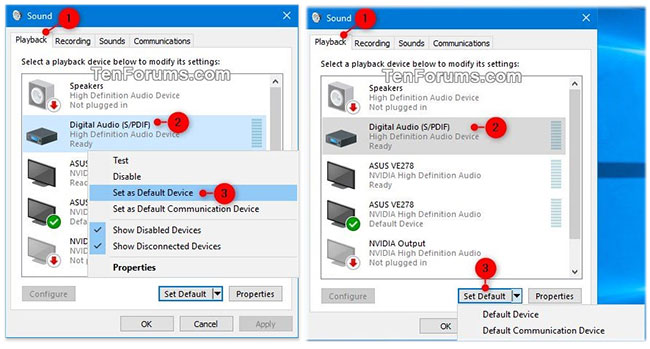
1. Open Control Panel (icon view) and click on the Sound icon .
If you like, you can open Run ( Win + R ), copy and paste the below command into Run , then click OK to directly open "Playback" devices in the Sound control panel .
rundll32.exe shell32.dll,Control_RunDLL mmsys.cpl,,0 2. Click the Playback tab and perform one of the actions you want to use below to set the default player.
- Right-click or hold and hold on the transmitter, and then select Set a Default Device .
- Select a transmitter and:
- Click Set Default to set both "Default Device" and "Default Communications Device".
- Click the arrow to the right of the Set Default drop-down menu and click Default Device.
- Click the arrow to the right of the Set Default drop-down menu and click Default Communication Device . This is not "Default Device".
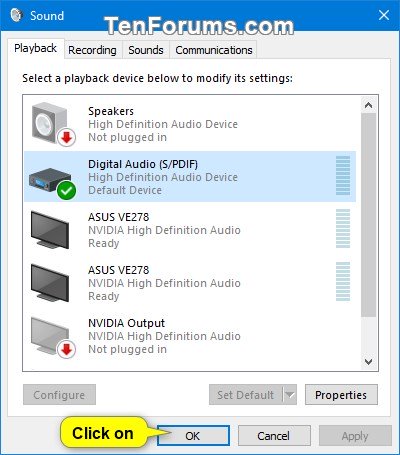
3. Click OK when done.
Change the default audio device from Game Bar
Note : This option is only available when starting from Windows 10 build 17692.
1. Open the Game Bar ( Win + G ).
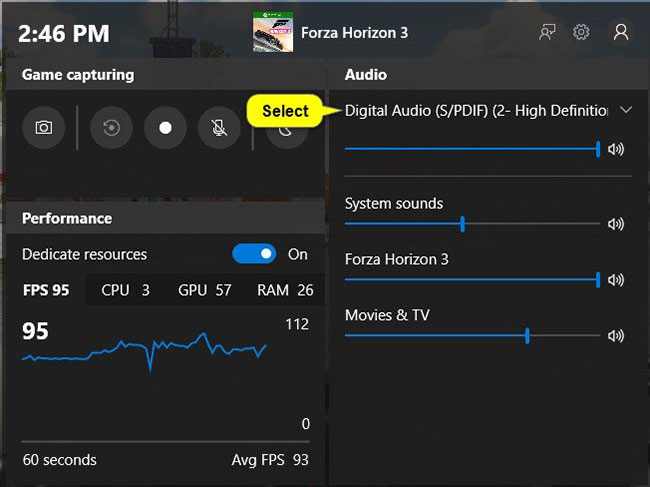
2. Select the default audio output device you want.
Note : You will not be able to select if there is only one audio output device.
3. When done, close the Game Bar if you like.
