How to change the default screenshot saving folder on Windows 10 and 11
Windows 10 and 11 offer multiple ways to take screenshots, of which the Snipping Tool (or PrintScreen key) is the most convenient..
Windows 10 and 11 offer multiple ways to take screenshots, of which the Snipping Tool (or PrintScreen key) is the most convenient. By default, screenshots/videos are saved in Drive C > Pictures > Screenshots. However, if you want to change the location of the screenshots, just follow these methods:
Method 1: Change the save folder via Snipping Tool
*(Only applies to photos taken from Snipping Tool, not to Win + PrintScreen key combination)*
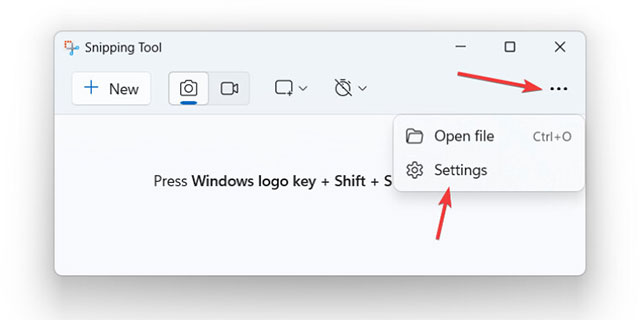
1. Open Snipping Tool > press the 3 dots button in the right corner > select Settings.
2. Scroll down to " Automatically save original screenshots " > click Change in the " Screenshots are saved to " section.
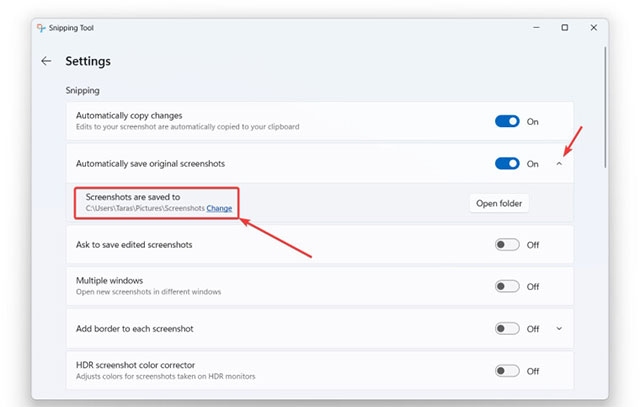
3. Select new folder > OK .
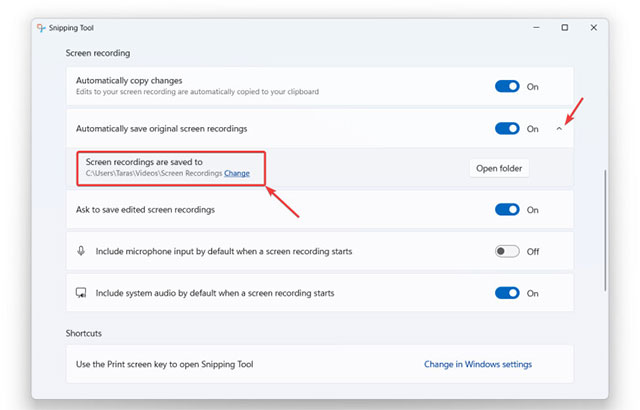
Change the folder where screenshots are saved (Screen Recordings):
Repeat the above steps with the " Automatically save original screen recordings " item.
Note : You can turn off "Automatically save." to choose where to save each shot.
Method 2: Change folder via File Explorer
*(Applies to both Snipping Tool and Win + PrintScreen , only changes the capture folder)*
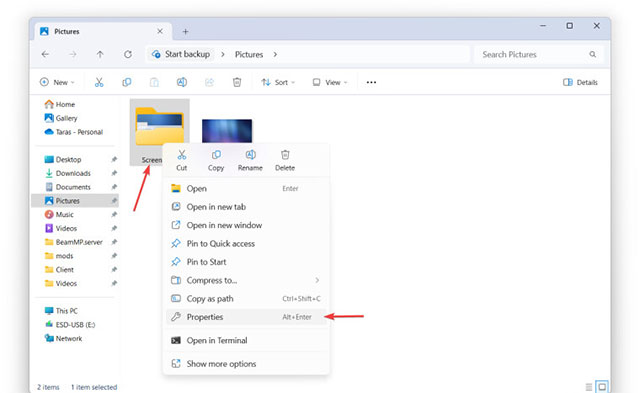
1. Open File Explorer > go to Pictures > Screenshots folder .
2. Right-click on Screenshots > select Properties .
3. Select the Location tab > click Move > select a new folder > OK .
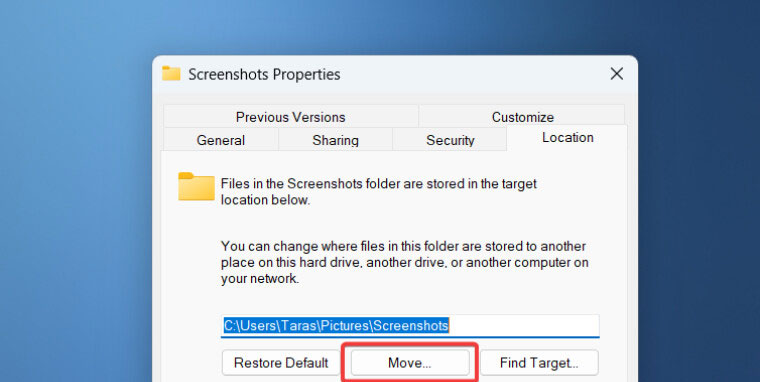
4. Select Yes when Windows asks if you want to move the old photos to the new folder.
Change the folder where screenshot videos are saved:
Do the same with the Videos > Screen recordings folder .
Restore default:
Repeat the above steps > click Restore Default .
Method 3: Switch to Registry Editor
(For advanced users, only applies to screenshots)
Warning : To be safe, back up your data before editing the Registry.
1. Create a new folder to save the images (for example: D:Screenshots ).
2. Press Win + R > type regedit > OK .
3. Paste the following path into the address bar:
ComputerHKEY_CURRENT_USERSoftwareMicrosoftWindowsCurrentVersionExplorerUser Shell Folders
4. Find the value { B7BEDE81-DF94-4682-A7D8-57A52620B86F } (if it doesn't exist, create a new one using Edit > New > String Value and set this value).
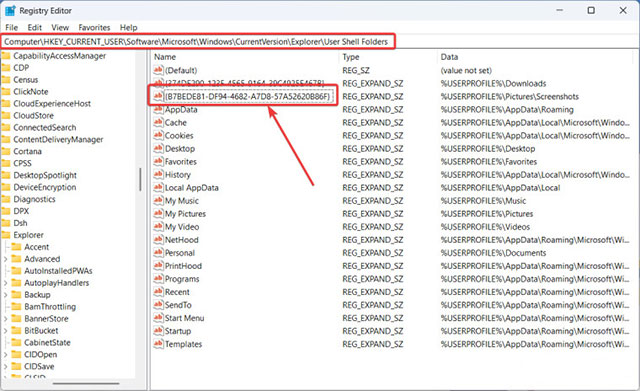
5. Double-click the value > enter the new folder path (eg: D:Screenshots ) > OK .
Note : This method does not move old photos to the new folder.
Important Note:
- The above steps do not apply to third-party screenshot apps (Snagit, ShareX.). Please check the settings of each app.
- To avoid filling up your hard drive, choose a save folder on a drive with plenty of free space.
Good luck!