Table of Contents
In case you want to change the default drive to a larger capacity drive on your Windows computer, follow the instructions below.
Normally, Windows uses the C drive to store all downloaded files and installed programs. In case you want to change the default drive to a larger capacity drive on your Windows computer, follow the instructions below.
How to change the default Windows 11 drive for applications
Step 1:
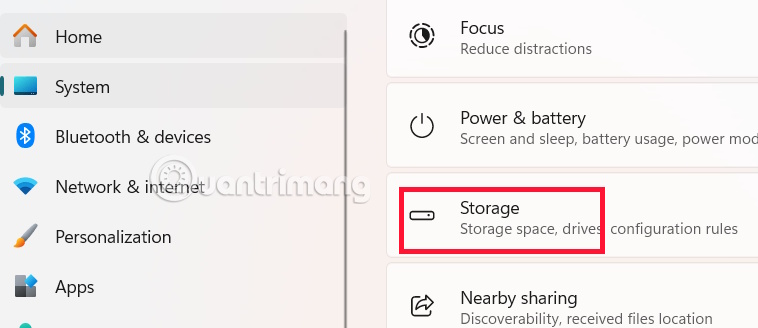
Open Settings On Windows and click on System , then look to the side And click on Storage .
Step 2:
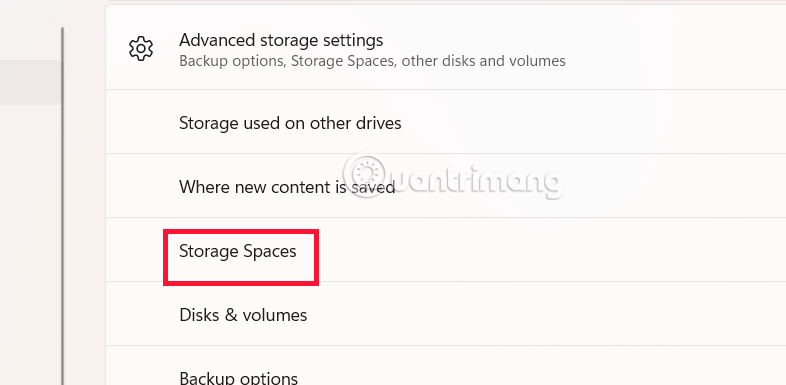
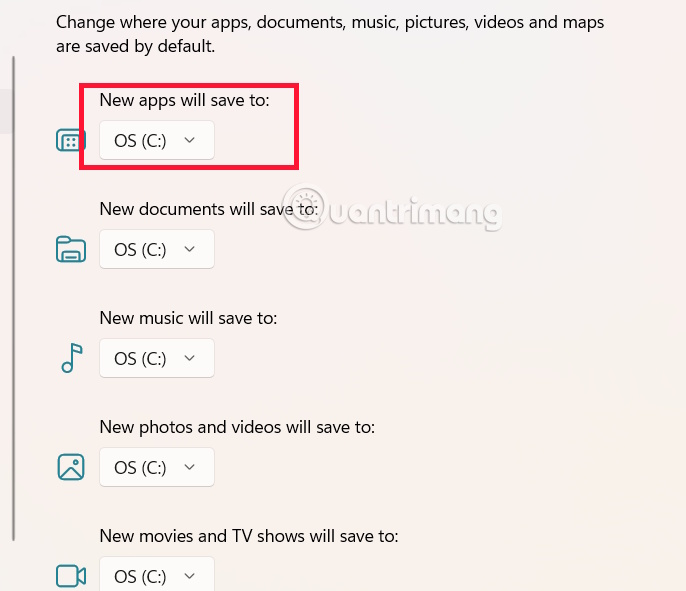
Then Click Advanced storage settings To expand advanced storage on your computer. Continue To click Where new content is saved To change the drive for the program and new saves.
Here select which drive will become the new default.
Change the hard drive where files downloaded from the browser are saved
Each browser will choose the Downloads folder in drive C to save downloaded files. You can completely change the location of the folder to save downloaded files on your computer.
- How to change download folder on Chrome
- How to change the default file save location on Edge
Change default hard drive for User file
The User folder stores many stuff from documents, games, added files, and even the default Downloads folder. You can move that storage to another drive and it will continue to be used.
Step 1:
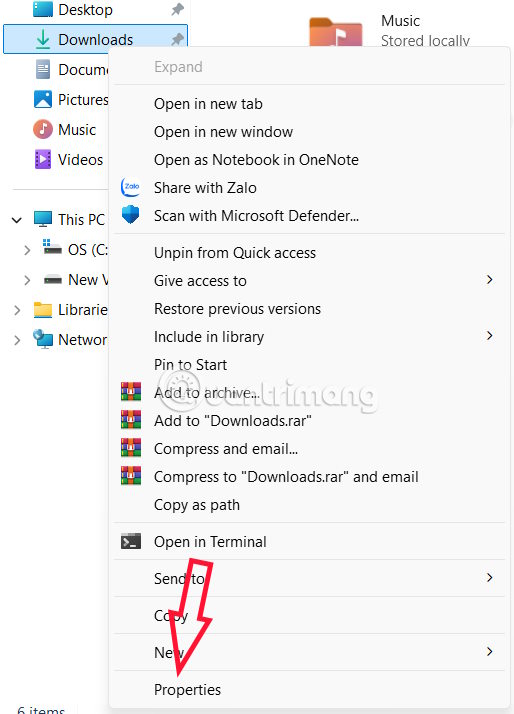
Open File Explorer then Right click on Downloads and select Properties .
Step 2:
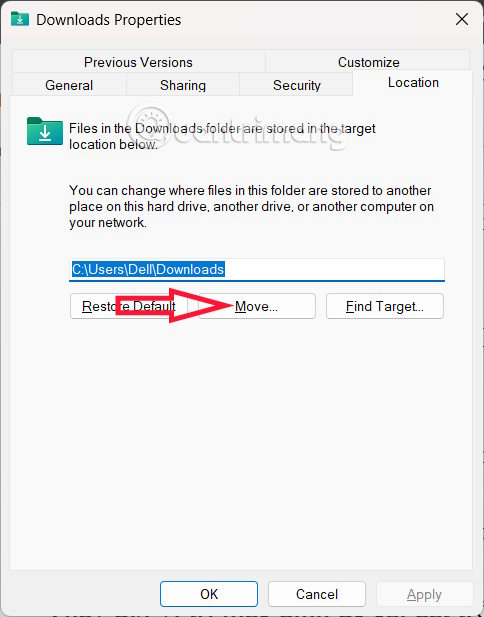
Display the new interface, the user Clicks on the Location tab To change the default location.
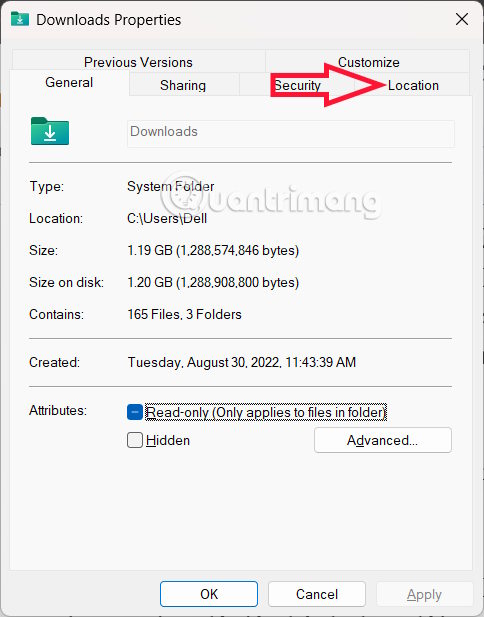
Now Click Move To select a new folder for Downloads on your computer and click Apply to save.
In case you want to change back to the previous storage, click Restore Default.
Change default location for game installation
Depending on the type of game installed on your computer, it may or may not support you to change the default data installation folder. Go to the game's Settings and check if there is an option to change the installation folder.
FAQ
How do you change the default drive in Windows 11: step-by-step guide?
In practical terms, in case you want to change the default drive to a larger capacity drive on your Windows computer, follow the instructions below.
What should you check before getting started?
Review the requirements, compatible device or software version, and any warnings described in the guide before making changes.
What should you do if the steps do not work?
Repeat the steps in order, confirm that your app or system is up to date, and review the troubleshooting details provided above.
Related Articles
 Change the Folder to Save the Default Data in Windows 103 minutes read
 Font Windows 10: How to Change the Default Windows 10 Font6 minutes read
 How to Change the Download Folder Windows Update in Windows 105 minutes read
 3 Ways to Change the Default Browser in Windows 105 minutes read
 8 Install Google Drive You Should Change Today8 minutes read
 Instructions for Changing the Default Web Browser in Windows 73 minutes read
Reader Comments 0
Sign in with email or Google to join the discussion.