Table of Contents
The Windows hosts file maps a hostname to an IP address before the system uses normal DNS resolution. Editing it is useful for testing a site on a new server, naming a device on a private network, or temporarily redirecting a domain on one PC.
On Windows 10 and Windows 11, the file is:
C:WindowsSystem32driversetchostsYou need administrator permission to save changes. Back up the file first, change only the required lines, and remember that the mapping affects this computer only.
Hosts file syntax
Each active entry contains an IP address followed by one or more hostnames, separated by spaces or tabs:
192.0.2.25    example.test
192.0.2.25    www.example.test
A line beginning with # is a comment. Do not remove comment markers from example lines unless you intend to activate them. Hostnames with and without www are different and need separate entries when both should resolve.
Method 1: Edit a copy, then replace the original
This method preserves an easy backup and avoids losing work if the editor cannot save in the protected folder.
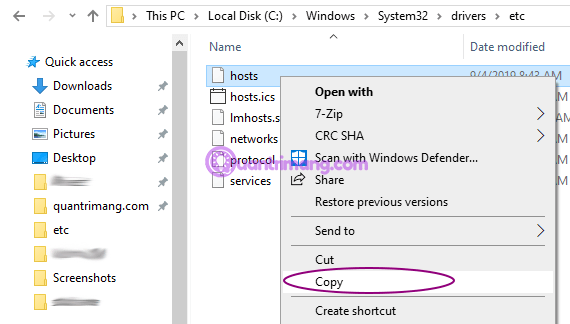
- Open File Explorer and paste
C:WindowsSystem32driversetcinto the address bar. - Copy the file named hosts to the Desktop or Documents folder.
- Create a second copy named
hosts.backup. - Open the working copy in Notepad. If Windows asks which app to use, choose a plain-text editor.
- Add or remove the required entries, then save. Keep the filename exactly
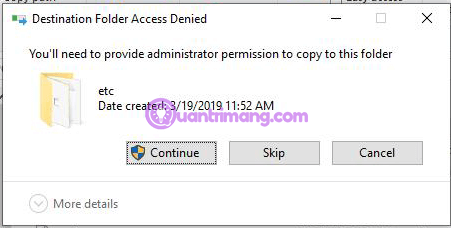
hostswith no extension. - Copy the edited file back to
C:WindowsSystem32driversetc. - Approve the administrator prompt and replace the existing file.
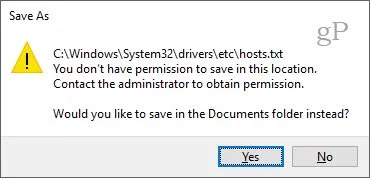
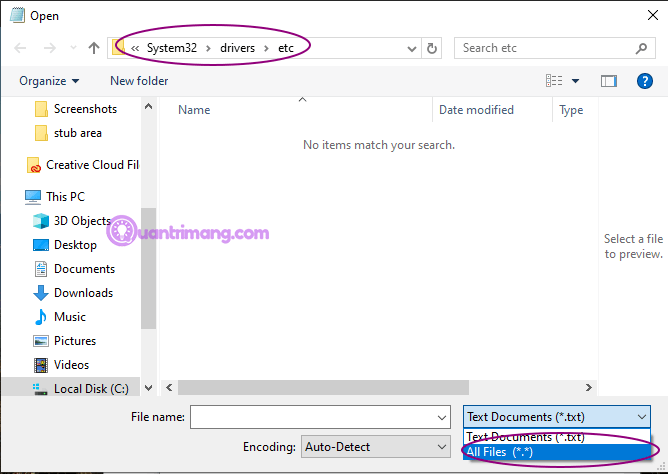
Notepad may silently add .txt if Text Documents is selected in the Save dialog. Choose All files and verify in File Explorer that the file is named hosts, not hosts.txt.
Method 2: Run Notepad as administrator
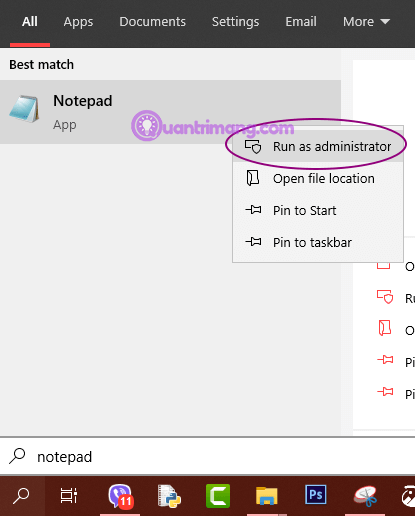
- Open Start and search for Notepad.
- Right-click it and choose Run as administrator.
- Approve User Account Control.
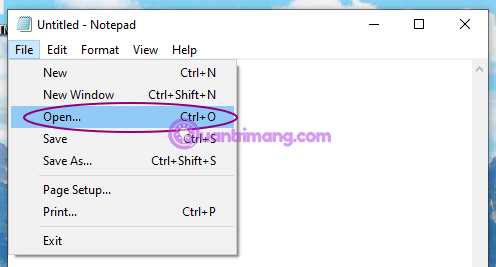
- In Notepad, select File > Open.
- Paste
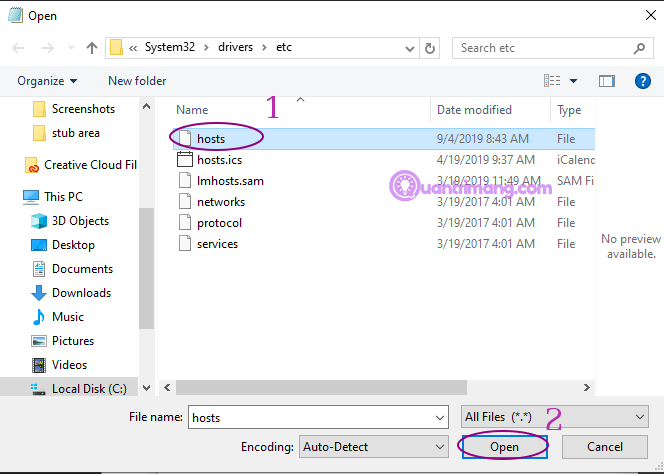
C:WindowsSystem32driversetchostsin the File name box, or browse to the folder. - If the folder appears empty, change the file filter from Text Documents (*.txt) to All files (*.*).
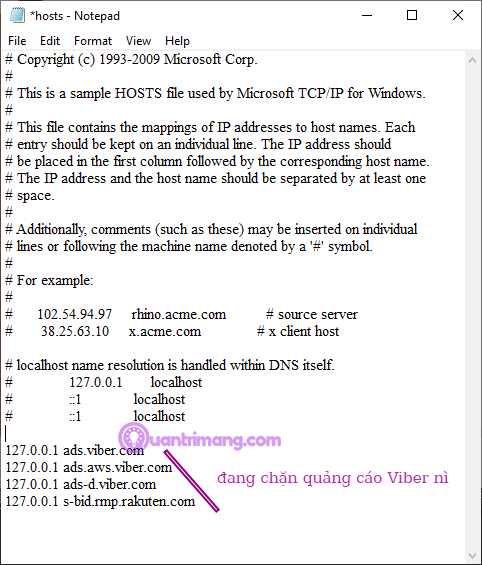
- Open hosts, make the change, and save.
Example: test a website on another server
Suppose a staging server uses the address 192.0.2.25, and you want this PC to open www.example.com there:
192.0.2.25    example.com
192.0.2.25    www.example.com
Remove those lines when testing is complete. Leaving a production domain pinned to an old address can make a later server migration look broken on that PC.
Blocking a hostname
You can map an unwanted hostname to a non-routable local address, for example:
0.0.0.0    ads.example.invalid
0.0.0.0    www.ads.example.invalid
The hosts file is not a complete parental-control or security system. Applications can use their own DNS or direct IP connections, users with administrator access can undo the change, and large blocklists are difficult to maintain. Use operating-system family controls, a managed DNS filter, browser policy, or a firewall when enforcement matters.
Apply and test the change
Most changes take effect without restarting Windows, but an application or DNS client may cache an earlier result. Close and reopen the browser first. If necessary, open Command Prompt as administrator and run:
ipconfig /flushdns
Test with:
ping example.testThe address shown by ping should match the hosts entry even if the server does not answer ICMP requests. nslookup queries DNS directly and is not a reliable way to confirm a hosts-file mapping.
If Windows will not save the hosts file
| Symptom | Fix |
|---|---|
| Access denied or no permission | Run the editor as administrator or use the copy-and-replace method |
| File saves as hosts.txt | Choose All files and remove the .txt extension |
| File is read-only | Open Properties and clear Read-only only if organizational policy permits it |
| Security software restores the file | Do not disable protection blindly; review the alert and allow the exact intended edit through approved controls |
| Change has no effect | Check spelling, comments, duplicate lines, cache, and the application’s DNS behavior |
| No administrator prompt appears | Confirm the account can elevate and that the editor was launched with Run as administrator |
Restore the default hosts file
The safest restoration is to copy back the backup made before editing. If no backup exists, remove only the custom entries you added and preserve the standard comments. Save the file, flush the DNS cache, and reopen affected applications.
Security checks
- Do not paste a hosts file from an unknown website; malicious mappings can redirect banking, update, or login domains.
- Do not change file or folder permissions to give all users write access.
- Record why each custom entry exists and remove it when no longer needed.
- If unexpected entries return after removal, run a trusted malware scan and check device-management policy.
- Use reserved documentation addresses such as
192.0.2.0/24in examples, not a real third-party server.
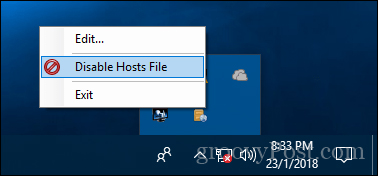
The reliable workflow is simple: back up hosts, edit it with administrator permission, keep the extensionless filename, flush cached DNS if needed, and test the resolved address. Avoid third-party hosts editors unless you have verified their publisher, maintenance, and security.
Related Articles
 Edit Hosts File: How to Fix Hosts File on Mac4 minutes read
 How to Reset Hosts File on Windows 7/8 // 8.1 and Windows 104 minutes read
 Block the Website by Hosts Files on Windows 87 minutes read
 How to Edit the Host File, How to Edit the Host File, Read and Open the3 minutes read
 How to Fix the Hosts File on Windows 104 minutes read
 How to Open the Hosts File on Windows - the Hosts File Stores the6 minutes read
Reader Comments 0
Sign in with email or Google to join the discussion.