How to automatically sync subtitles with SubSync
There are many foreign films dubbed. For the rest of the movie titles, you have to rely on subtitles. Unfortunately, most subtitles are created by passionate people, based on their video version and it may be different from yours. Therefore, subtitles will not play in sync with the video you have.
Until recently, you'll have to find other subtitles, wait for someone to create or manually sync them. Now, smart tools like SubSync (Subtitle Speech Synchronizer) can do this automatically in less than 5 clicks.
SubSync is cross-platform compatible and can be used on Windows, macOS and Linux. Today's article will use Linux (Ubuntu) as an example.
Install SubSync
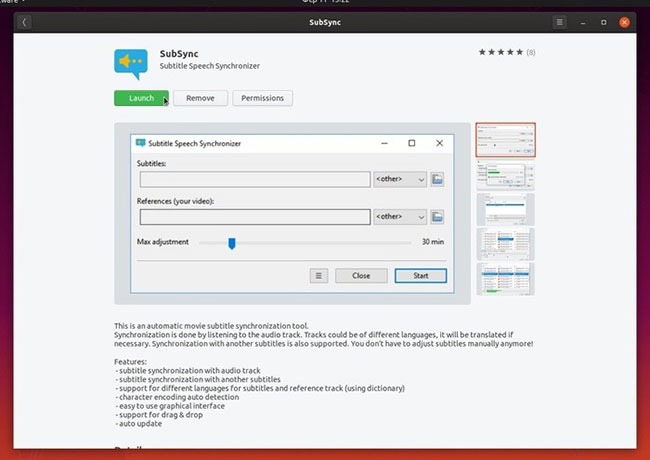
If you use a distribution compatible with Ubuntu, you will find SubSync in the Software Center. Alternatively, you can install it in a terminal with the following command:
sudo apt install subsync 
Once installed, launch the program and open your favorite file browser, point it at the folder where the video and subtitles are having problems.
Find more subtitles
Even if you can't find subtitles that are fully synchronized for your language, it's worth a quick search to see if you can find some appreciated subtitles in other languages. If so, download them.
Even if you don't understand that language, if you find the subtitles well synchronized, SubSync will be able to use them as a reference to sync your language.
Add asynchronous subtitles
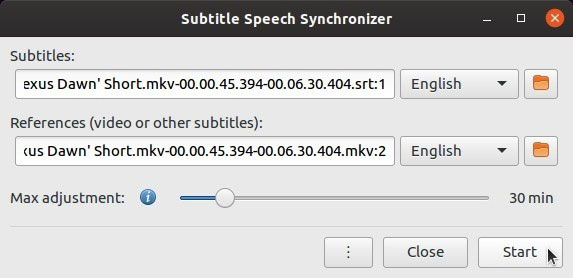
Put SubSync and the file manager window side by side. Select the problematic subtitle file you want to fix, then drag and drop it into the 'Subtitles' field of SubSync.
In most cases, the only thing you have to do in the pop-up window is to select the language from the drop-down menu, then click OK.
Subtitles or video references
If you find subtitles synced in another language to use as references, drag and drop that file into the 'References (video or other subtitles)' field of SubSync.
If not, use the video instead. SubSync will be able to analyze the sound and map every voice type it detects to the subtitles.
As in the previous step, put your language in the window that appears and click OK.
Begin synchronization
With the 2 files selected, the only thing left is to click on 'Start' to begin the process.

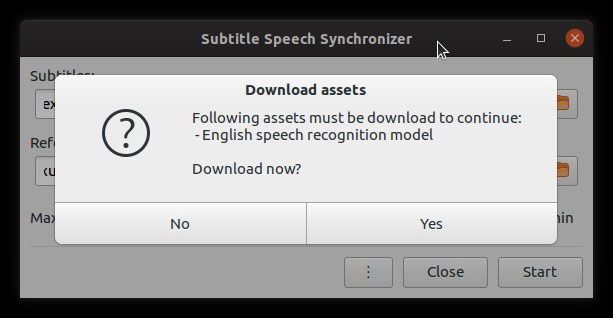
Depending on the language you have chosen, SubSync will notify you that it needs to fetch some new assets. Please accept the download.

The downloaded file will be relatively small, so you only have to wait more than a few seconds.
However, please note that this is for a specific language. If you choose another language in the future, SubSync will prompt you once again to download additional voice recognition models.
Score sync
When syncing subtitles, SubSync tries to find matches in subtitles or videos synchronized in a foreign language that you use as references. The more points you find, the more accurate the results.
When you think you've found enough sync points, SubSync will notify that you can save subtitles. For better results, wait for the process to complete to find all possible synchronization points.
In case of failure
Sometimes the process may fail. In the example case, the article used a short video and SubSync could not find enough sync points. When this happens, it's time to explore the program options.

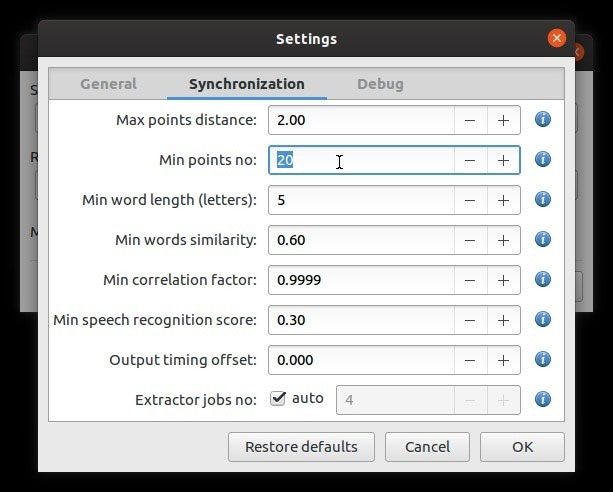
Click the three-dot button and select Settings.
The article cannot propose a single tweak that can fix all problems because each case is different.
For example, we fixed the problem by reducing the number of 'Min points no' to 15 points.
In other cases, you can try increasing the 'Max points distance' or reducing 'Min words similarity' and 'Min speech recognition score' to reduce the accuracy of the synchronization process.
Try this if it's a last resort because in many cases the above adjustments result in suboptimal results.
Check and rename
When the process is complete, save the new, synchronized subtitle file in your video folder.
Open the video in your favorite media player and load new subtitles on it. The audio and text in the subtitles will match.
If you're happy with the result, delete the old, problematic subtitle version and rename the new file so it has the same name as the video - except for the extension.
This way, most media players will understand that this is a subtitle file for a specific video and automatically load subtitles when you open it.