How to activate or add additional fonts in Command Prompt
Want to enable additional font options in the Command Prompt? Follow these steps to add new fonts to the Command Prompt in Windows 10.
Table of Contents
Want to enable additional font options in the Command Prompt? Follow these steps to add new fonts to the Command Prompt in Windows 10.
Things need to notice
Before you can follow the procedure below, there are a few things you should know and do.
- The font must be a TrueType (.ttf) font.
- The font must be a monospace font (the width of the letters is the same).
- The font you want to add or activate is already installed in Windows.
- You should know the name of the font. You can find it from the Fonts page in the Settings or Control Panel application .
- Not all monospace fonts are compatible with the Command Prompt. This is true even if the destination font meets all of the above conditions.
Instructions for adding / activating additional fonts in Command Prompt
As mentioned above, to enable additional fonts in Command Prompt, the article will use Registry Editor. So, first make a backup of the Registry. This helps you restore it if anything goes wrong and if you want to restore the previous settings.
1. Open Registry Editor by searching for it in the Start menu. After opening, copy the link below, paste it into the address bar and press Enter. This will take you to the font list. In fact, you see all the default fonts on the right.
HKEY_LOCAL_MACHINESOFTWAREMicrosoftWindows NTCurrentVersionConsoleTrueTypeFont2. On the right, right-click in a blank and select New> String value .
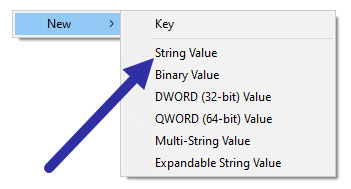 Select the value New> String
3. Name the string value "01" and press Enter. If you already have the value 01 , name it 02. Basically, you can name the new values 01, 02, 03, etc.
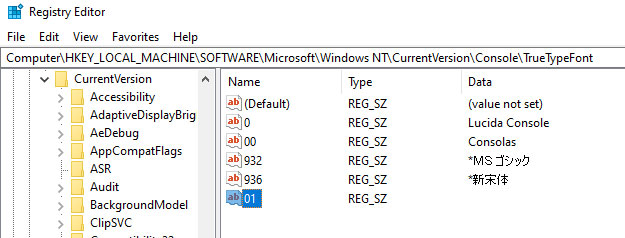 Name the string value "01" and press Enter
4. After creating the value, double click it. In the Value data field , enter the name of the monospace font you want to add to the Command Prompt. Click the OK button to save the changes.
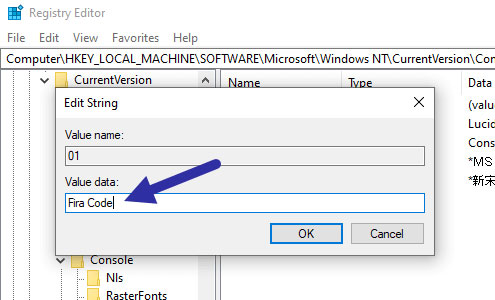 In the Value data field, enter the name of the monospace font you want to add to the Command Prompt
5. Close Registry Editor and restart Windows.
After rebooting, open the Command Prompt window, right-click on the title bar and select Properties.
In the Properties window , go to the Fonts tab and you will see the new font in the font list. Choose a font and it will be applied to the Command Prompt.
If you cannot see the font even after following the above procedure, it just means that the Command Prompt does not recognize the font. Sorry there is nothing you can do in that case.
Was this article helpful?
Your feedback helps us improve.
Related Articles
 How to add fonts to Command Prompt on Windows 104 minutes read
 How to activate Ctrl + C / Ctrl + V to execute paste command in Command Prompt window?2 minutes read
 How to use the command history function in Command Prompt7 minutes read
 The simplest way to install additional fonts for computers and laptops3 minutes read
 Launch Microsoft PowerPoint from Command Prompt: complicated but useful6 minutes read
 Add Command Prompt to Power User Menu on Windows 102 minutes read
Reader Comments 0
Sign in with email or Google to join the discussion.