Table of Contents
Disable, Remove Notification Icon Get Windows 10 is easier to understand when the core ideas are paired with practical examples. The sections below explain the topic clearly, highlight useful steps, and point out details that can prevent common errors.
When announcing Get Windows 10 appears continuously, it will make users feel annoying. Plus this notification icon Get Windows 10 running on the system is also "consuming" the resources of the computer.
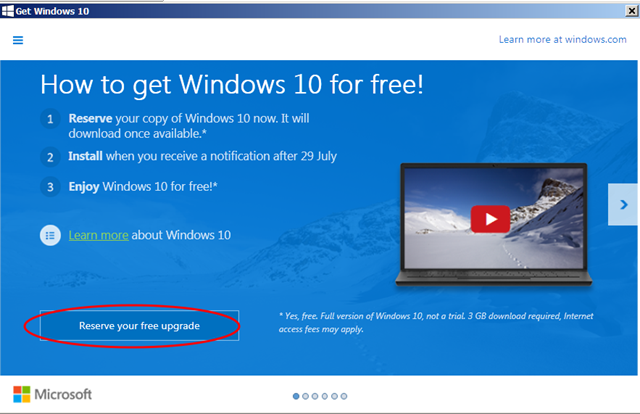
1. Notification icon Get Windows 10
For Windows 7 or Windows 8.1 users, if you look carefully a bit, you will see a message prompting to upgrade to Windows 10 (Get Windows 10) appears on the Taskbar.
When this message appears continuously will make users feel annoying. Plus this notification icon Get Windows 10 running on the system is also "consuming" the resources of the computer.
2. Disable or remove the notification icon Get Windows 10
The easiest way to disable notifications Get Windows 10 is to hide the notification icon Get Windows 10 on the Taskbar. To do this, follow the steps below:
1. Right-click the date / time display area on the Desktop and select Customize notification icons .

2. At this time, the Notification Area Icons window appears. Here you set up GWX - Get Windows 10 into Hide icon and notifications.

3. Click OK and exit the Notification Area Icons window.
Note : This method only applies to the current user account.
3. Disable the notification icon Get Windows 10 for all user accounts
If you want to hide or remove Windows 10 upgrade notifications for all user accounts on your computer, follow the steps below:
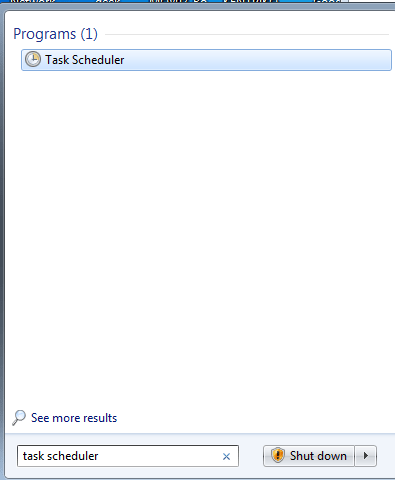
1. On the Search Start Menu box, enter task scheduler and press Enter to open the Task Scheduler window.
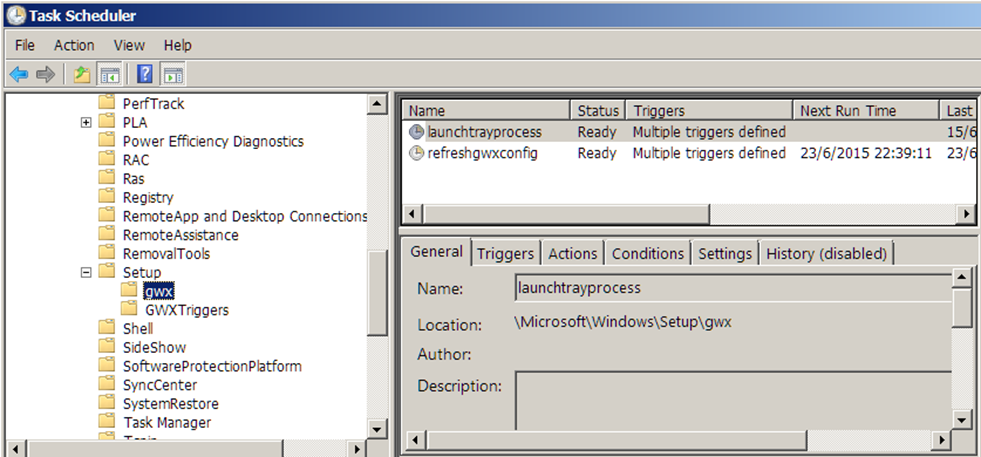
2. On the Task Scheduler window, in the list of items in the left pane, expand Task Scheduler Library => Microsoft => Windows => Setup => gwx.
3. Look at the list in the right pane, right-click launchtrayprocess and select Disable .
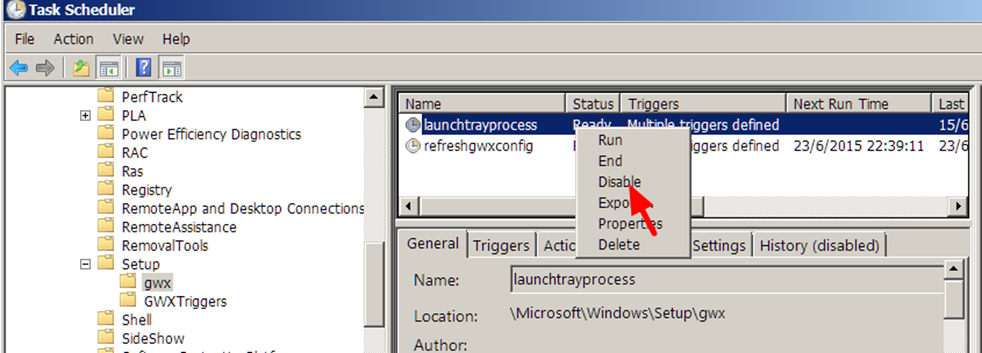
4. Next right-click refreshgwxconfig and select Next Disable .
5. Close the Task Scheduler window and restart your computer.
Refer to some of the following articles:
- Steps to disable or completely remove the Onedrive application on Windows 10
- How to combine multiple hard drives into a Volume on Windows 10
- 9 tips to protect your computer safely from virus attacks
Good luck!
FAQ
What should you know about 1. Notification icon Get Windows 10?
For Windows 7 or Windows 8.1 users, if you look carefully a bit, you will see a message prompting to upgrade to Windows 10 (Get Windows 10) appears on the Taskbar.
What should you know about 2. Disable or remove the notification icon Get Windows 10?
The easiest way to disable notifications Get Windows 10 is to hide the notification icon Get Windows 10 on the Taskbar. To do this, follow the steps below:
What should you know about 3. Disable the notification icon Get Windows 10 for all user accounts?
If you want to hide or remove Windows 10 upgrade notifications for all user accounts on your computer, follow the steps below:
Related Articles
 How to Disable the Notification Area in Windows 104 minutes read
 What Is the Microsoft Office Upload Center? How to Disable This8 minutes read
 How to Hide or Show Windows Security Icon on Taskbar Windows 107 minutes read
 How to Turn Off the Notification Center on Windows 10?3 minutes read
 Click: How to Disable Avira on PC or Mac5 minutes read
 How to Turn Off Notifications for Connected Bluetooth Devices on Windows4 minutes read
Reader Comments 0
Sign in with email or Google to join the discussion.