Introduction to Network Access Protection (Part 5)
In the previous series of articles on this topic, we showed you how to configure a security policy so that Windows checks whether the client is requesting access to the network with the firewall enabled. Next is how to create valid templates for the system to define what is appropriate and dry
Introduction to Network Access Protection (Part 1)
Introduction to Network Access Protection (Part 2)
Introduction to Network Access Protection (Part 3)
Introduction to Network Access Protection (Part 4)
In the previous series of articles on this topic, we showed you how to configure a security policy so that Windows checks whether the client is requesting access to the network with the firewall enabled. Next is how to create valid system templates to define what is appropriate and does not fit into a network's security policy.
In this article, we will continue on how to create secure licensing policies. These policies are used to control what happens when a client needs to check or not to check for network security policies. These are also policies to indicate the level of access for clients when they access the network.
Start the process by opening the Network Policy Server user interface and selecting Authorization Policies . Look at the Details window to see if any licensing policies exist. In our test system, there are four pre-existing licensing policies, but no one is sure that these policies will exist until the final version of Longhorn Server. For existing policies, you can completely delete them by right-clicking and selecting the Delete command.
After you've cleared the policies that existed before, you can create a new licensing policy. To do so, right-click the item containing Authorization Policy and select the New | Custom by right-clicking. Windows will show you the New Authorization Policy Properties window.
The first thing you will have to do is to assign a name to a policy. Get the name as shown in Figure A showing Compliant-Full-Access . Normally you will have to enter the policy name in the name field in the Overview tab. Then select the Grant Access option in the Policy Type section to prevent users from having full access to your network.

Figure A : Set policy type in Grant Access mode
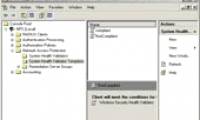
Now select the Conditions tab of the properties window. As its name implies, the Conditions tab allows you to set conditions for the client. Search through the list of conditions provided for NAP and then select SHV Templates. When you are done with that selection, the details pane will display some of the sub-conditions in this section in the drop-down list. Choose Compliant from the list of conditions and click the Add button. The conditions used in this Policy window will instruct Computer Health matches 'Compliant' as shown in Figure B. This means that to consider clients, they must match the criteria defined in the Compliant policy section. created in the previous section. More specifically, this means that clients must have the Windows firewall enabled.
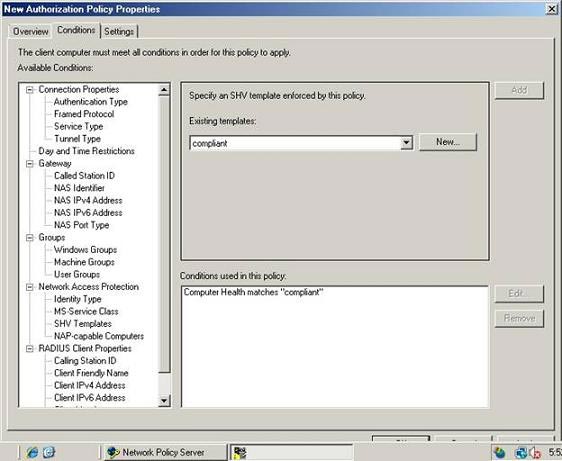
Figure B : In order to comply with the rule, the client must have a request
has been defined in the Compliant policy you created.
Now select the Settings tab of the Properties window. This tab contains a set of settings that can be applied to computers that have previously defined conditions. This is a policy that applies to computers that comply with the network security principle, so we need to remove the restrictions in Settings so that these computers can increase access to the network.
To do that, go to Protection | NAP Enforcement . Select the Do Not Enforce button as shown in Figure C.
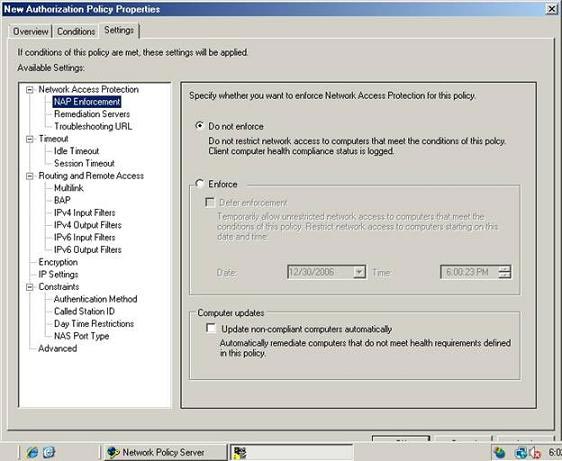
Figure C : NAP implementations should not be applied to computers that need to be checked
After selecting the Do Not Enforce option , go to Constraints | Authentication Method . This window will show you a series of checkboxes, each corresponding to a different licensing method. Uncheck all these boxes and select only one EAP checkbox. Check the box EAP Methods and then click Add . Select the Secured Password option (EAP-MSCHAP v2) and click OK twice to close the other opened dialog boxes. Click OK again to save the template you created.
When creating a template for computers to test, we must create a similar pattern for computers that do not need to be tested. To do this, simply right-click the item containing the Authorization Policies section of the tree view and select New | Custom from the shortcut menu. Windows will show you the New Authorization Policy Properties window.
As in the previous case, the first thing you must do is enter the name of the new policy you want to create. Take Noncompliant-Restricted for convenience in our testing. Even though we are creating a restricted policy, you still have to set the policy type to Grant Access . Remember that it is to prevent access to the network, but allows more detailed handling of the policy.
Now select the Conditions tab. Once you have created a licensing policy for the computers to be tested, we have created a requirement for the computer to follow the check pattern created in the previous section. When this policy is used for computers that do not need to be checked, you must check whether the configuration of the clients matches the conditions in the NonCompliant template, which also means checking the firewall Is Windows not enabled?
Look in the list of conditions available in NAP, select the SHV Templates section . Select the NonCompliant option in the list of existing templates and then click the Add button.
Next select the Settings tab and go to Constraints | Authentication Method . The details window will show you a series of check boxes, each of which corresponds to a different method. Uncheck all check boxes, only select the EAP check box. Click the EAP Methods check box and then click the Add button. Select the Secured Password option (EAP-MSCHAP v2) and click OK twice to close the other opened dialog boxes.
Everything we did for the policy for non-test computers was exactly the same as for computers to check except for specifying different SHV patterns. If we remove this policy, computers that do not need to be checked can access the network freely. Only when we don't want that to happen, we need to use NAP to prevent such network access.
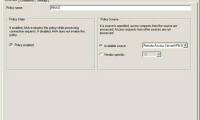
To do so, select the NAP Enforcement section found in the list in Available Settings . The Details window will show you the required options. Select Enforce option, then select check box Update Non Compliant Computers Automatically as shown in Figure D. Click OK to save the policy you created.
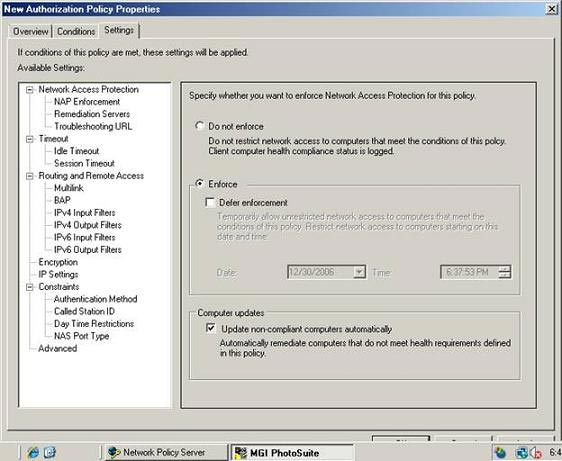
Figure D : You must enable NAP protection for computers that do not need to check
Conclude
In this article, I have shown you how to create licensing policies for computers to check and do not need to check. In the next part of this article series, I will continue the discussion by showing you how to configure the server.
Introduction to Network Access Protection (Part 6)
Introduction to Network Access Protection (Part 7)
Was this article helpful?
Your feedback helps us improve.
Related Articles
 Introduction to Network Access Protection (Part 2)8 minutes read
 Introduction to Network Access Protection (Part 4)7 minutes read
 Introduction to Network Access Protection (Part 7)8 minutes read
 Introduction to Network Access Protection (Part 1)8 minutes read
 Introduction to Network Access Protection (Part 3)10 minutes read
 Introduction to Network Access Protection (Part 6)9 minutes read
Reader Comments 0
Sign in with email or Google to join the discussion.