Connect your Gmail account with Windows Phone 8.1
Gmail is one of the most popular email services, because it has an intuitive interface, the ability to work efficiently and has cross-platform compatibility. If you are using a device running Windows Phone 8.1 then in addition to your Microsoft account, below we will show you how to connect your Gmail account with Windows Phone to work seamlessly.
To connect to your Gmail account with Windows Phone 8.1 of course, the first requirement is that you need a Gmail account. In addition, your device running Windows phone must have an Internet connection to perform.
To set up your Gmail account on a device running Windows Phone 8.1, access the list of apps by tapping the screen from right to left, then selecting the People app. By default, the People app can also be found on the Start screen. If you do not remove it, you can access it from here.
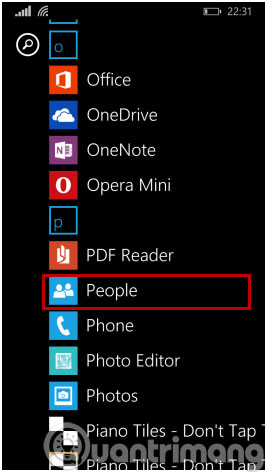
In the screen of the People app, click the More button (three dots button) in the lower right corner of the screen.
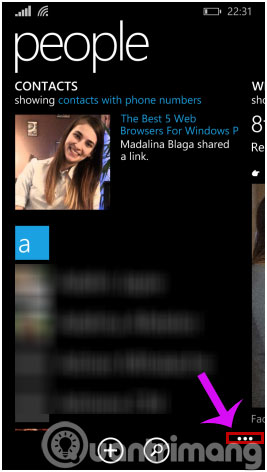
Tiếp theo bấm nút Add an account ở bên dưới để tiếp tục
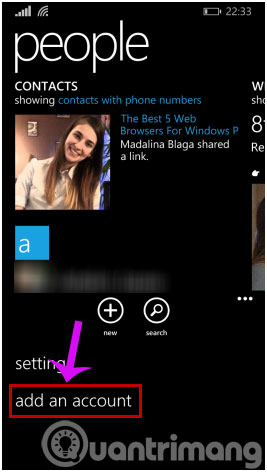
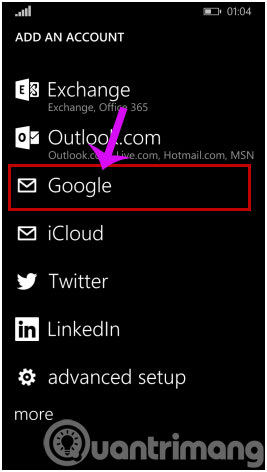
Google can be listed in the Add Contacts screen if you have a Gmail account that is connected to Windows Phone. To add a new account, click the Add an account button.
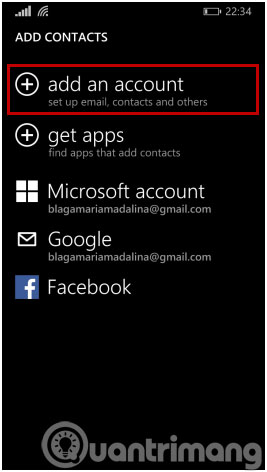
To the next screen, click to select Google from the Add an account screen
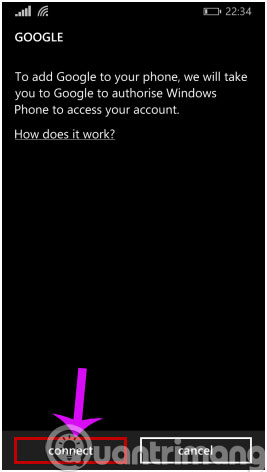
A window displays, asking you to authorize Windows Phone to access your Google account. Click the Connect button to continue.
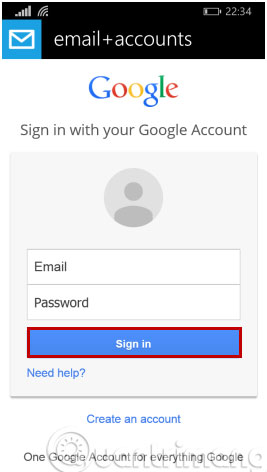
Next, log in to your Google account by entering your account name and password and clicking the Sign in button.
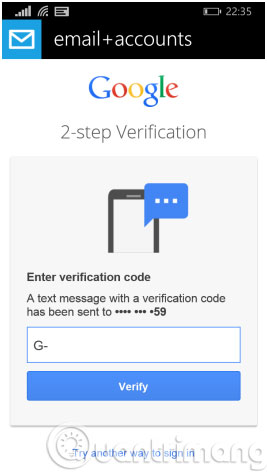
Note : If you enable 2-step verification for your Google account, the verification code will be sent by SMS to the phone. You need to enter this security code to access the account.
In addition, you also need to allow Windows Phone to manage your Google account information by clicking the Accept button to continue.
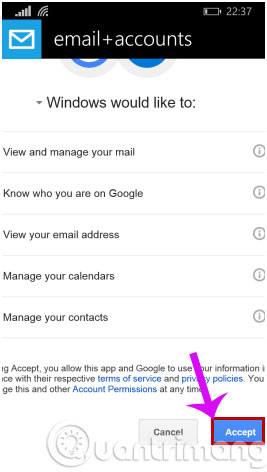
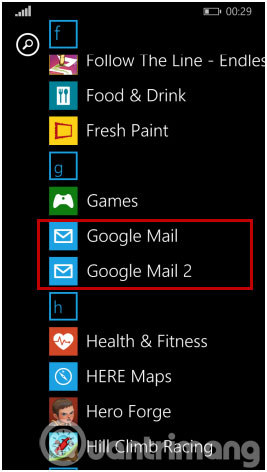
Now, you have connected your Windows Phone to your Gmail account. Soon, you will receive emails and notifications on Windows Phone. Now, the Google Mail app will automatically appear in your app list.
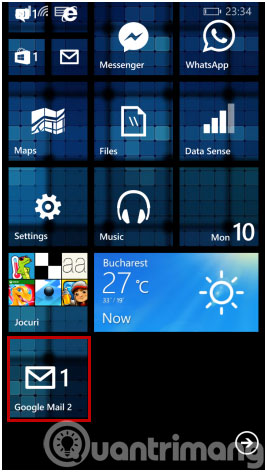
In addition, a Gmail Live Tile will also appear on your Start screen for quick access.
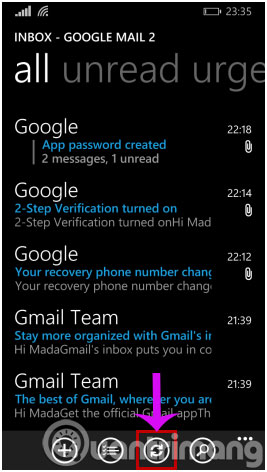
In the next screen, you can see what you will get in the new Google Mail application. Note that although your email will automatically sync with the application at a certain time, if you want to sync right away, just click the Sync menu (third position from left) from the menu at on the bottom.
Configure Gmail account to work on Windows Phone 8.1
To configure how Windows Phone will interact with your Gmail account, click the Add Contacts button on the screen and click on the account name you want to configure.
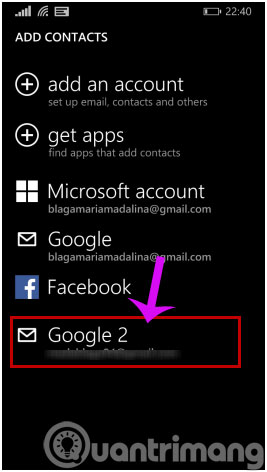
The first thing you can change is the account name (Account name). Touch the empty frame and enter a new name for your account.
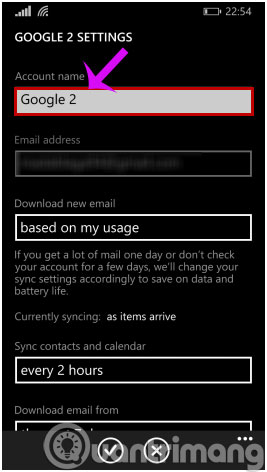
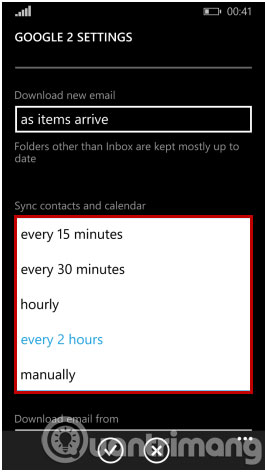
Next, you can set the time Windows Phone will automatically download new mail. To do so click Download new email .
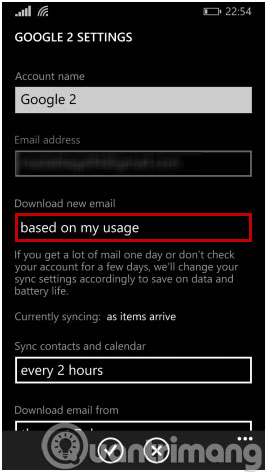
In the drop down menu, you can choose a specific time period for new emails to download automatically. You can choose from 15 minutes, 30 minutes to 2 hours depending on how you want.
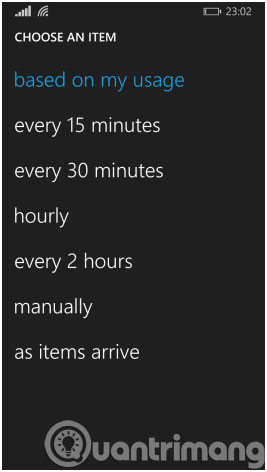
Besides the new mail download option over time, you can also set up to sync both contacts and calendar to Windows Phone from your Gmail account via the Sync contacts and calendar option right below, you You can also choose a synchronous time period depending on your needs.
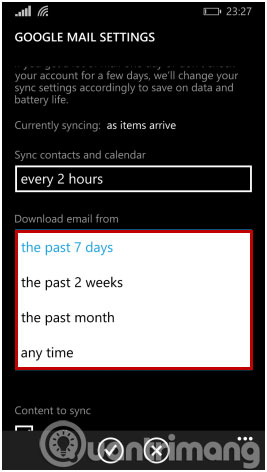
Bên cạnh đó, bạn còn có thể thiết lập khung thời gian muốn tải về các email của mình. Bằng cách chọn tuỳ chọnBên cạnh đó, bạn còn có thể thiết lập khung thời gian muốn tải về các email của mình. Bằng cách chọn tuỳ chọnDownload email fromoption then selectbất kỳ từ menu thả xuống.timebất kỳ từ menu thả xuống.
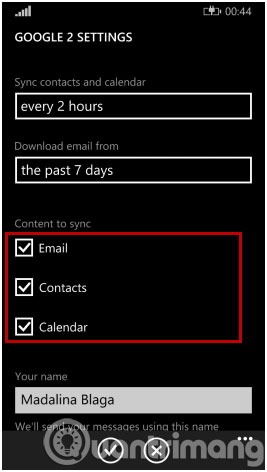
Ngay bên dưới bạn có thể thiết lập các nội dung mà mình có thể đồng bộ bao gồm:Email , danh bạ và lịch . Theo mặc định cả ba tuỳ chọn này đều được chọn nhưng bạn có thể chọn theo nhu cầu sử dụng. danh bạ và lịch . Theo mặc định cả ba tuỳ chọn này đều được chọn nhưng bạn có thể chọn theo nhu cầu sử dụng.
Gần dưới cùng của màn hình, bạn có thể đặt My name and the application sẽ gửi tin nhắn bằng cách sử dụng tên do bạn nhập vào ở đây.
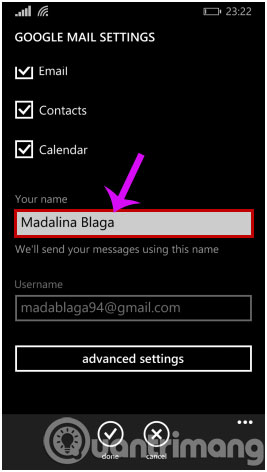
Sau khi bạn đã thực hiện xong cấu hình các thiết lập tài khoản Gmail của bạn, hãy nhấp vào nút Done trình đơn ở dưới cùng
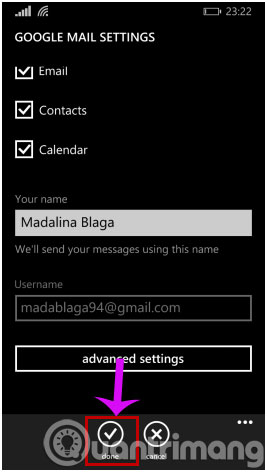
Như bạn có thể nhìn thấy trên đây, việc kết nối tài khoản Gmail của bạn tới Windows Phone 8.1 cùng với khả năng cấu hình cách Windows Phone tương tác với tài khoản của mình là tương đối đơn giản.
- Mở màn hình Windows Phone bằng cách chạm 2 lần?
- How to enable or disable 3G on Windows Phone?
- Instructions on how to play Wifi on Lumia phones