Configure Windows Server 2008 to remotely access SSL VPN Server (Part 4)
 Configure Windows Server 2008 to remotely access SSL VPN Server (Part 1)
 Configure Windows Server 2008 to remotely access SSL VPN Server (Part 2)
 Configure Windows Server 2008 to remotely access SSL VPN Server (Part 3)
Thomas Shinder
Obtain CA certificate from Enterprise CA
SSL VPN clients need to trust the CA that issued the certificate used by the VPN server. To establish this trust, we need to install the CA certificate that issued the VPN server's certificate. We can do this by connecting to the Web enrollment site on the CA on the internal network and installing the certificate in the Trusted Root Certification Authorities certificate store of the VPN client. Follow the steps below to obtain a certificate from the enrollment Web site.
1. On the VPN client connected to the VPN server via the PPTP link, enter http://10.0.0.2/certsrv in the address bar in Internet Explorer and press ENTER.
2. Enter a valid username and password in the necessary dialog box. In this example, we will use the password and username of the default domain administrator account.
3. In the Welcome Web site of the Welcome Web site, click the Download a CA certificate, certificate chain, or CRL link .

Figure 17
4. Click Allow in the dialog box warning that A website wants to open the content web using this program on your computer . Then click Close on the dialog box Did you notice the Information bar if it appears.

Figure 18
5. Note that this information tells you that the Web site may not work properly, because the ActiveX control is locked. However, this is not a problem, because we will download a CA certificate and use the Certificates MMC to install the certificate. Click the Download CA certificate link .
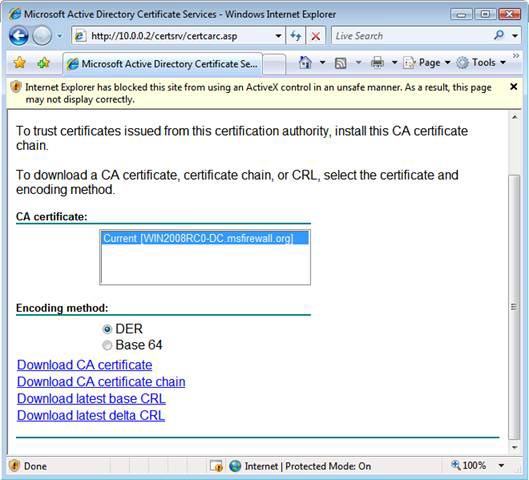
Figure 19
6. In the File Download - Security Warning dialog box, click the Save button. Save the certificate to the Desktop.
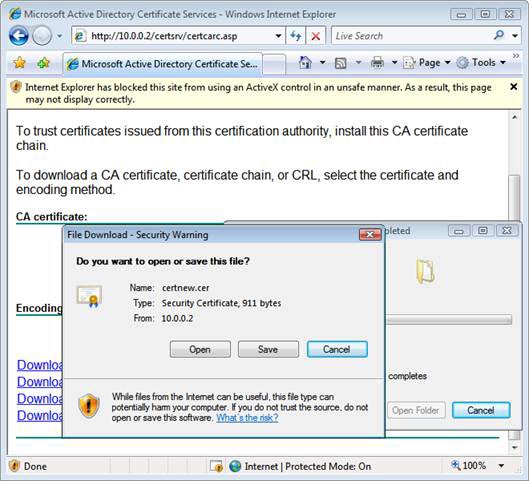
Figure 20
7. Click Close in the Download complete window.
8. Close Internet Explorer.
Now we need to install the CA certificate in the Trusted Root Certification Authorities Certificate Store of the VPN client. Follow the steps below to install the certificate:
1. Click Start and then enter mmc in the Search box. Press ENTER.
2. Click Continue in the UAC dialog box
3. In the Console1 window, click the File menu and then click Add / Remove Snap-in .
4. In the Add or Remove Snap-ins dialog box, click the Certificates item in the Available snap-ins list and then click Add .
5. In the Certificates snap-in window, select the Computer account option and click Finish .
6 In the Select Computer window, select the Local computer option and click Finish .
7. Click OK in the Add or Remove Snap-ins dialog box
8. In the left console, open the Certificates (Local Computer) button and then on the Trusted Root Certification Authorities button. Click the Certificates button. Right-click the Certificates button, point to All Tasks and click Import .
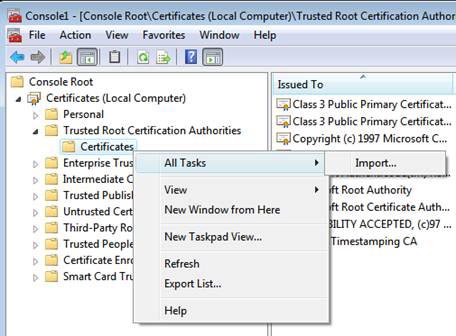
Figure 21
9. Click Next on the Welcome to the Certificate Import Wizard window
10. On the File to Import window, use the Browse button to find the certificate, and then click Next .
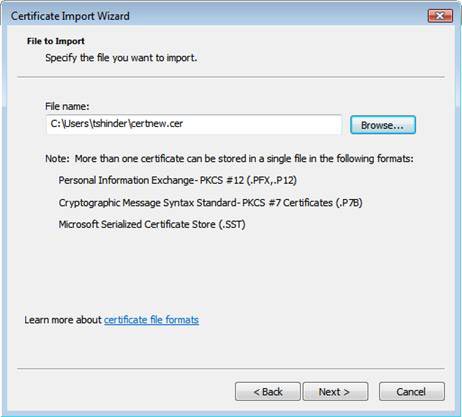
Figure 22
11. In the Certificate Store window, confirm that the option Place all certificates in the following store has been selected and the Trusted Root Certification Authorities repository is listed in the list. Click Next .
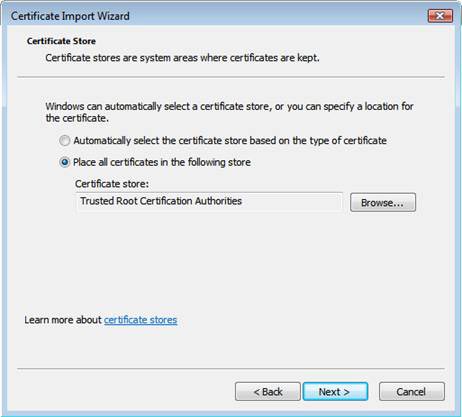
Figure 23
12. Click Finish in the Completing the Certificate Import window.
13. Click OK in the dialog box to let you know that the import was successful.
14. The certificate will now appear in the console, as you can see in the picture below.
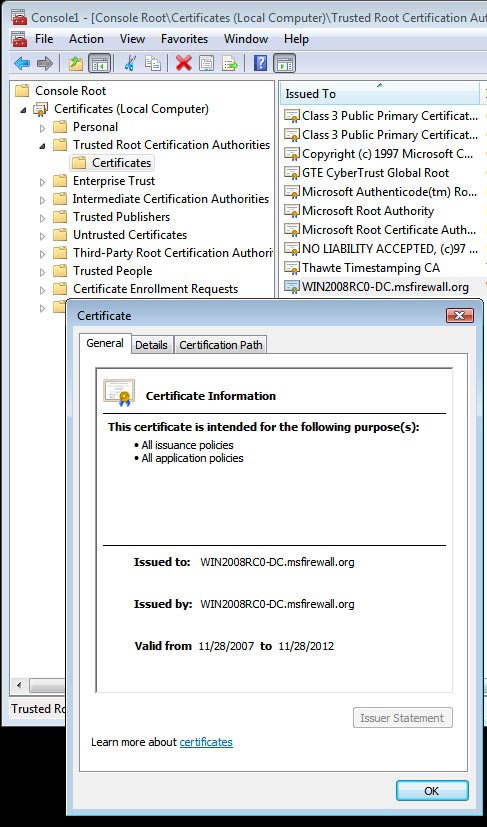
Figure 24
15. Close the MMC console.
Configure the client to use SSTP and connect to the VPN server using SSTP
Now we need to disconnect the VPN connection and configure the VPN client to use SSTP for its VPN protocol. In a production environment, you will not have a user perform this step, because you will use the Connection Manager Administration Kit to create a VPN connection for the user, which will set up the client to use SSTP, or You will only configure SSTP ports on the VPN server. Depending on the environment, you sometimes want users to be able to use PPTP while you are deploying certificates. Obviously you can always deploy out-of-band CA certificates through download or email, which is in case you do not need PPTP permission. But then, if there were some low-level clients without SSTP support, you would need to allow PPTP or L2TP / IPSec, so you won't be able to disable all non-SSTP ports. In that case, you will have to depend on manual configuration issues or a newly upgraded CMAK package.
Another way is to close the SSTP listeners for a certain IP address in the RRAS server. In this case, you can create a customized CMAK package to indicate the IP address on the SSL VPN server listening to incoming SSTP connections. Other addresses on the SSTP VPN server will listen to PPTP or L2TP / IPSec connections.
Follow these steps to disconnect the PPTP session and configure the VPN client connection to use SSTP:
1. At the VPN client, open the Network and Sharing Center as you did before.
2. In the Network and Sharing Center window, click the Disconnect link, which is located under the View Status link that we used earlier.
3. The Session SSL VPN will disappear in the Network and Sharing Center.
4. In the Network and Sharing Center, click the Manage network connections link .
5. Right-click the SSL VPN link and click Properties .
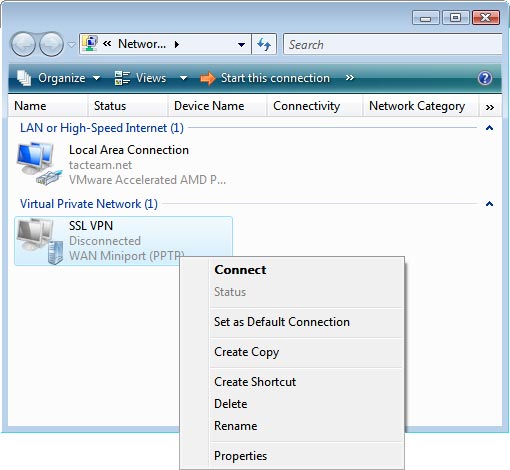
Figure 25
5. In the SSL VPN Properties dialog box, click the Networking tab. In the Type of VPN option , click the down arrow and select the Secure Socket Tunneling Protocol (SSTP) option , then click OK .
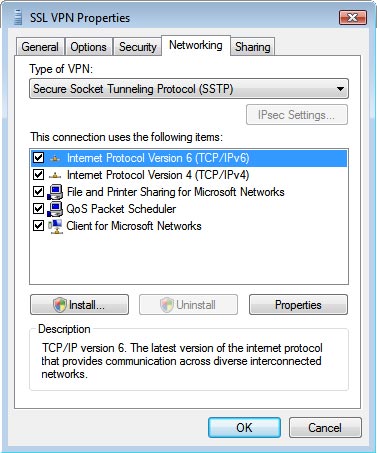
Figure 26
6. Double-click the SSL VPN connection in the Network Connections window
7. In the Connect SSL VPN dialog box, click the Connect button.
8. When the connection is complete, right-click the SSL VPN connection in the Network Connections window and then click Status .
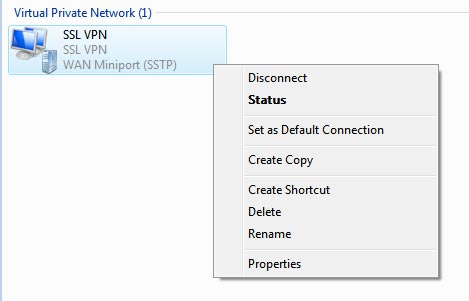
Figure 27
9. In the SSL VPN Status dialog box, you can see an established SSTP WAN Miniport connection.
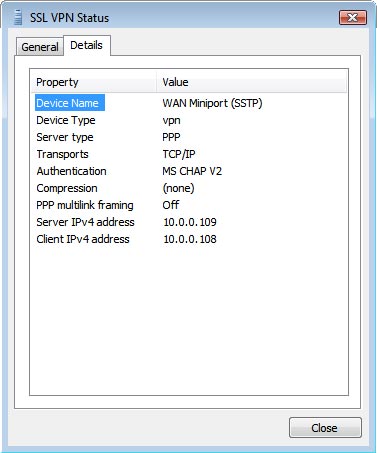
Figure 28
10. If you go to the VPN server and open the Routing and Remote Access Console , you will notice that an SSTP connection has been established.

Figure 29
Conclude
In this third part, the last part of a series of articles on how to combine an SSL VPN server using Windows Server 2008, we have completed the configuration of user accounts, CRL Web sites, and clients. SSL VPN. At the end of the lesson, we completed the SSTP connection and confirmed that it was successful. Hope you will find many interesting in this series.
You should read it
- ★ Configure Windows Server 2008 to remotely access SSL VPN Server (Part 2)
- ★ Introduction to Network Access Protection (Part 3)
- ★ Execute and troubleshoot certificate deployment issues in ISA Server 2006 - Part 2
- ★ Installing and configuring the 2004 ISA Server Firewall - Chapter 2 Installing Certificate Services
- ★ Secure the installation of ISPConfig 3 with Certificate Class1 SSL of StartSSL