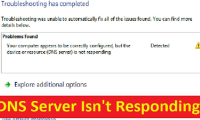
How to Fix DNS Server Not Responding Problem
This wikiHow teaches you how to fix your PC's Internet connection issues that are caused by Domain Name Server (DNS) errors. DNS is a server that translates websites' addresses so that your browser can connect to them. If the addresses...
Table of Contents
Troubleshooting
-
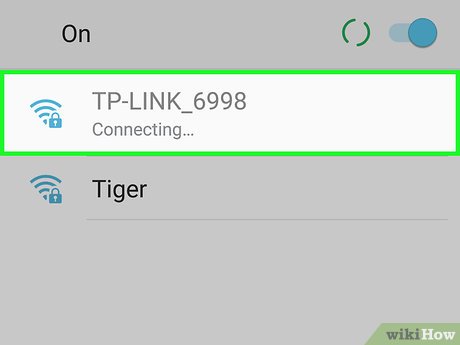 Try connecting with a different device. If you can connect a phone, tablet, or computer to the network and access the webpage that you're having trouble with on your primary device, the issue is definitively with the device and not the router.
- Not being able to connect with the second device doesn't necessarily mean that the router is the problem.
Tip: If you're having trouble with a specific website, try accessing it using mobile data. If you still can't access the site, the issue is on the site's end.
-
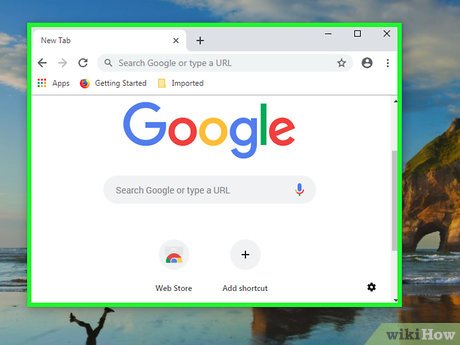 Try a different browser. This is one of the quickest ways to test your DNS connections. Download a different free browser such as Firefox or Chrome and attempt to connect to the internet; if the problems persist, you can rule out browser problems as the reason for your DNS server not responding.
- If the issues are resolved, uninstalling and then reinstalling your old browser will likely fix the problem.
-
 Power cycle your modem and router. This will clear your router's cache and thus may resolve DNS errors. To do so:
- Unplug your modem's power cable as well as your router's power cable.
- Allow both your modem and your router to sit for at least 30 seconds.
- Reconnect your modem and wait for it to come back online.
- Reconnect your router to your modem and wait for it to come back online.
-
 Connect your computer to your router via Ethernet. If you're already using Ethernet, skip this step.
- If you can connect to a web page while using Ethernet, the problem may stem from your router. You'll most likely need to reset it.
- If you can't connect to a web page while connected via Ethernet, your DNS settings may be the problem.
Flushing the DNS Cache
Windows
-
 Open Start. Click the Windows logo in the bottom-left corner of the screen, or press ⊞ Win.
-
 Type command prompt into Start. Doing so searches your computer for the Command Prompt app.
 -
 ClickCommand Prompt. It's at the top of the Start window. This will open Command Prompt.
-
 Type in ipconfig /flushdns and press ↵ Enter. This command removes any saved DNS addresses. The next time you try to open a website, a new DNS address will be created.
 -
 Restart your web browser. Doing so refreshes your browser's cache. If you can now connect to the webpage you were having trouble with earlier, the problem is resolved.
- If you're still experiencing connection issues, proceed to the next method.
Mac
-
 Open Spotlight. It's in the top-right corner of the screen.
- You can also press ⌘ Command+Space to open Spotlight.
-
 Type terminal into Spotlight. Spotlight will begin searching for Terminal on your Mac.
 -
 ClickTerminal. It should be the first option at the top of the Spotlight results.
-
 Type this command into Terminal:and press ⏎ Return. This will restart the macOS DNS process.
sudo killall -HUP mDNSResponder
- You may have to enter your administrator password first.
-
 Restart your web browser. This refreshes your browser's cache as well. If you can now connect to the webpage with which you were having issues, the problem is resolved.
Disabling Extra Connections
-
 Open your computer's Network Settings.
- On Windows: Open Start , click Settings
 , click
 Network & Internet, and click Change adapter options.
- On Mac: Open the Apple menu , click System Preferences, and click Network.

- On Windows: Open Start
-
 Look for extra connections. You can remove any connection to which you aren't currently connected; this includes Bluetooth and wireless connections.
- The most common cause for DNS issues is the existence of "Microsoft Virtual WiFi Miniport Adapter".[1]
-
 Select an extra connection. Simply click a connection to select it.
- On Windows, each icon on the page represents a connection.
- On Mac, the connections are on the left side of the window.
-
 Remove the connection. To do so:
- Windows - Click Disable this network device at the top of the window.
- Mac - Click the minus sign (-) at the bottom of the network window.
-
 Try visiting a webpage. If you can access your webpage, then the issue is resolved. If not, proceed to the next method.
Editing the DNS Server
Windows
-
 Click your current connection's name. It will be on the Connections page. This will select it.
 -
 Click Change settings of this connection. This button is in the top row of options in the window. Clicking it will open the connection's settings.
 -
 Click the "Internet Protocol Version 4 (TCP/IPv4)" result. It's in the window that's in the middle of the Wi-Fi Properties pop-up. Doing so will select it.
- If you don't see this window, click the Networking tab at the top of Wi-Fi Properties.
EXPERT TIPLuigi Oppido is the Owner and Operator of Pleasure Point Computers in Santa Cruz, California. Luigi has over 25 years of experience in general computer repair, data recovery, virus removal, and upgrades.
Luigi Oppido
Computer Repair Technician & Owner, Pleasure Point Computers Luigi Oppido
Computer Repair Technician & Owner, Pleasure Point ComputersOur Expert Agrees: If you restart your router and modem and you still don't have internet, go into the adapter settings for your device in your Control Panel or System Preferences, and double-click on your IPV4 settings. In that window, double-click on the TCP-IP settings and make sure everything is set to automatic. If it is and you're still not online, contact your ISP.
-
 Click Properties. This option is near the bottom of the window.
 -
 Check the "Use the following DNS server addresses" circle. It's near the bottom of the Properties window.
 -
 Enter a preferred DNS address. This goes in the "Preferred DNS server" field near the bottom of the window. Reliable DNS servers include the following:
- OpenDNS - Enter 208.67.222.222.
- Google - Enter 8.8.8.8.
-
 Enter an alternate DNS address. This goes in the "Alternate DNS server" field below the first field. Depending on what you entered in the "Preferred" field, what you enter here will vary:
- OpenDNS - Enter 208.67.220.220.
- Google - Enter 8.8.4.4.
-
 Click OK. Doing so saves your DNS settings.
 -
 Click Close. It's at the bottom of the window.
 -
 Restart your computer. Once your computer finishes booting up, you can test your network connection; if it works now, your computer's default DNS server was the problem.
- If your computer can connect, consider calling your Internet Service Provider to notify them about the DNS issues.
- If you still can't connect, proceed to the next method.
Mac
-
 Open the Apple menu. It's in the top-left corner of the screen.
-
 Click System Preferences. You'll find it near the top of the Apple drop-down menu.
 -
 Click Network. This globe-shaped icon is in the System Preferences window.
 -
 Click your current Wi-Fi network. It's in the pane on the left side of the window.
 -
 Click Advanced. You'll find this near the middle of the window.
 -
 Click the DNS tab. It's at the top of the window.
 -
 Click +. This option is below the DNS Servers window.
 -
 Enter a DNS server address. OpenDNS and Google both have reliable, quick DNS servers:
- Google - 8.8.8.8 or 8.8.4.4.
- OpenDNS - 208.67.222.222 or 208.67.220.220
-
 Click the Hardware tab. It's on the far-right side of the tabs at the top of the window.
 -
 Click the "Configure" box, then click Manually. This box is near the top of the Hardware page.
 -
 Click the "MTU" box, then click Custom. The "MTU" box is below the "Configure" box.
 -
 Type 1453 into the text field. It's below the "MTU" box.
 -
 Click OK. It's at the bottom of the page.
 -
 Click Apply. This button is at the bottom of the page. Doing so saves your settings and applies them to your current Wi-Fi network.
 -
 Restart your computer. Once your computer finishes booting up, you can test your network connection; if it works now, your computer's default DNS server was the problem.
- If your computer can connect, consider calling your Internet Service Provider to notify them about the DNS issues.
- If you still can't connect, proceed to the next method.
Resetting the Router
-
 Find your router's "Reset" button. This button is usually on the back of the router.
- You'll usually need a needle, a paperclip, or a similarly thin item to press the "Reset" button.
- Resetting your router will also disconnect every device you have connected to the router.
-
 Press and hold the "Reset" button. Hold it for at least 30 seconds to ensure that the router completely resets.
 -
 Connect to your network. Use the factory password that's printed on the bottom of your router to complete the connection.
 -
 Try accessing the website you were having trouble with. If you still can't connect to the Internet or access the site you're trying to use, it's time to contact your Internet Service Provider to make them aware of the DNS issues you're facing.
- If resetting the router does indeed resolve the DNS issues, consider picking up a newer router if yours is more than a couple of years old.
Was this article helpful?
Your feedback helps us improve.
Related Articles
 Some ways to fix DNS Server Not Responding on Windows 7/8/1013 minutes read
 How to fix The DNS Server isn't Responding error on Windows9 minutes read
 What is DNS server isn't responding error? How to fix the error effectively9 minutes read
 Xfinity DNS Server Not Responding9 minutes read
 What is Not Responding Error? Top fastest ways to fix it7 minutes read
 Windows Not Responding - Causes and solutions7 minutes read
Reader Comments 0
Sign in with email or Google to join the discussion.