Changing user on Macbook has lost admin rights, what should Apple do?
Changing user on Macbook and losing admin rights makes many Apple fans worried because they don't know what to do. TipsMake's solutions can help you.
Macbook is considered a laptop line with beautiful appearance as well as strong performance. The stability of this product line is also highly appreciated by users. However, sometimes macbooks also have some extremely annoying errors. In today's article, we will learn together about changing the user on a Macbook that has lost admin rights . If you are also bothered by this error, please read the entire article below!

The reason why users who change users on macbooks lose admin rights
Many people complain that they just changed their account name but still lost admin rights on their macbook. The main cause of this problem may be because the account has been moved from admin to standard. This has caused you to no longer be able to access full rights on your macbook.
How to fix the error of changing User name and losing Admin rights on Macbook
Currently, there are many methods that are said to help you fix the error of losing admin rights on Macbook. The following are methods used by many people and have a fairly high success rate.
1: Create a new account to grant permissions to the old account
With this method, we will use the command to create an additional account under admin. This account will be able to re-authorize your old account. The steps are as follows:
- Step 1 : Restart your macbook. During the boot process we will hold down the command + S key combination .
- Step 2 : After the root screen appears. Please copy and paste the 3 command lines below one after another.
- mount -uw /
- rm /var/db/.applesetupdone
- reboot
- Step 3 : Once you have entered and run the 3 command lines above, the macbook will reboot. Booting quickly or slowly will depend on how much memory your computer has left. Once the boot process is complete, you will need to set up your computer again like a new one.

- Step 4 : After you have finished setting up, go to the user & Groups section . Then click on the account that has lost rights and select ' Allow user to administer this computer ' and you're done.
Finally, log out of your current account and log in with your original account.
2: Use root user
This method is somewhat more difficult to implement and requires more operations than the first method. However, the success rate is almost 100%.
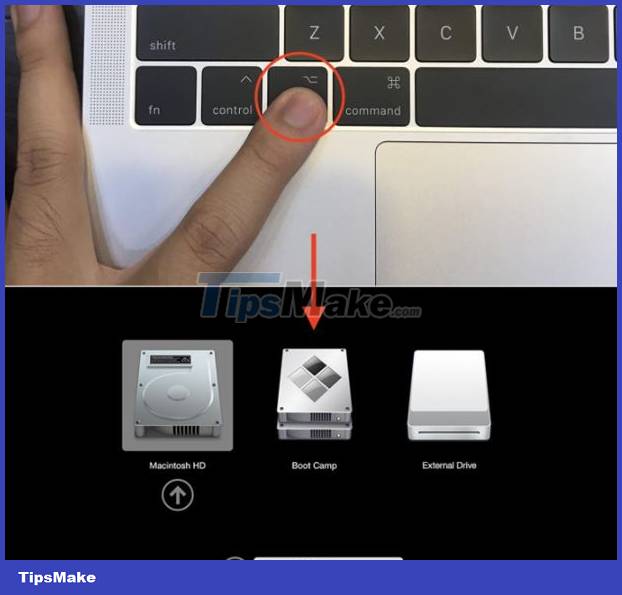
- Step 1 : Shut down and restart. While the computer is booting, hold down the option key to access partition selection mode.

- Step 2 : Once the default partition has been selected, hold down the command + S key combination and press the enter key . Press enter until white text appears on the screen as shown.
- Step 3 : Enter the command line /sbin/mount -uw / after exit and press enter .

- Step 4 : Use the command launchctl load /System/Library/LaunchDaemons/com.apple.opendirectoryd.plist to open the list of users in the system.
- Step 5 : Enter the command passwd root and press enter . Then enter the password you want (note, just enter a number to make it easy to remember) then press enter and re-enter again and finally press enter to finish.
- Step 6 : Enter the reboot command to restart the computer. When the computer restarts, click Other. on the login screen.
- Step 7 : Log in with the username ' root ' and the password you created earlier. Then continue through the same steps as when creating a user.

- Step 8 : Go to the main screen of the computer, then access the macusersmacbookpro partition path and then rename ' macbookpro ' to the new name.

- Step 9 : Open system preference and select User & Group . Then proceed to unlock the adjustment lock (if any). At this point we will see that the account has lost admin rights. We will regain admin rights and rename this account.
- Step 10 : Right-click on the account that has lost admin rights and click advanced option . Next, rename the components as shown in the image. After changing, click ok to save.
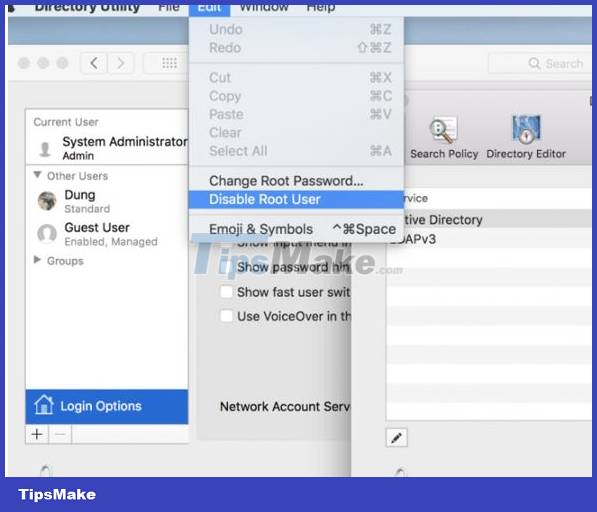
- B11 : Click on Login Option , then continue to click ' join .' Then click on Open Directory Utility . Finally, click on the 'edit' tab in the toolbar. Then click ' Disable Root User ' and it's successful.

And so we have successfully fixed the error of changing user on macbook and losing admin rights. Hope this information will be useful to you.