Lost Admin rights on Windows 10, this is how to fix it
Option 1: Regain lost admin rights in Windows 10 through Safe Mode
Step 1 : Log in to your current Admin account where you have lost administrative rights.
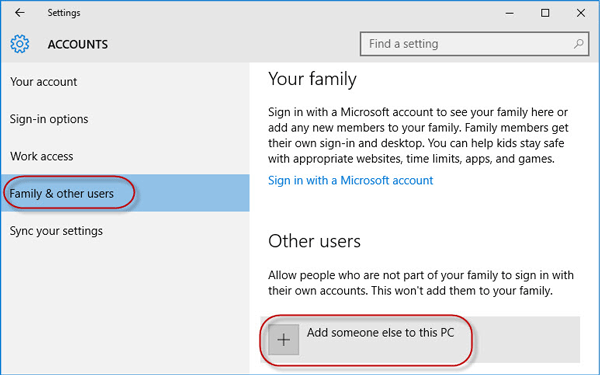
Step 2 : Open the PC Settings panel and select Accounts.
Step 3 : Select Family & other users , then click Add someone else to this PC .
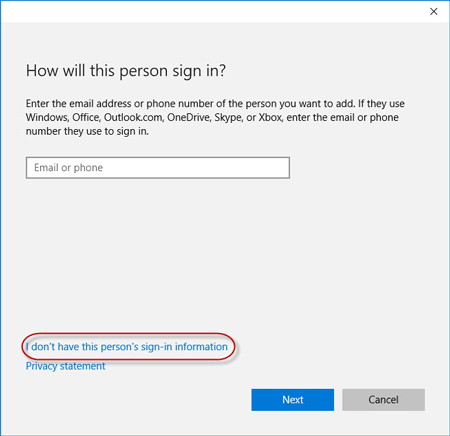
Step 4 : Click I don't have this person's sign-in information .
Step 5 : Click Add a user without a Microsoft account.

Step 6 : Enter the username, then click Next. This will add a new local account on your PC.

Step 7 : Press Win + R keys to bring up the Run dialog box , type cmd and press Enter.
Step 8 : After the Command Prompt window opens, type shutdown /r /o and press Enter.
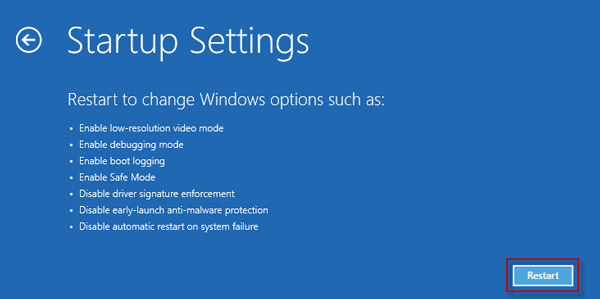
Step 9 : After Windows 10 reboots to the "Choose an option" screen , click Troubleshoot > Advanced options > Startup Settings . Then click Restart.
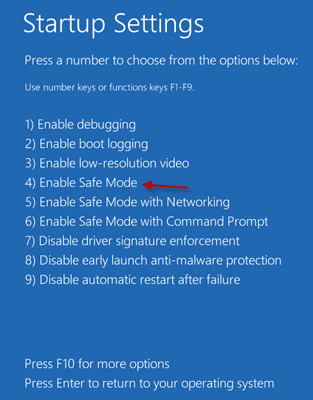
Step 10 : On the Startup Settings screen , press number 4 to turn on Safe Mode.
Step 11 : After Windows 10 starts in Safe Mode, open Control Panel. Go to User Accounts > Manage another account , select the new local account you added in step 6, then click the Change the account type link . Select Administrator and click Change Account Type to change the account from standard user to admin.
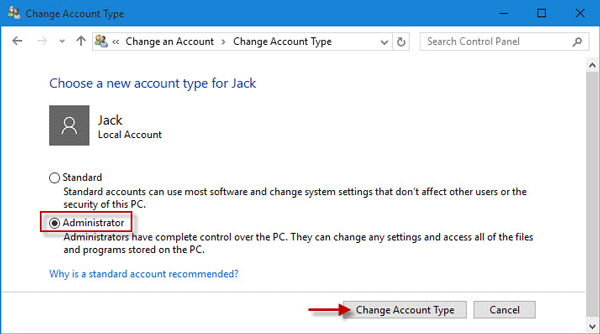
Step 12 : Restart your PC to bring Windows 10 out of Safe Mode and back to normal mode. Log in to Windows 10 with a new admin account. Now, you have regained administrator rights in Windows 10 and can delete the assigned Admin account that you lost administrator rights to.
Option 2: Modify account settings from Registry Editor
1. Open Settings .
2. Then, access 'Update and Security' settings .
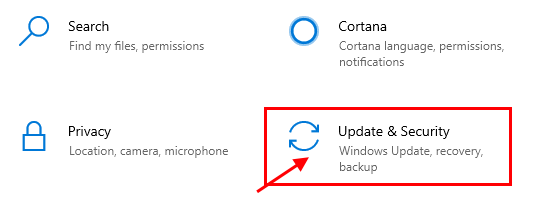
3. Then, click "Recovery".
4. Then, in the 'Advanced Startup' section , click 'Restart Now'.
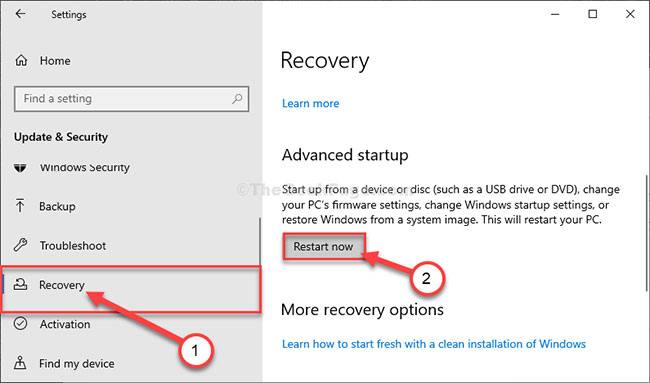
5. The next step is to click 'Troubleshoot'.
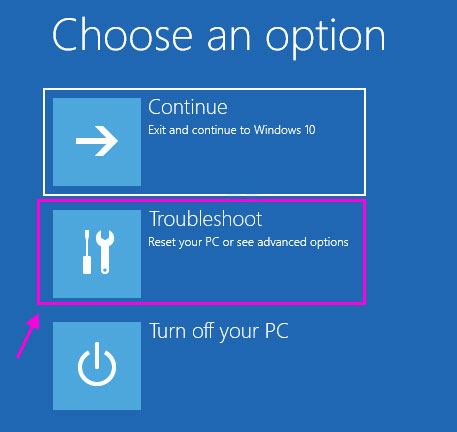
6. To see more available options, you must click on "Advanced options".
7. You need to access "Command Prompt". So let's click on it.
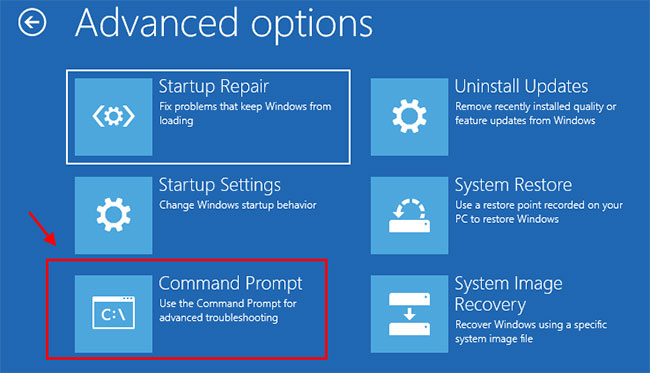
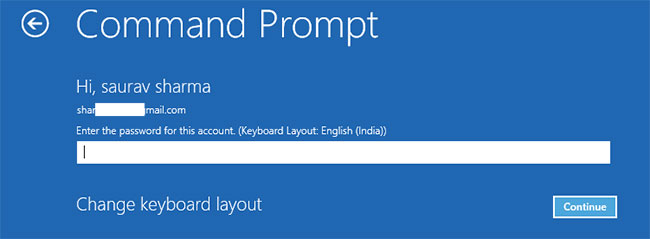
8. Set your account password to access the CMD terminal. Click 'Continue'.
9. In the Command Prompt window, type or copy "regedit" and press Enter to open the Registry Editor on your computer.
NOTE: You need to create a Registry backup. Once you have opened the Registry Editor, you need to click File and then select Export from the menu bar.
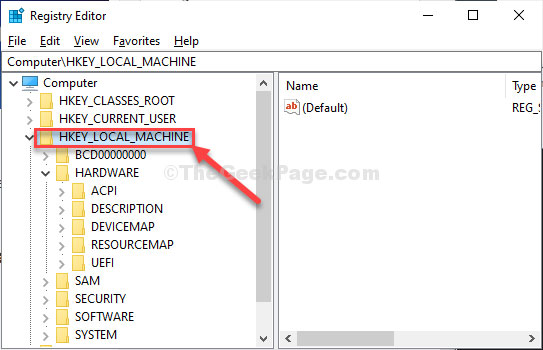
10. In the Registry Editor window , select the "HKEY_LOCAL_MACHINE" branch to highlight it.
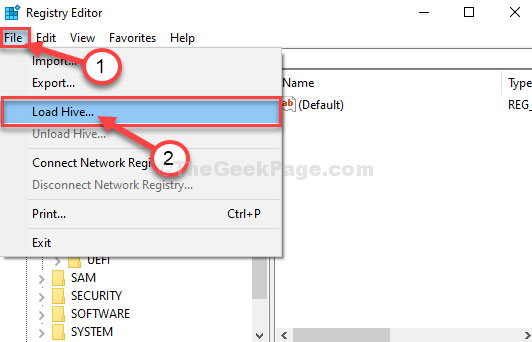
11. Now, click on 'File' from the menu bar and then click on 'Load Hive'.
12. In the Load Hive window , navigate to this location:
system root drive > Windows > System3213. In the System32 folder , double-click the 'config' folder .
14. In the Config folder , scroll down to find and select the 'SAM' file.
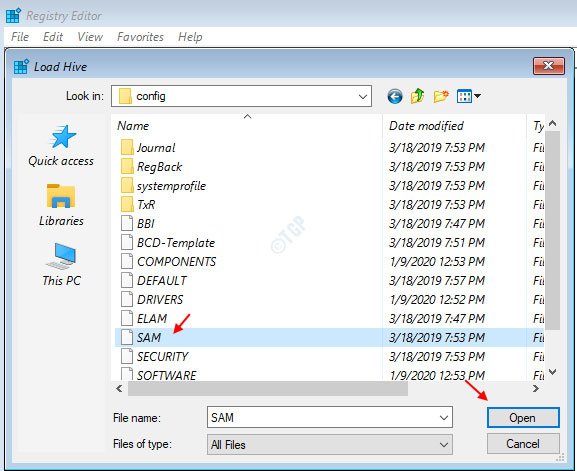
15. Now, click Open to load the hive in the registry branch.
16. You need to provide a name for the hive.
17. Name the key 'REM_SAM'. Click OK.
18. In the Registry Editor window, on the left side, navigate to this location:
HKEY_LOCAL_MACHINEREM_SAMSAMDomainsAccountsUsers HKEY_LOCAL_MACHINEREM_SAMSAMDomainsAccountsUsers�00001F4 0001F419. Now, in the same window, on the right hand side, double click on the binary value 'F' to modify it.
20. In the Edit Binary Value window , go to line '00000038".
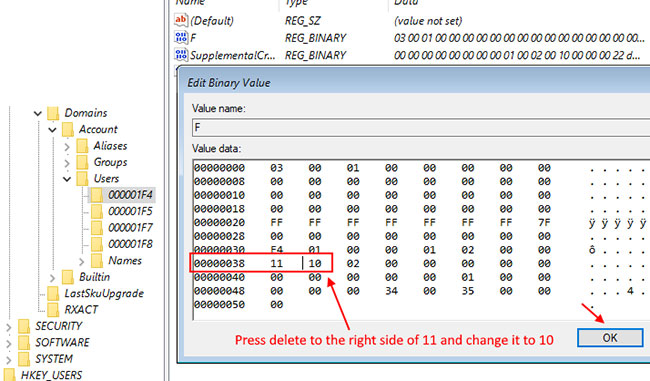
21. Place your cursor just to the right of '11' and press Delete from the keyboard.
22. Now, type '10' to change the value.
23. Finally, click OK to save the changes on your computer.
Close the Registry Editor and Command Prompt windows.
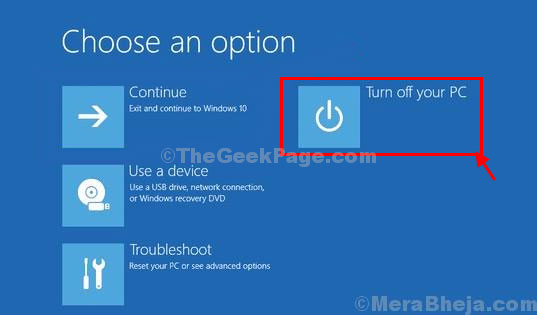
24. Return to the Choose an Option window , click Turn off your PC to turn it off.
Restart your computer.
After restarting your computer, you will have administrative rights to your account again.
Note:
Trying to open file 'SAM' , you may see this error message 'The process cannot access the file it is being used by another process' or the message 'File is in use' .
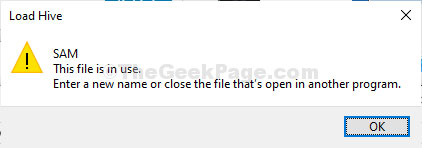
To resolve the issue, follow these steps:
1. In the Registry Editor window, select the "HKEY_LOCAL_MACHINE" branch to highlight it.
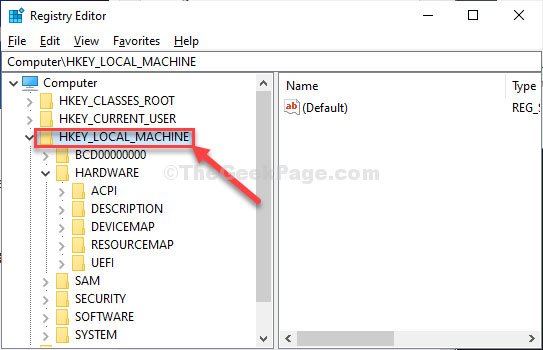
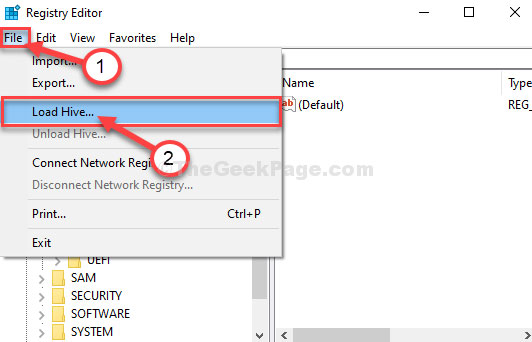
2. Now, click on 'File' from the menu bar and then click on 'Load Hive'.
3. Now, click on 'Look in:' to open the drop-down menu.
Note : You are facing trouble because you are selecting the 'BOOT (X:)' drive on which CMD is running.
4. Select the system root drive on the computer (for this computer, it is the 'Local Disk (D:)' drive , usually Local Disk (C:) ) and then click 'Open'.
5. Now, scroll down and double-click on the 'Windows' folder.
6. In the same way, scroll down, find the 'System32' folder and access it.
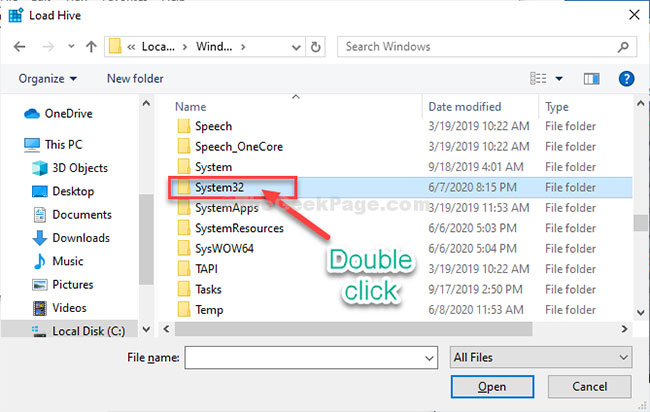
7. Now, double click on the 'Config' folder to access it.
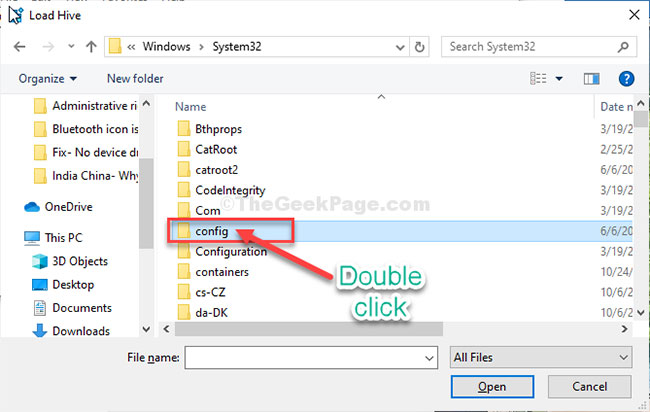
Then, follow the remaining instructions (from step 13) to modify the binary value and resolve the problem.
Option 3: Regain lost Admin rights on Windows 10 with the iSumsoft Windows Password Refixer tool
To use this option, you need to borrow a PC that you can access as admin.
Step 1 : On another PC that you can access with admin rights, download and install iSumsoft Windows Password Refixer.
Step 2 : Launch this tool and follow the steps to burn it to USB and create a bootable drive.
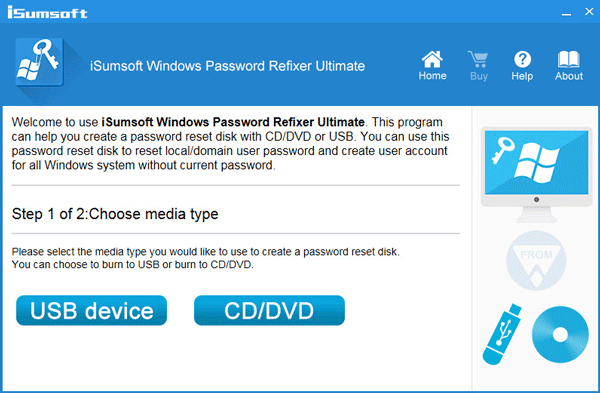
Step 3 : Connect the bootable USB drive to the Windows 10 PC on which you have lost admin rights and set the PC to boot from USB.
Step 4 : After the " Windows Password Refixer " screen appears, click Add User . Then, enter the username in the dialog box and click OK. This will add a new local user with admin rights on Windows 10.
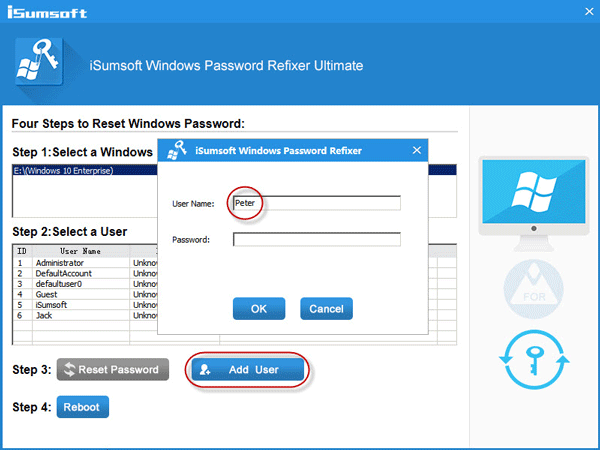
Step 5 : Click Reboot and exit the bootable USB drive to restart your PC. The new admin account will appear on the Windows 10 login screen. Log in to it and you have regained admin rights.
Wish you success!