Chrome Cache Size Limit: Hidden Setting That Saves You GBs of Storage
Google Chrome is a great browser for everyday browsing, but many people are always annoyed by its unlimited cache size.
Table of Contents
Google Chrome is a great browser for everyday browsing, but many people are annoyed by its unlimited cache size. In my experience, letting Chrome store tons of temporary files will eventually slow down your system and waste SSD space unnecessarily.
Use command line flags to set Chrome cache size
Before you limit Chrome's cache, you should check how much space it's currently using. This gives you a baseline to work from (and will show you which sites are hogging your storage space!).

You can find the size of your Chrome cache by typing chrome://settings/content/all into the address bar. You can then click on any website and check its usage. Alternatively, you can navigate to the folder in File Explorer:
C:UsersPCAppDataLocalGoogleChromeUser DataThen go to your Chrome profile folder and check the size of the cache folder directly.
The simplest way to limit the cache size is via a command line flag. This method does not require any registry modifications. Here is how to set it up:
- Right-click on the Chrome desktop shortcut and select Properties .
- Go to the Shortcut tab .
- In the Target field , add --disk-cache-size=209715200 at the end.
- Make sure there is a space before the double dash.
- Click Apply > OK .
- Restart Chrome for changes to take effect.

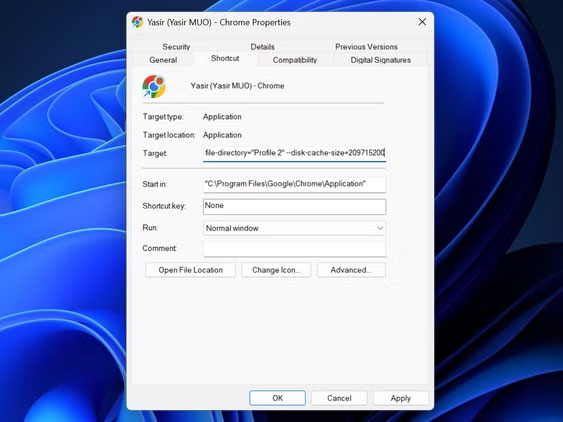
Note : The number 209715200 represents bytes and is equal to 200MB. You can adjust this number based on your needs using a unit converter like Convert Units - people usually prefer 400MB (419430400) for heavy web browsing sessions.
This is useful if you've been experiencing excessive RAM usage with Chrome, as limiting the cache can reduce overall resource consumption. The cache limit is applied every time you launch Chrome through that particular shortcut.
Force Chrome Cache Limit via Windows Registry
If the command line flag doesn't work for your setup, the Windows Registry offers a more permanent solution. This method applies the cache limit system-wide, regardless of how you launch Chrome.
First, you need to have access to the Registry Editor - if it's disabled, see our guide on how to enable Registry Editor access .
Tip : Always back up the registry before making changes, as even one wrong edit can cause system crashes.
Here is the step-by-step procedure to force Chrome cache limit via Windows Registry:
- Open the Run dialog box by pressing Windows + R and typing regedit , then pressing Enter.
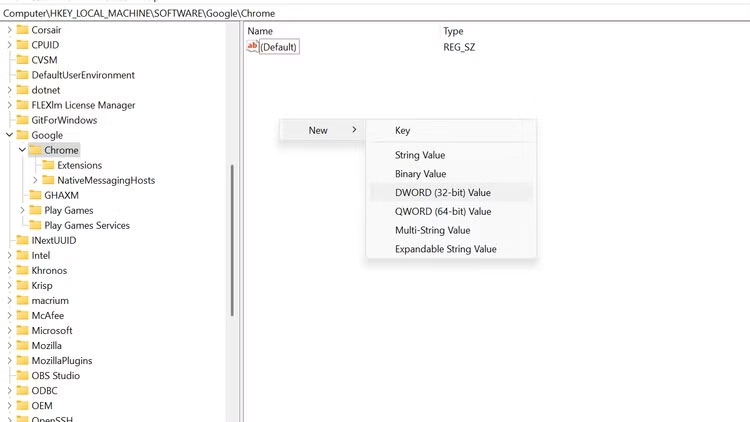
- Navigate to ComputerHKEY_LOCAL_MACHINESOFTWAREGoogleChrome.
- If the "Google" or "Chrome" folder doesn't exist, create them by right-clicking and selecting New > Key.
- Right-click the Chrome folder and select New > DWORD (32-bit) Value .
- Name it DiskCacheSize.
- Double click on the new entry and set the value to the desired cache size in bytes.
- Select Decimal as the base and enter 209715200 for 200MB.
- Click OK and restart Chrome to apply the changes.
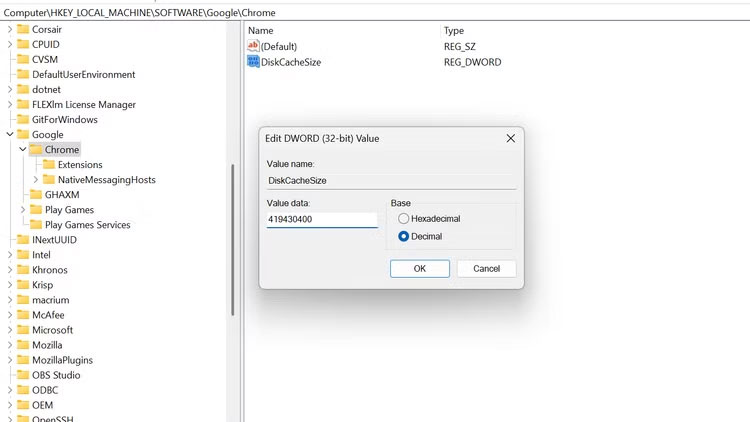
Many people choose 419430400 (400MB). The registry method will override any previously set command line flags, making it the system-definable cache limit. It is also useful for managed environments where you want a consistent cache limit across all users.
People like this approach because it only requires one-time setup. Once configured, every instance of Chrome respects the limit without any special shortcuts or parameters.
Check if cache limit is actually working
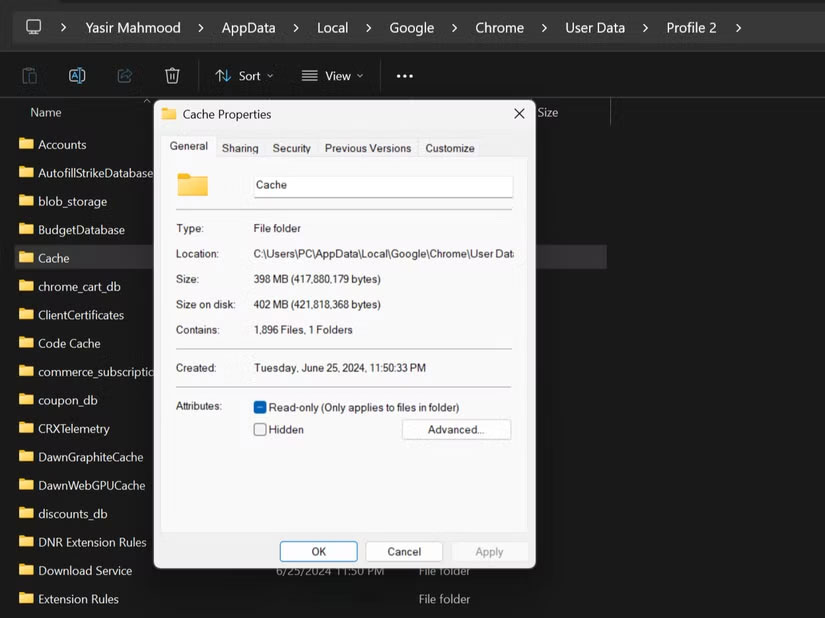
Setting cache limits is pointless if they don't work. The easiest way to verify is to check the cache folder size directly. Navigate to the following path in File Explorer:
C:UsersPCAppDataLocalGoogleChromeUser DataThen go into your Chrome profile folder and check the size of the Cache folder . During normal browsing sessions, the Cache folder size should never exceed the limit you set - if it does, your profile won't work.
If the limit doesn't work, double-check your command line syntax or registry entries. A typo in the target field or incorrect data type in the registry can break things. Additionally, some Chrome extensions can interfere with the cache limit; try disabling them temporarily if you're having trouble.
Chrome's default caching behavior never made sense. These methods work well, but honestly, Chrome should have this setting by default. Until Google adds a built-in cache limit option, these workarounds will effectively solve the storage problem. Hopefully future updates will make this process more user-friendly.
Was this article helpful?
Your feedback helps us improve.
Related Articles
 How to increase browser buffer size for better performance3 minutes read
 How to clear the DNS cache buffer in Google Chrome3 minutes read
 6 steps to 'hide' garbage on Windows?5 minutes read
 To speed up Chrome browser, apply these tricks6 minutes read
 5 Simplest Ways to Reduce Zip File Size10 minutes read
 Enable this hidden setting to stop Chrome from eating up RAM7 minutes read
Reader Comments 0
Sign in with email or Google to join the discussion.