Allow / prevent users / groups from changing time in Windows 10
By default, only members of the Admin group can change system time in Windows 10. This tutorial will show you how to allow or prevent specific users and groups from changing system time. in Windows 10.
Table of Contents
The PC's system clock is used to record the time whenever you create or modify files on it.
Each group in Windows has its own default permissions. When a user is a member of a group, the user is assigned the group rights.
By default, only members of the admin group can change the system time in Windows 10.
This tutorial will show you how to allow or prevent specific users and groups from changing system time in Windows 10.
Note : You must be logged in as an administrator to perform it.
Option 1: Change in Local Security Policy
Note : Local Security Policy is only available in Windows 10 Pro, Enterprise and Education editions.
All versions can use option 2 below.
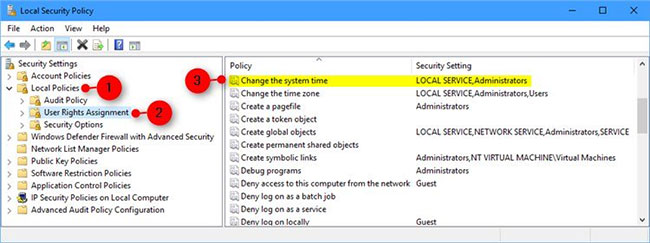
1. Press the Win + R keys to open Run , type secpol.msc into Run and click OK to open Local Security Policy .
2. Expand Local Policies on the left side of Local Security Policy, click User Rights Assignment and double click Change the system time on the right.
3. Click the Add User or Group button.
4. Click the Object Types button .
5. Select all the boxes in Object types and click OK.
6. Click the Advanced button .
7. Click the Find Now button, select the name of the user or group (eg "Everyone" ) you want to add and click OK.
Note : If you like, you can press and hold the Ctr l key to select more than one user and / or group.

8. Click OK 2 times.
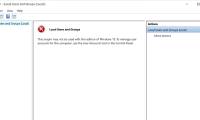
9. When done, you can close Local Users and Groups if desired.
To prevent users / groups from changing the time in Windows 10 with Local Security Policy, do the following:
1. Follow steps 1 and 2 above.
2. Select the user or group (eg "Everyone" ) you want to remove and click the Remove button .
Note : If you like, you can press and hold the Ctrl key to select more than one user and / or group.
Do not delete LOCAL SERVICE because it is used by Windows.
3. Click OK.
4. When finished, you can close Local Users and Groups if desired.
Option 2: Change in Command Prompt
1. If not, you will need to do the following before continuing to step 2 below.
A) Download this ntrights.exe file from Windows Server 2003 Resource Kit Tools.
B) Save the ntrights.zip file to the desktop and unblock it.
C) Open ntrights.zip file, copy or move ntrights.exe file to C: WindowsSystem32 folder and click Continue.
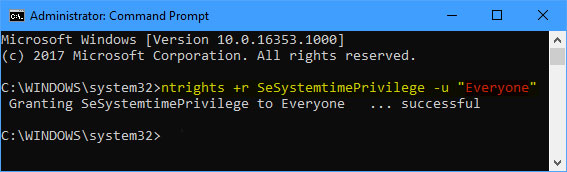
2. Open Command Prompt with admin rights.
3. Enter the command you want below into the Command Prompt with admin rights.
- Add users or groups
ntrights +r SeSystemtimePrivilege -u "User or Group"
- Delete user or group
ntrights -r SeSystemtimePrivilege -u "User or Group"
Note : Replace User or Group with the real name of the user or group (eg "Everyone" ) that you want to add or delete for this policy.
For example:
ntrights +r SeSystemtimePrivilege -u "Everyone"
Do not delete LOCAL SERVICE because it is used by Windows.
4. When done, you can close the Command Prompt if you like.
Was this article helpful?
Your feedback helps us improve.
Related Articles
 How to change time, date and month in Windows 10?4 minutes read
 Restrict users to change system settings3 minutes read
 How to Configure Users and Groups in OS X Mavericks Server App 3.X4 minutes read
 Win 11 does not have Local users and groups, what should I do?5 minutes read
Reader Comments 0
Sign in with email or Google to join the discussion.