Table of Contents
The following guide provides a clear overview of Office 2010, with the most relevant background, details, and practical takeaways.
Office 2010 Overview
Note: Artistic Effect is only available in Word, Excel, and PowerPoint.
To insert an image into an Office document, click Picture in the Insert tab.
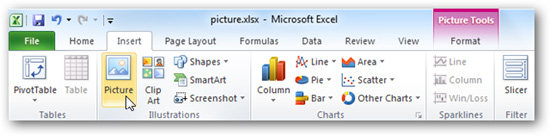
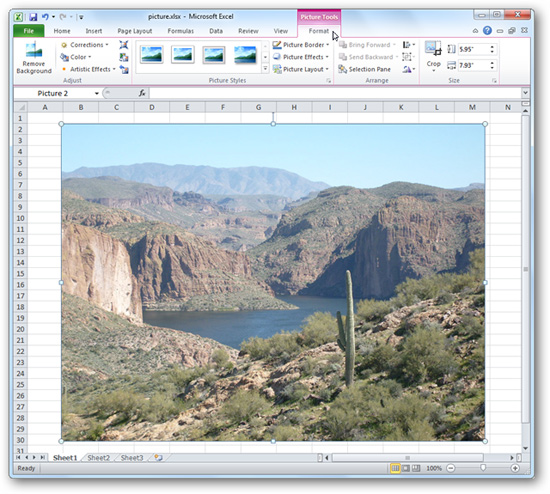
After entering the image to insert, the Picture Tool image editing tool box will appear. If not, click on the picture.
In Adjust, click Artistic Effects. You will see a series of options for slideshow effects in the list that can be dragged down.
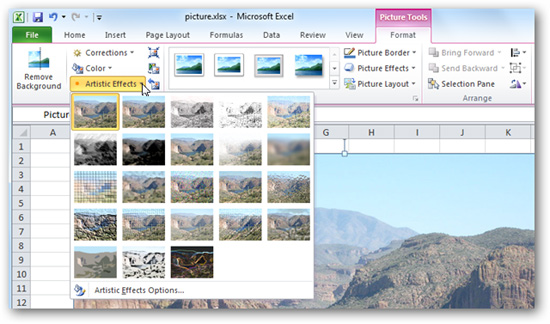
Moving your cursor over the effects to use Live Preview can see what your image looks like if the effect is applied.
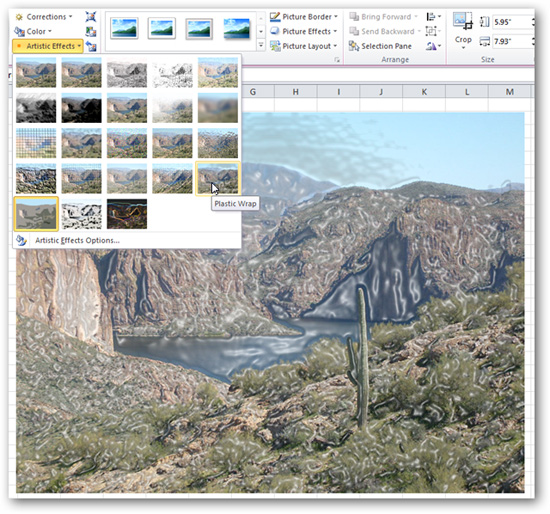
When you find the effect you like, just click on the effect to apply it to the photo.
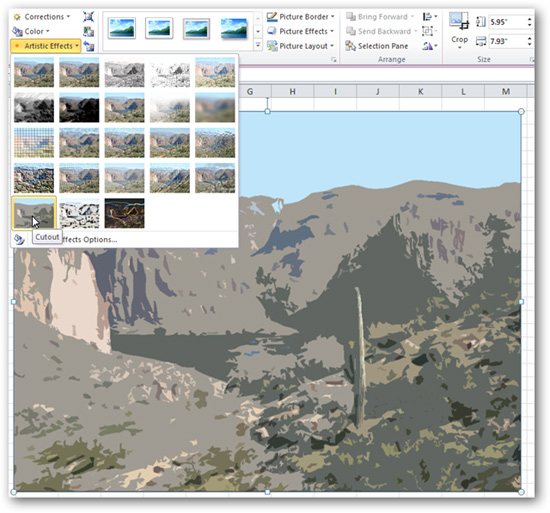
In addition, there are still some extra Artistic Effect Options.
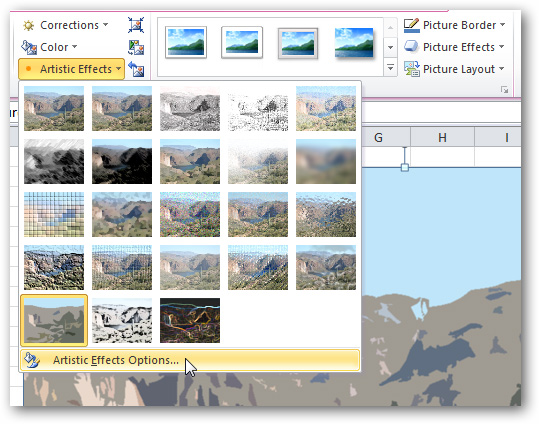
Each effect has its own function, you can edit it by moving the slider left or right.
If you find a favorite effect and apply it to your photo, click on the None option from the slideshow, under Artistic Effects.
Conclude
Artistic Effects provides a simple way to add amazing effects to your photos in Office 2010 without having to use graphics software.
FAQ
What happened in Add Artistic Effects to Photos in Office 2010?
The following guide provides a clear overview of Office 2010, with the most relevant background, details, and practical takeaways.
What factors influenced Office 2010?
Office 2010 Overview Note: Artistic Effect is only available in Word, Excel, and PowerPoint.
What was the practical impact on users?
To insert an image into an Office document, click Picture in the Insert tab.
Related Articles
 3 Mobile Apps Provide Creative Photo Effects: What You Need to Know7 minutes read
 Make Artistic Black and White Photos with Photoscape3 minutes read
 Top App to Turn Photos into Paintings on the Phone10 minutes read
 Download the Fontmania Photo Art App, Which Costs $ 4.99 for Free4 minutes read
 Extract Images from Office Documents Quickly3 minutes read
 Bighugelabs: How to Create a Puzzle Effect for Photos2 minutes read
Reader Comments 0
Sign in with email or Google to join the discussion.