8 Mail Settings on iPhone You Should Change Now
Apple Mail is a useful app for managing email on your iPhone, but its default settings aren't optimized for the best experience..
Apple Mail is a great app for managing email on your iPhone, but its default settings aren't optimized for the best experience. Thankfully, a few tweaks can reduce battery drain, save on data usage, and unlock handy features you'll never want to be without again.
1. Switch Mail from Push to Fetch
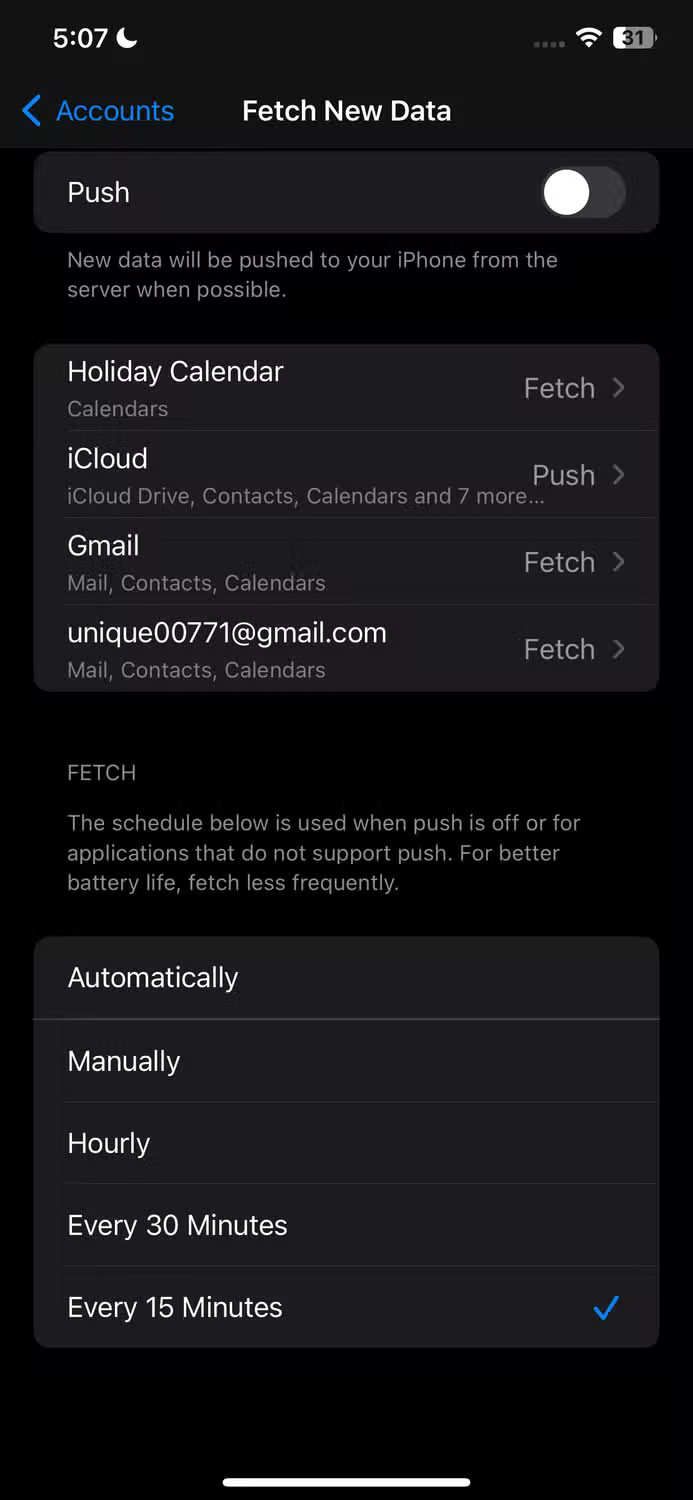
By default, the Apple Mail app uses the 'Push' setting. This setting causes the app to constantly connect to the email server to retrieve new emails in real time. While it's convenient for instant updates, this feature can drain your battery and network resources. If you don't need instant notifications, you should switch to the 'Fetch' option.
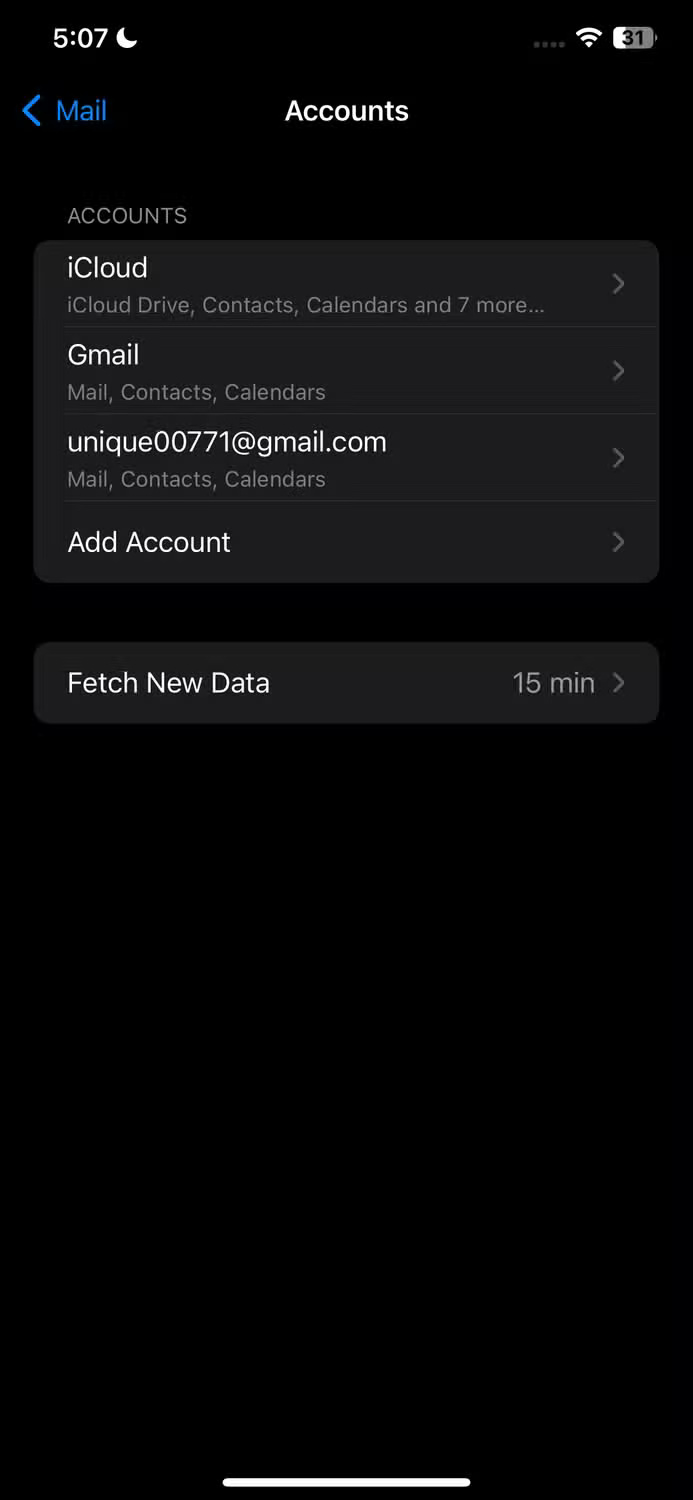
With 'Fetch,' the app will check for new email at varying intervals—15 minutes is a good balance. This reduces the frequency of checking, saving battery life and data on your iPhone. To switch, open the Settings app, go to Mail > Accounts > Fetch New Data , and turn 'Push' off.

2. Adjust the data collection interval
By default, changing from 'Push' to 'Fetch' will only cause your iPhone to fetch new data from the server when it's connected to Wi-Fi and charging. Otherwise, it will fetch data whenever you open the Apple Mail app. However, you can set it to fetch data at specific intervals, like Hourly , Every 30 Minutes , or Every 15 Minutes .
This reduces the frequency of background checks, saves battery and data, and ensures you get regular emails and don't miss important updates. To set your preferred fetch interval, go to Settings > Mail > Accounts > Fetch New Data and select the interval that works best for you.
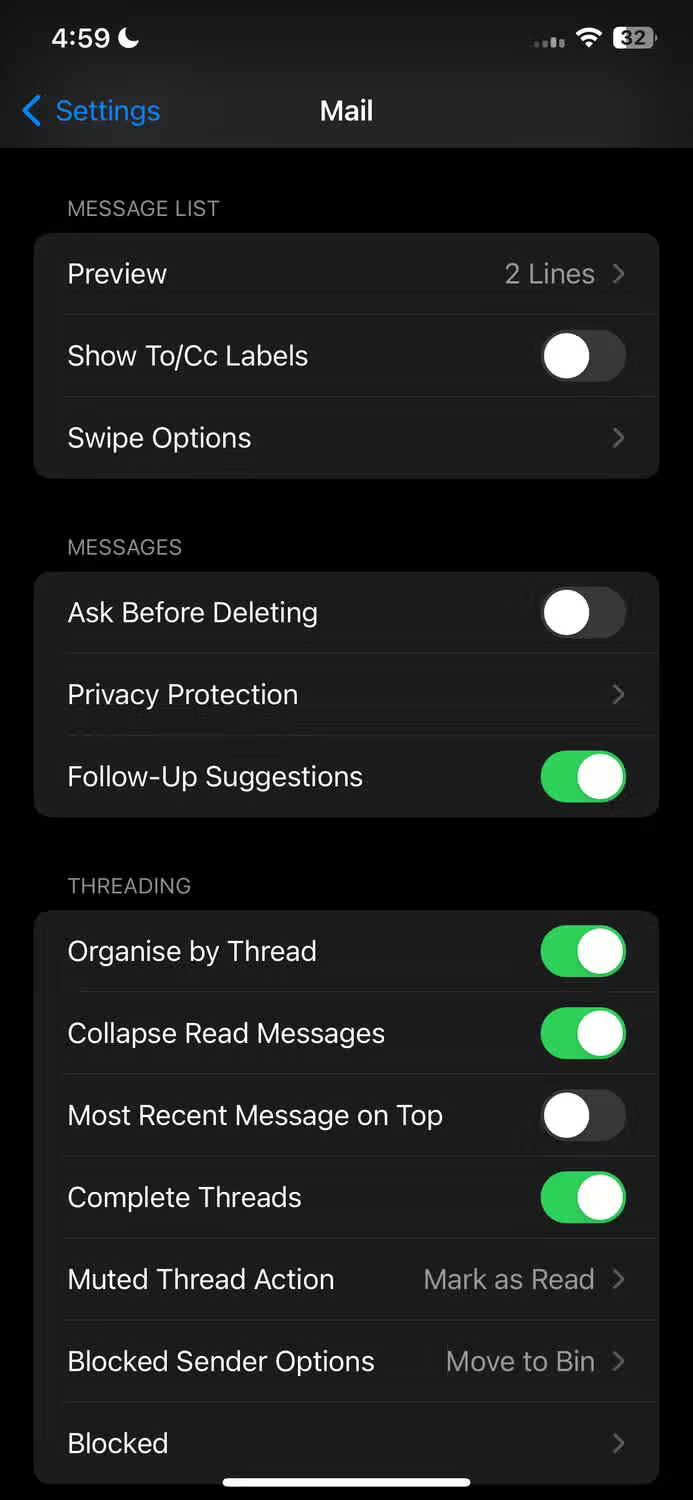
3. Disable remote image loading
When you open an email in Apple Mail, remote content like images, videos, or stylesheets is automatically downloaded from the Internet. This can expose you to inappropriate content, allow malicious code to run, and put your email account or device at risk. It also drains your device's battery and uses bandwidth, and may even notify the sender that you've read the email.
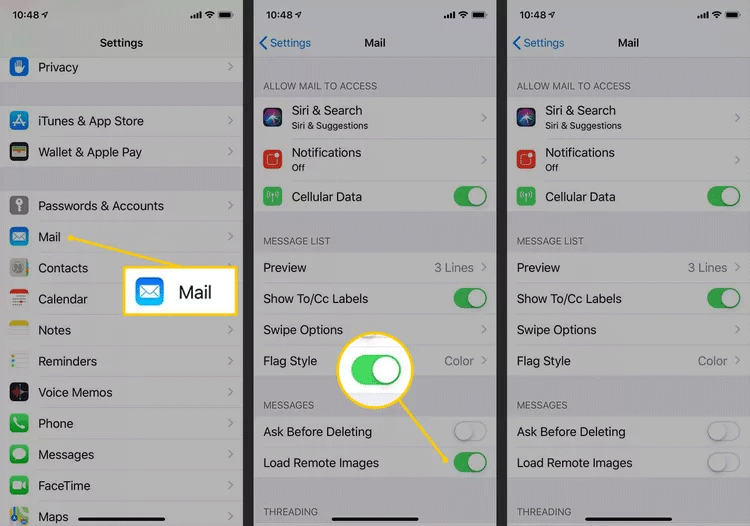
We recommend turning this feature off to improve your iPhone's privacy, security, and performance. To turn off remote loading in the Apple Mail app, go to Settings > Mail > Messages and turn off the toggle next to "Load Remote Images" .
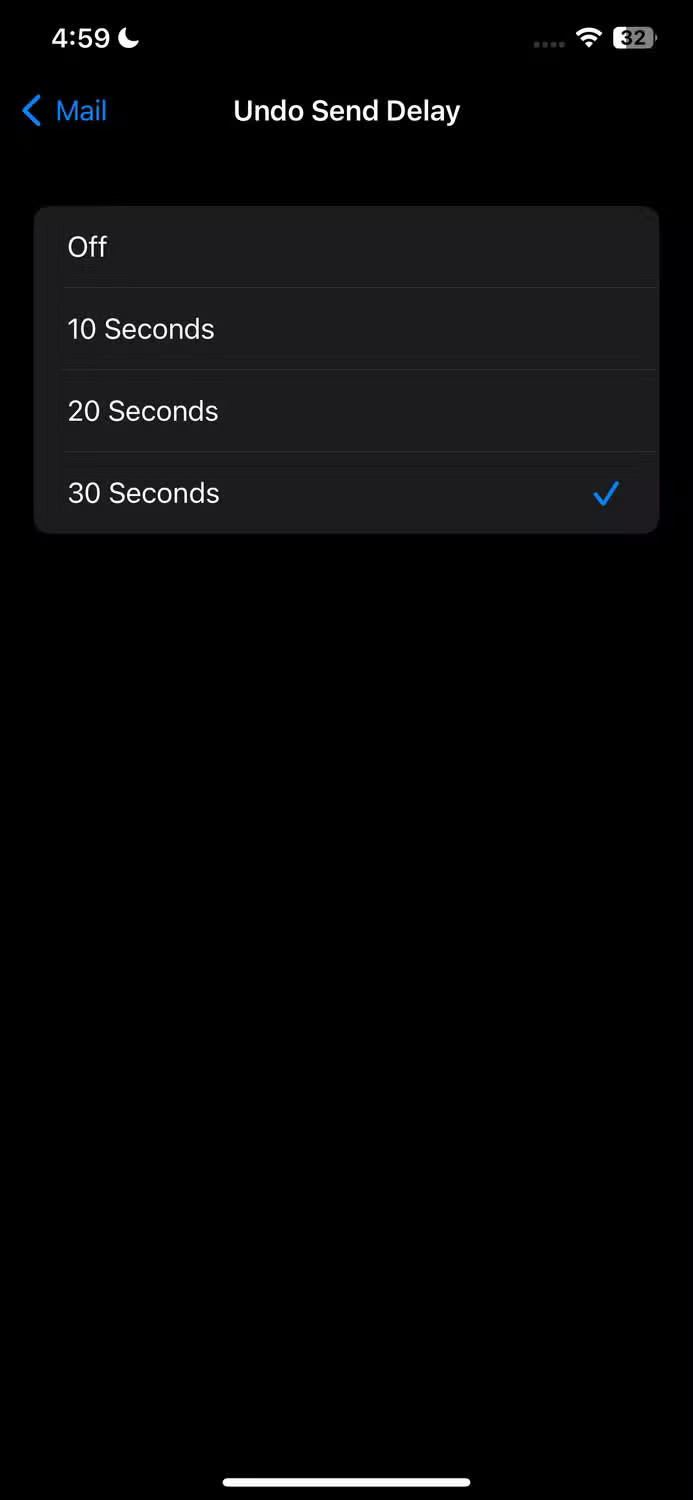
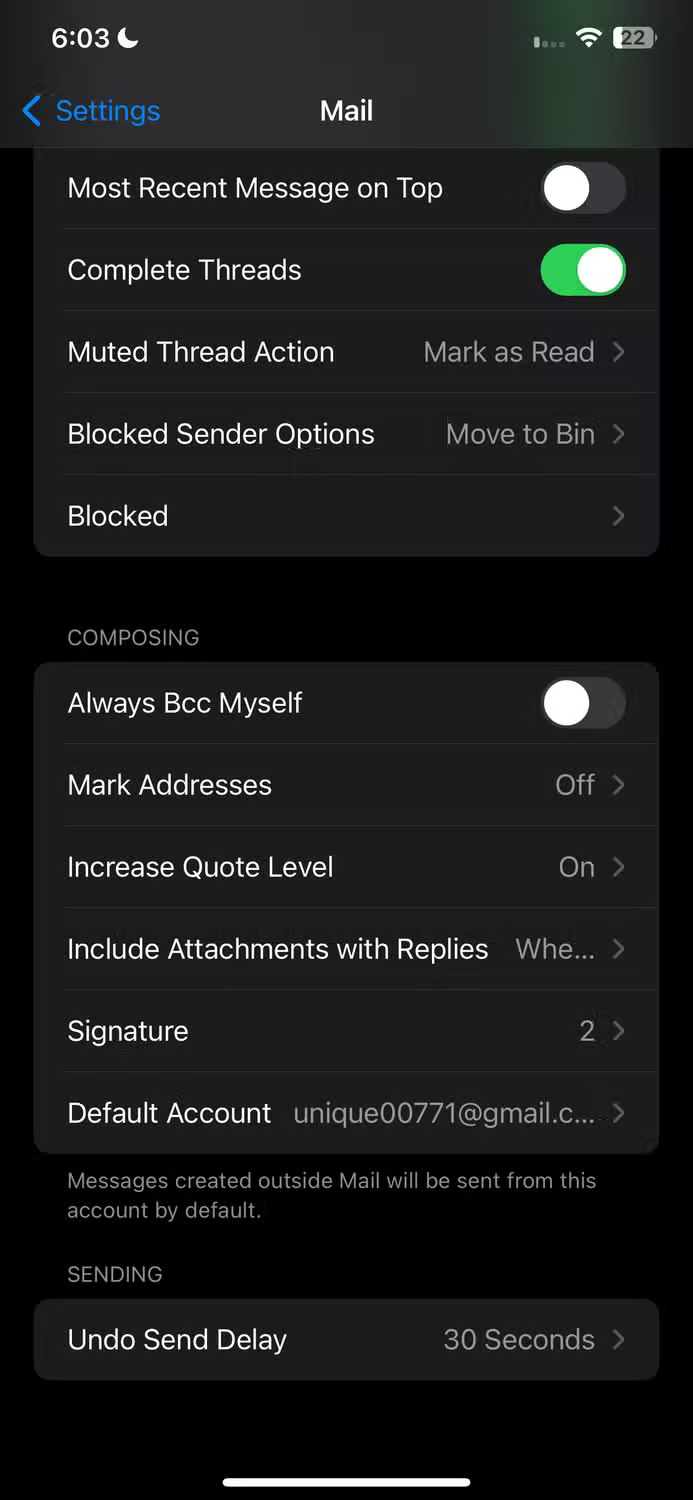
4. Modify undo send delay
We've all been there, accidentally sending an email that's incomplete, contains errors, or is missing an attachment. While Apple Mail allows you to undo a sent email, the default undo time is just 10 seconds, which isn't enough. Luckily, you can extend that time to 20 or 30 seconds.
By increasing the delay, Apple Mail will keep the undo option visible for up to 30 seconds, giving you enough time to recall emails before they leave your outbox. To extend the undo delay, go to Settings > Mail , then select the "Undo Send Delay" option under Sending. Choose "20 Seconds" or "30 Seconds" and you're done.


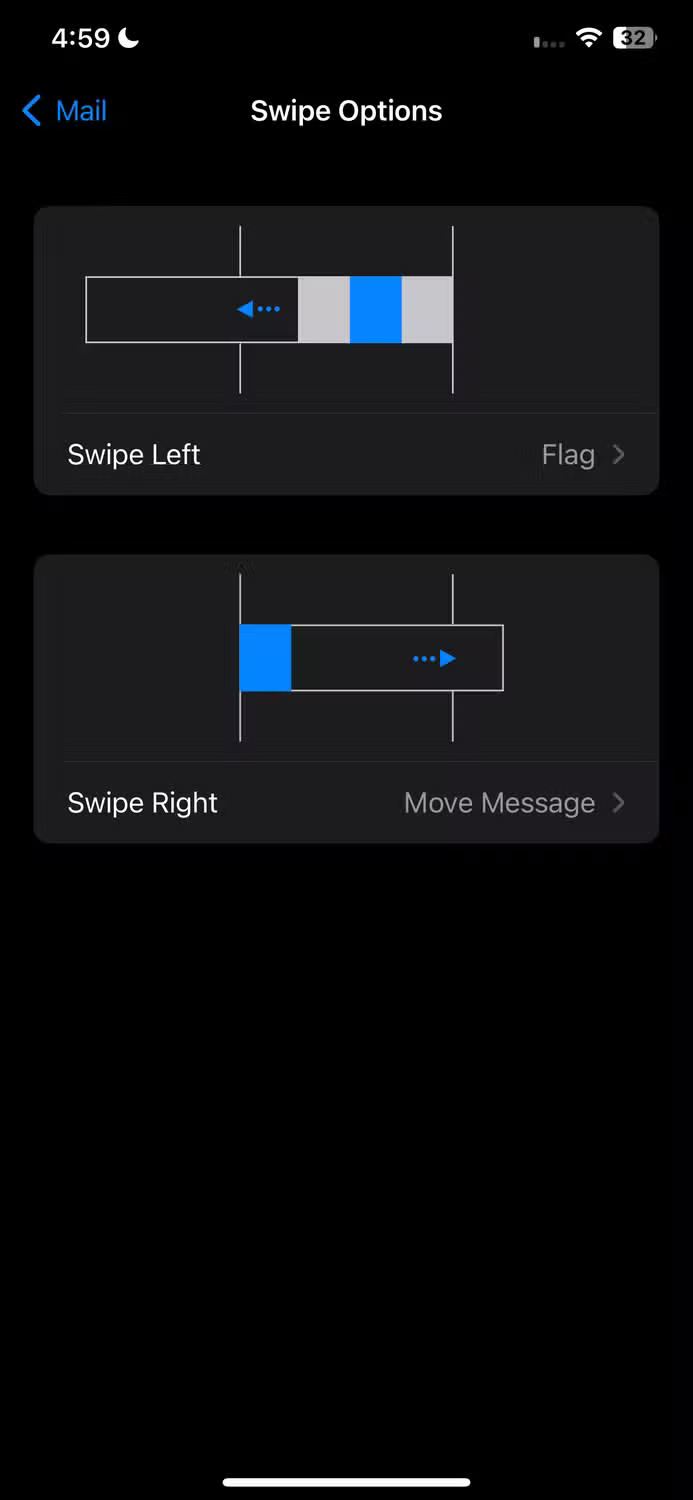
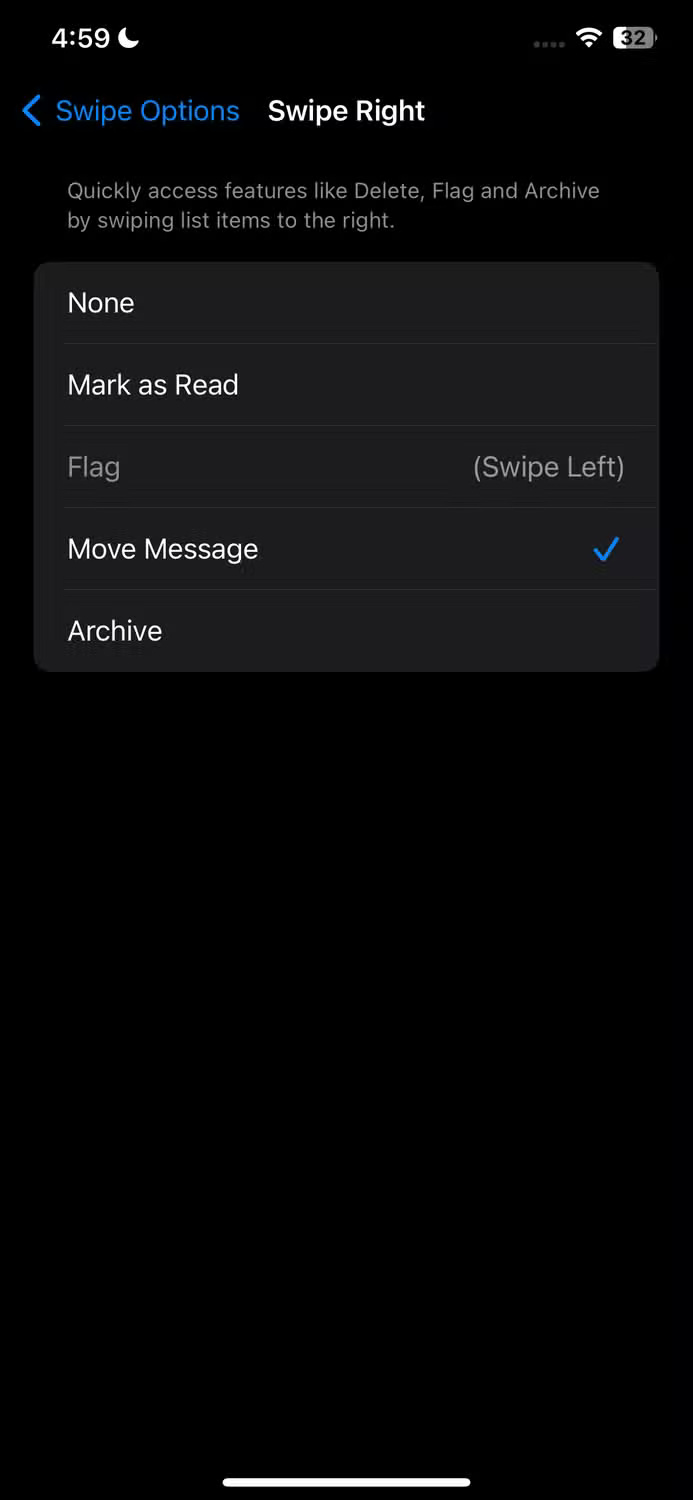
5. Customize swipe actions
Apple Mail lets you perform a number of actions with swipe gestures. By default, swiping left archives an email, and swiping right marks it as read or unread.
While you can't change the default swipe left action to anything other than archive, you can add secondary actions like "flag", "mark as read", or "move message" and apply them manually after swiping left.
For the right swipe, you can change the action to "flag", "move message", or "archive". If you choose "archive" for the right swipe, the default left swipe will automatically change to "delete".
To customize these gestures, open Settings > Mail > Swipe Options . From there, tap on 'Swipe Right' and 'Swipe Left' to modify the actions for each swipe direction.
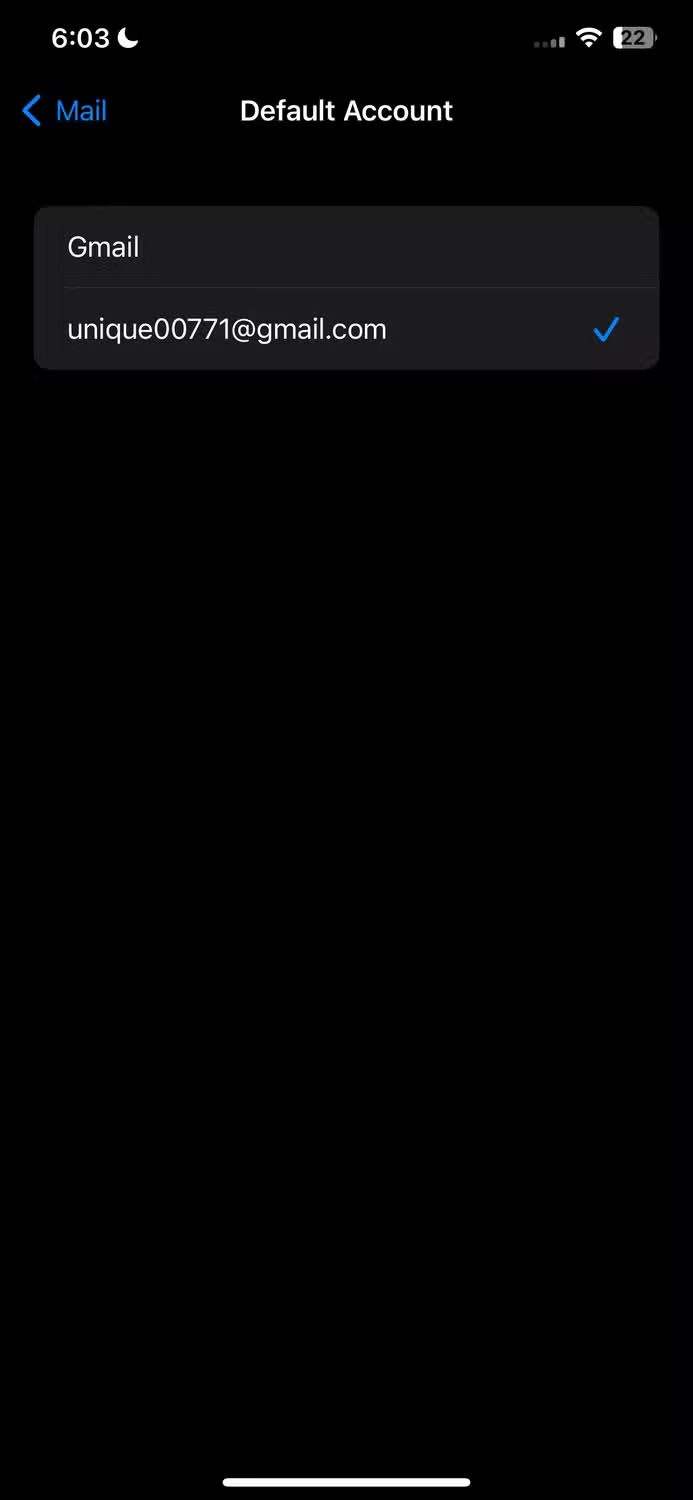
6. Select default email account
When you add multiple accounts to Apple Mail, your iPhone will automatically use your default email account when sending attachments outside of the Apple Mail app. For example, if you send a photo from the Photos app to the Mail app, the default email address will be filled in the "From" field.
If you often have to manually change the "From" field to a different email address, you can eliminate this hassle by adjusting your default account in your Mail settings. To do this, open the Settings app, navigate to "Mail," scroll down, and tap "Default Account."
Now, select the email account you want to use as default when sending messages from other apps.

7. Update default signature
Do you see the words 'Sent from my iPhone' whenever you start composing an email in the Apple Mail app? That's the app's default signature. If you don't want it to appear, you can easily update your email signature to include your name, title, or other relevant details, turning it into a digital business card.
Apple Mail even lets you set different signatures for each account. To update your signature, go to Settings > Mail > Signature . To apply the same signature to all accounts, select 'All Accounts' and make your changes.
Alternatively, you can select an individual account and update that account's signature separately.
If you don't want to use a signature, leave the signature box blank and your email will be sent without a signature.


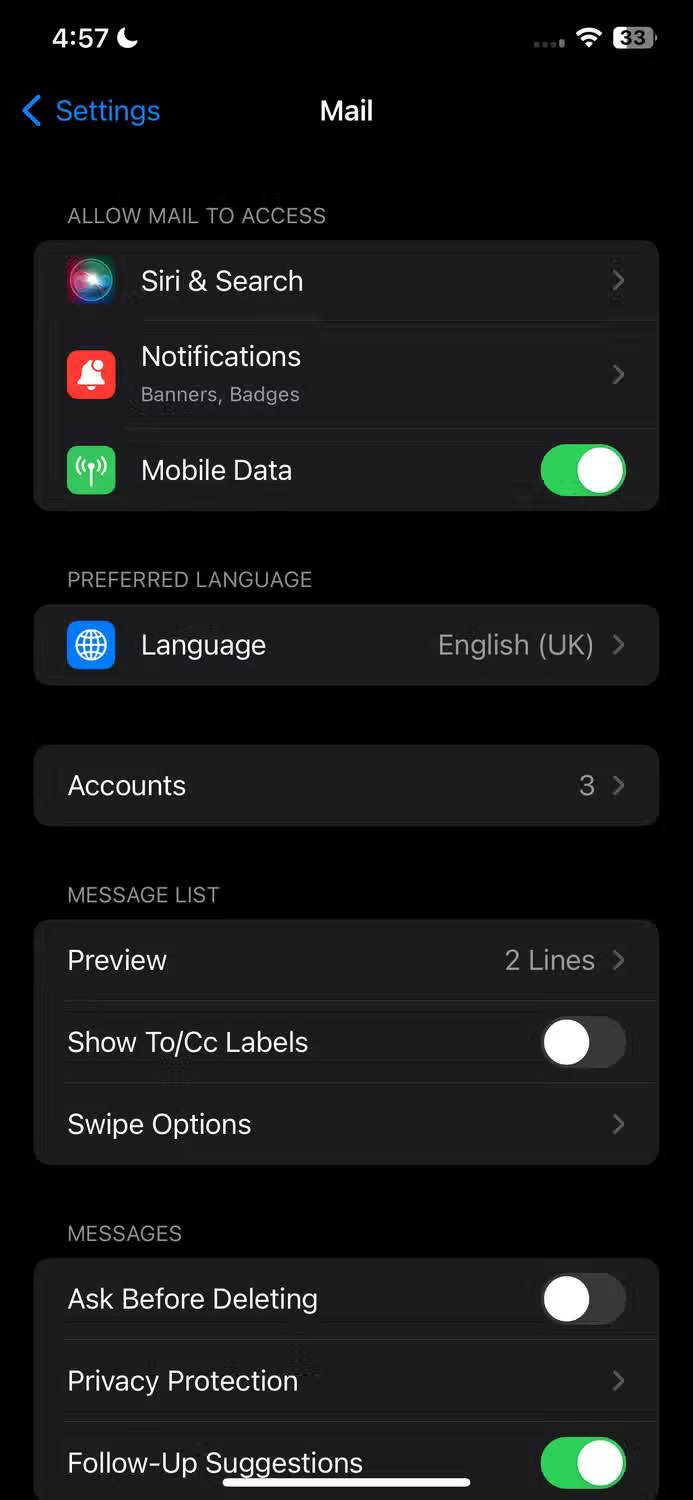
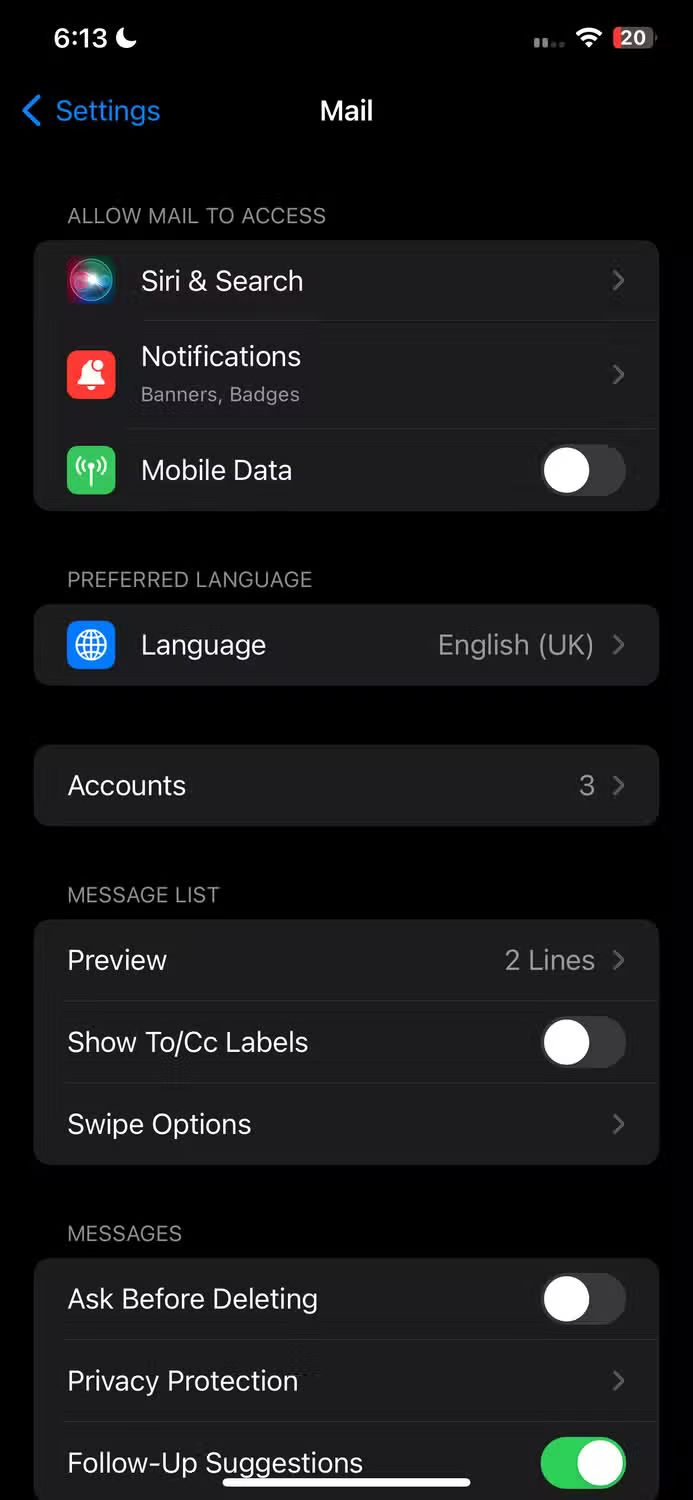
8. Turn off mobile data for Mail
Apple Mail uses Wi-Fi to fetch data, sync emails, and perform other tasks. If Wi-Fi is not available and cellular data is turned on, the app switches to cellular data and uses that data to perform its operations.
If you want to restrict the Mail app to Wi-Fi mode and prevent it from using cellular data to avoid additional charges, you can turn this feature off.
To stop Apple Mail from using cellular data, open the Settings app, go to 'Mail,' and turn off 'Cellular Data' or 'Mobile Data.' While this will save you data and avoid charges, you may miss important updates because your iPhone will only check for new email and notify you when you're connected to Wi-Fi.

Here are some examples of how Apple Mail's default settings aren't optimized well, and how tweaking them can significantly improve your experience. If you've never made these tweaks before, give them a try, but don't be afraid to change them back if they're also hampering your overall experience.