4 steps to troubleshoot audio loss in Windows
Loss of sound on the computer is a problem that occurs quite often and there are many ways to overcome the loss of sound on Windows. In this article, TipsMake.com will tell you 4 methods to fix audio inaudible errors on your computer.
A beautiful day like any other day, you turned on your computer and opened your favorite songs and videos but suddenly realized that the song was running half way but still no sound came out. Don't be alarmed, try the following to fix this loss of sound.
There are 4 ways to fix sound loss on your computer including:
- Restart Windows - Restart.
- Check the Volume section.
- Reinstall sound driver - Sound.
- Check audio jacks, speakers, headphones.
Take TipsMake.com to make and check it out!
1. Restart the computer
First, restart your computer to see if the problem will be fixed. In many cases, Windows may fail because the software conflicts with each other, causing the machine to become unstable, and restarting the computer is the fastest way to get it to a stable state.
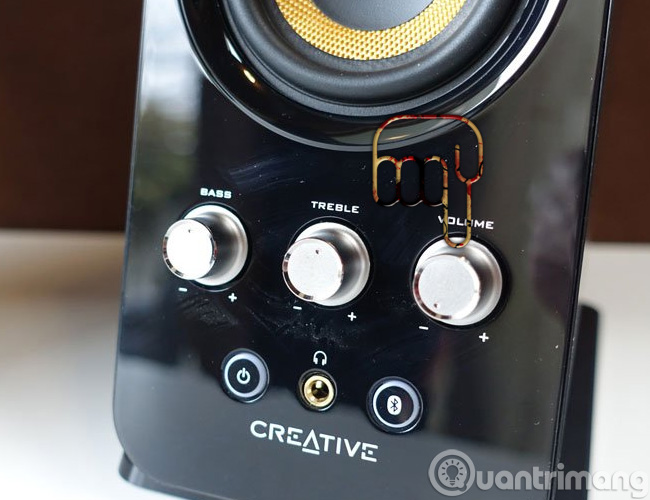
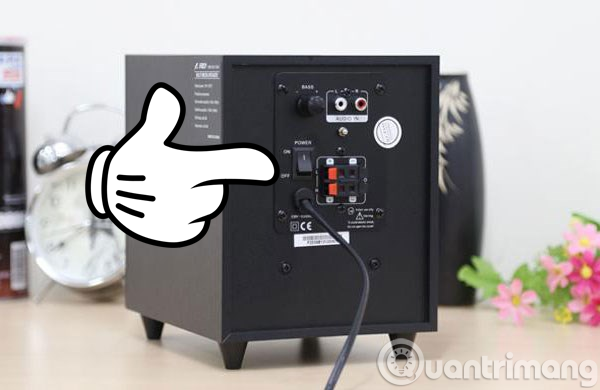
Make sure that the computer speaker is turned on (check the Power button, or Of / Off ) then be the volume button - Volume on the speaker, maybe some naughty person has turned the volume down to the minimum level. Especially when your home has young children.


2. Check the Volume section of Windows
If the speaker is turned on and the volume is audible but your PC is still silent , the problem is probably in Windows. Click on the speaker icon in the lower right corner of the system tray and see if the volume is set to Mute mode, if the volume bar is at its minimum, push the volume bar up to get it. can hear. Then try checking again by letting the computer test a certain music and video file .
- See more articles on how to turn off sound on each tab of Chrome
- Control Panel; Open Control Panel Or open Run> type Control Panel> press Enter Step 2: In the Control Panel, open the Sound section as shown below: Select the Sound section Step 3: In the Sound window, you will see many Small Tab, select Recording: Select Recording Step 4: In the Recording tab, select the device that has been plugged into the computer (like this example I am using a Tako Headphone, cheap Vietnamese goods 150k), then Set Default: Select the device Step 5: Now, please test and whether it worked or not, tap the microphone head a few times (or whisper the Mic head). If you see the green signal line as shown below, the Microphone works normally, and if there is no signal, it means there is a problem: Test the signal in the Recording section Step 6: If you are in the Recording tab and If you can't see your microphone device, click on any device shown in the Recording tab. In the menu that appears, check Show Disabled Devices if it is not marked. If you still can't see your microphone, this may not be the case or you need to install the driver to work. In the first case, just check if it is plugged in correctly, plug it back in. If it uses a USB port, you can spit it and plug it into another port (because on the computer, laptop usually has at least is 2 USB ports). In the second case, use the driver from the manufacturer's website or from the accompanying CD to install. How to update the driver on the computer Step 7: For some reason, Windows may not "recognize" all the Microphone devices connected to the computer or laptop. Therefore, we need to make Windows know that there is a Microphone on the computer. To do so, open the Control Panel window> Ease of Access Center or Control Panel> Speech Recognition (depending on the version of Windows Vista, 7 or 8, 10): Open Ease of Access Center Step 8: Now, in Speech Recognition, Select Set up microphone as shown below: Set up microphone Step 9: Select the microphone device you are currently using and click the Next button. Select Microphone, Headphone As in this example, I am using headphone Tako, select the first item - Headset Microphone. The instruction here indicates that, for Headset Microphone (we call it headphone), the user needs to wear the device on the head, put the Microphone about 1 inch from the mouth (range 2 - 3 cm), should not breathe directly into the microphone head (saliva, steam in the mouth will stick to it and affect recording quality), Volume key is not in Mute mode. Click Next to continue: Conduct a Microphone test Step 10: Read loudly and clearly the sentence in the picture (highlighted in black) for the system to receive and process your voice. When you're done, click Next: Read the English test script The system displays the checked message, Microphone setup is complete. Everything works fine. Microphone Quality Click the Finish button and start using the Microphone to record your voice. If in case of an error, please review the instructions from step 1 to see where the problem is. Good luck! Updated: March 10, 2017 Nguyen Trang 1 2 3 4 5 3 ★ 19
You should read it
- ★ Computer does not recognize speakers - Causes and solutions và
- ★ Evaluating the speaker Edifier M1380: Good sound quality, high durability, reasonable price
- ★ Fixed a bug with the speaker icon with a red X, the computer has no sound
- ★ The easiest way to connect speakers to TVs
- ★ How to fix sound errors on Windows 10