3 Ways to free up Google Drive space, increase memory
How long is Google Drive service stored? Google Drive is a familiar file storage place for many people, allowing documents to be saved in different formats from photos, videos to doc files, but not everyone knows, they are like physical hard drives in On computers, they are limited to 15GB of space. If you regularly store 15GB, the 15GB will quickly evaporate, making it difficult for you to upload files to storage. In order for Google Drive to continue storing documents, you can buy more space or use the method to increase Google Drive capacity. down here.
How to free up Google Drive space
1. Increase Google Drive memory by deleting files
Step 1 : To open the files, access the link HERE .
Step 2 : Select 1 or more files you want to delete (Arrow 1). Next, click on the trash icon (Arrow 2) as shown below.
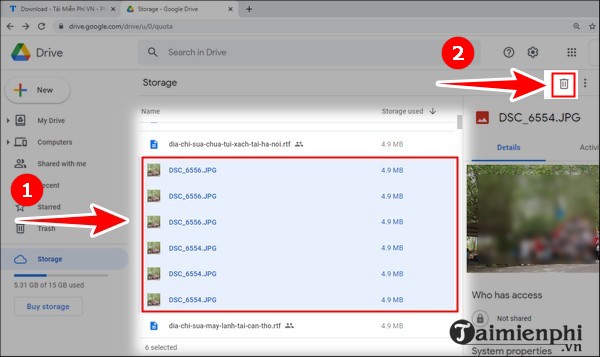
Note : To select multiple files, select 1 file. Next, hold down the Ctrl key and click on the file you want to delete .
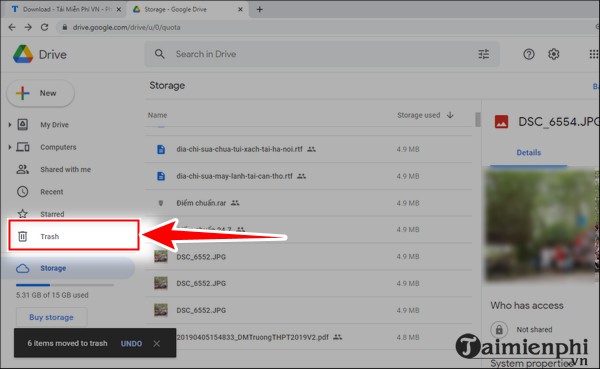
Step 3 : At this point, you will be able to delete the files you selected. If you want to permanently delete it, click " Trash " on the left side of the screen.
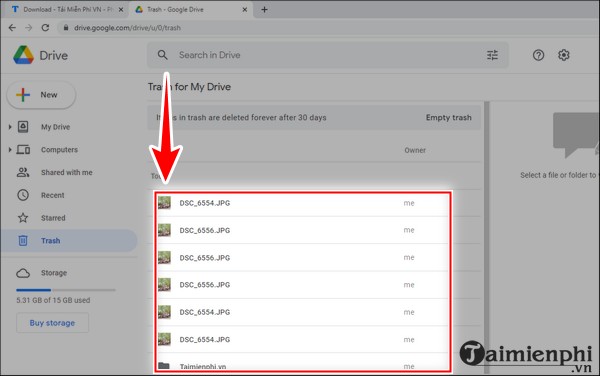
Step 4 : Similar to step 2, click on the file you want to permanently delete .
Step 5 : Looking in the upper right corner, click the trash icon .
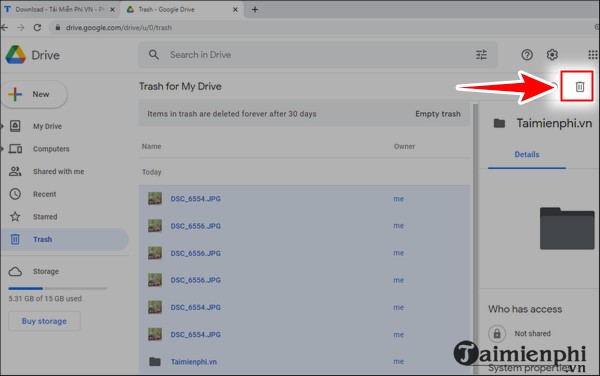
Then, click " Delete forever " (delete forever)
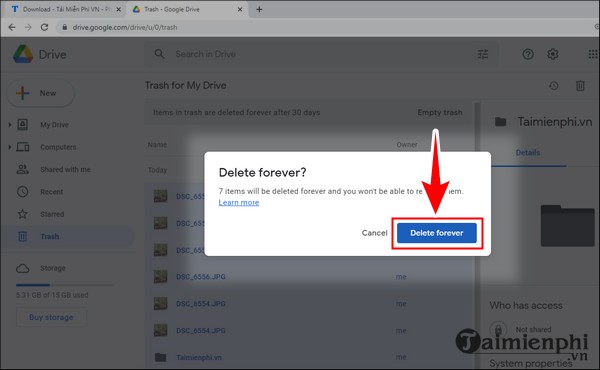
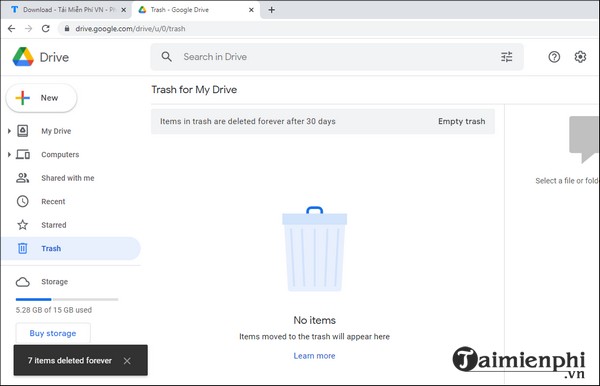
In the lower left corner, " x items deleted forever " is displayed , which means you have successfully deleted the file forever.
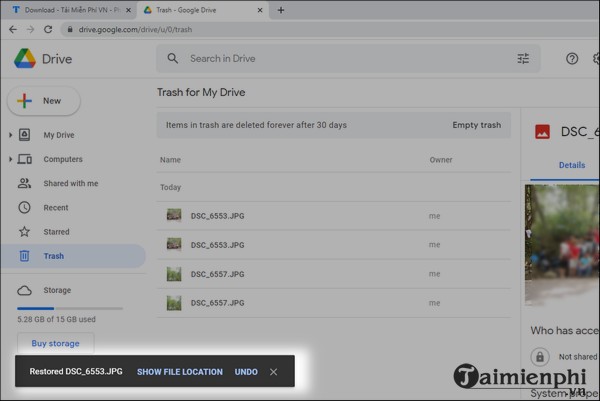
Note : If you accidentally delete the wrong file, don't worry. Click " Trash " (Arrow 1) -> Right click on the file you want to restore (Arrow 2) -> Select " Restore " (Arrow 3).

So, you have restored your deleted files.
2. How to increase Google Drive capacity by deleting attachments in Gmail
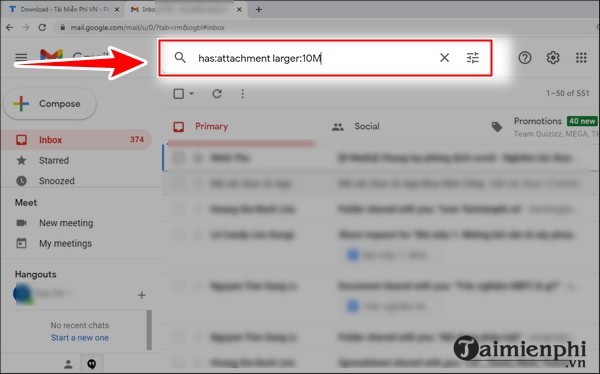
Step 1 : Open your Gmail. Next, in the search bar in Gmail , enter the following: " has:attachment larger:10M ".
Note : 10M is the size of attachments in Gmail. You can customize this number.
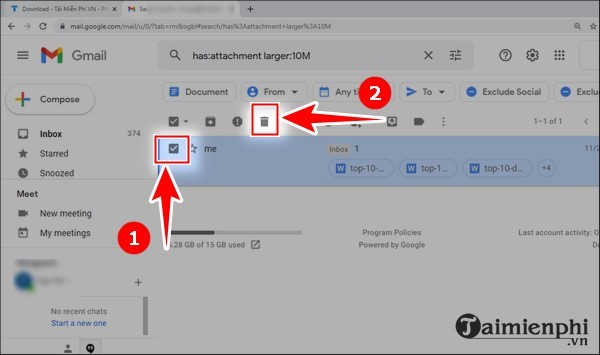
Step 2 : Check the small box in front of the email you want to delete (arrow 1) and then click the trash can icon (arrow 2) (Similar to a file, you can select multiple emails at the same time to delete, helping save time).
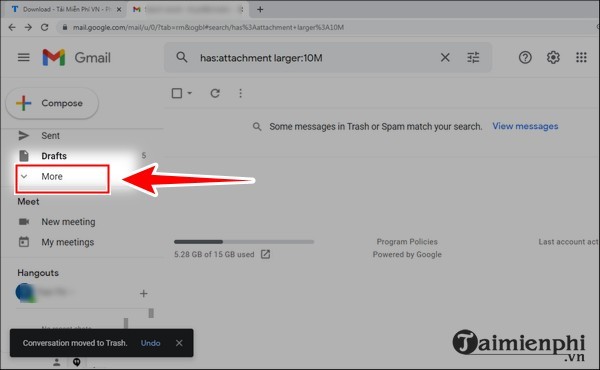
Step 3 : To permanently delete, move your mouse to the left, scroll , find and click " More ".
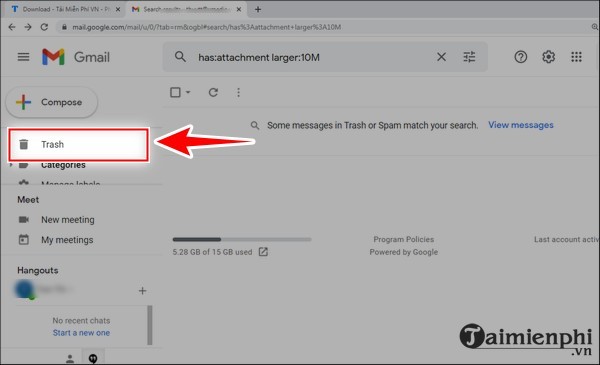
Step 4 : Continue scrolling, find and click " Trash " as shown below.
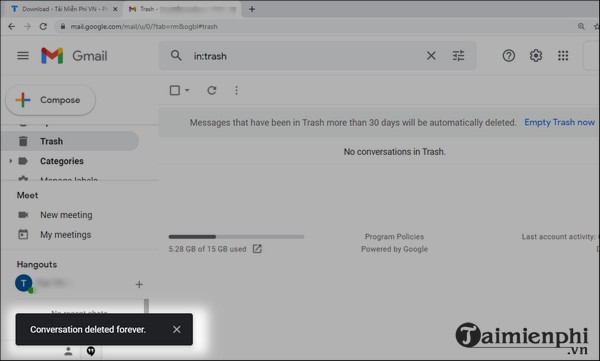
Step 5 : Check the Email box you want to delete (arrow 1). Next, click " Delete forever" ( arrow 2).
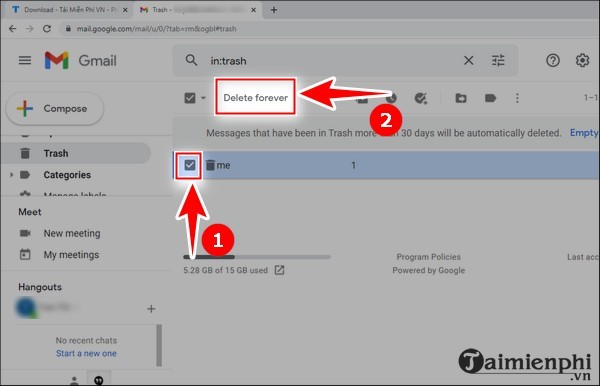
A permanent deletion notice appears.
3. How to increase Google Drive capacity by freeing up Google Photo space
3.1. Delete photos
Step 1 : Access Google Photos HERE
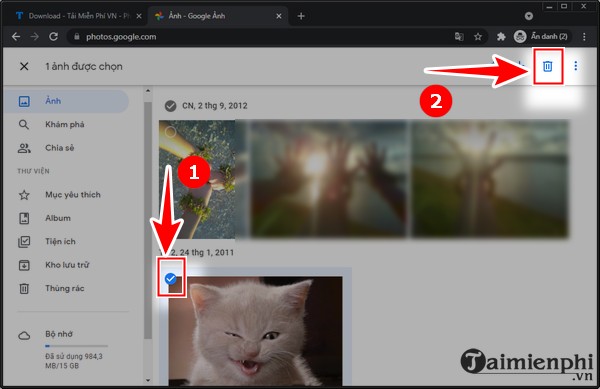
Step 2 : You tick the small circle in the upper left corner of the photo you want to delete (arrow 1) (you can select 1 or more photos as you like). Next, click the trash icon (arrow 2).
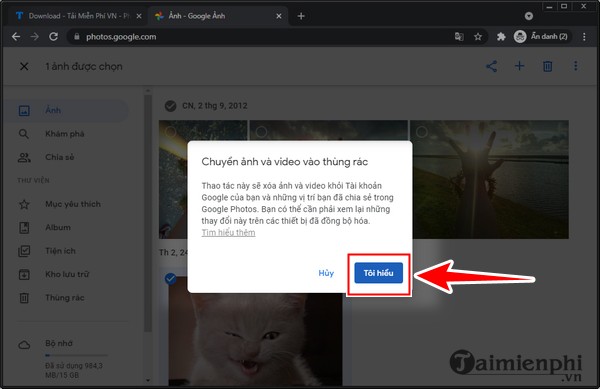
Step 3 : Click " I understand " to confirm.
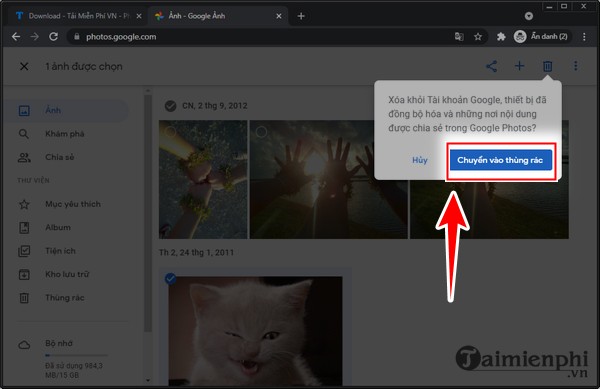
Step 4 : Click " Move to trash ".
Step 5 : If you want to permanently delete or restore deleted photos, click " Trash " on the left side of the interface.
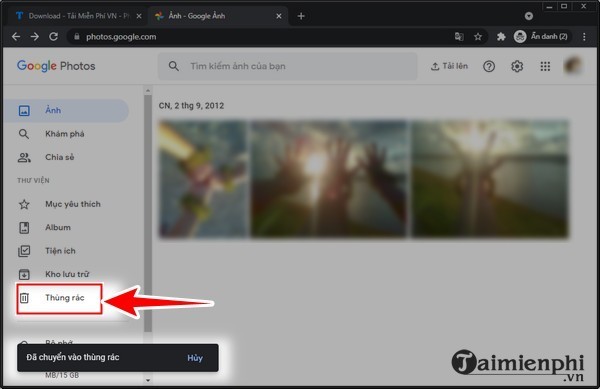
Step 6 : Check the small circle in the upper left corner of the photo you want to delete (arrow 1). Next, click " Delete permanently " (arrow 2).
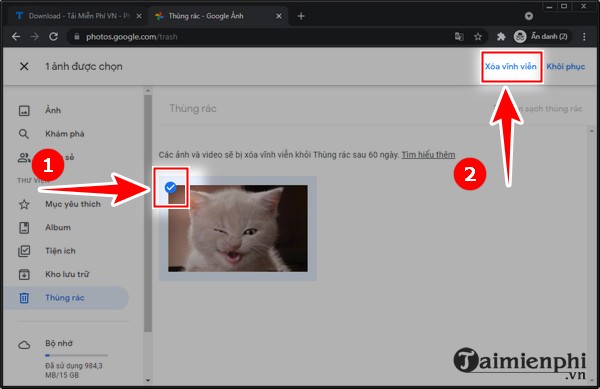
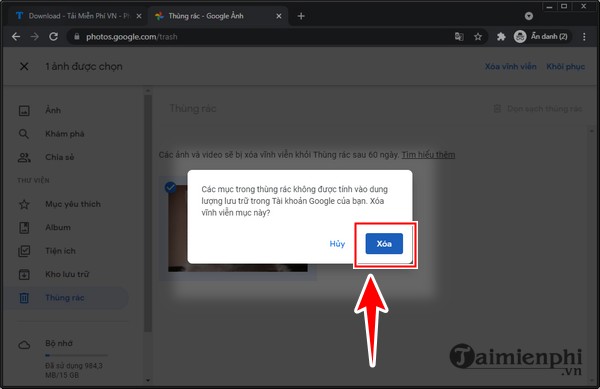
Click " Delete " to confirm.
To restore photos , you also check the small circle in the upper left corner of the photo you want to restore (arrow 1), then click " Restore " (arrow 2).
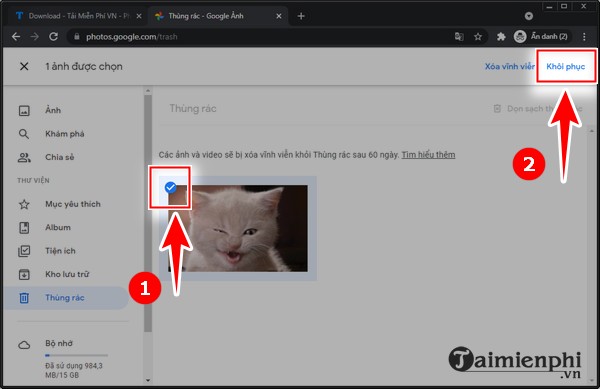
Then, click " Restore " to confirm.
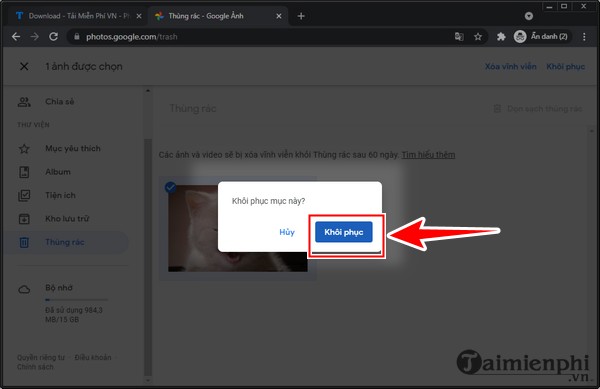
3.2. Change photo resolution
Step 1 : Open Google Photos HERE .
Step 2 : Look in the upper right corner, click the gear icon .
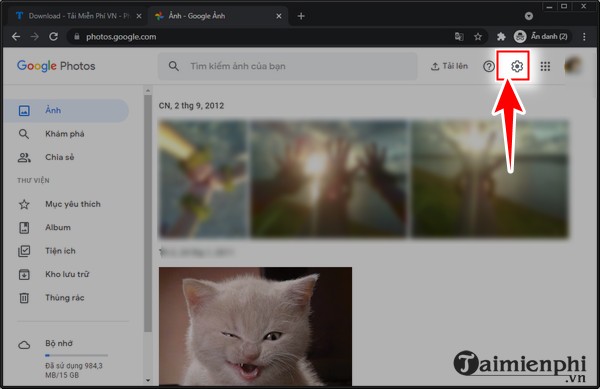
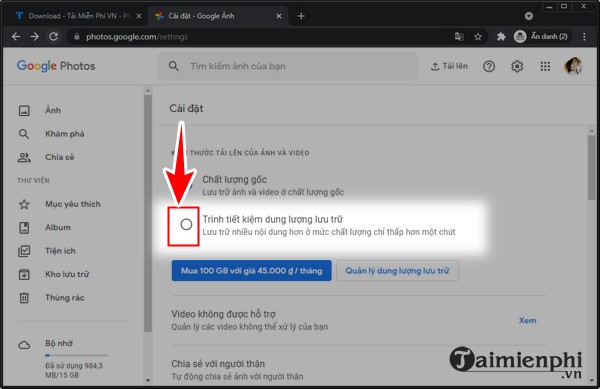
Step 3 : The installation interface opens, check the box " Storage saver ".
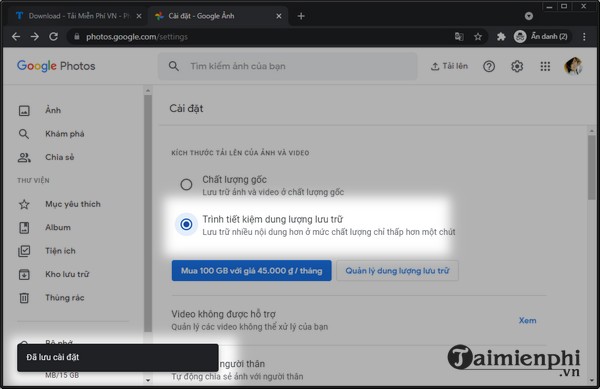
At this point, the system will save your settings.
After following how to free up Google Drive space, you can upload files easily, store photo files, files. effectively. In addition, when you encounter a situation where downloading a certain file on Google Drive is limited in 24 hours, please refer to the plan below to download files that exceed the limit on Google Drive.
You should read it
- ★ Support tools for using documents from Google Drive
- ★ The smart answer when asked in an interview: What is your expected salary?
- ★ Download files and websites directly from Google Drive in Chrome browser
- ★ How to use Google Drive like free FTP server or Network Drive
- ★ Don't miss these 9 useful Google Drive tricks!