3 Simplest Ways to Record Macbook Screen with Sound
The operations on a Macbook computer are often very different from those on a Windows computer. So how do you record a Macbook screen with sound?.
Are you looking for a way to record your Macbook screen with sound, but the video after recording has an error of no sound even though you have tried many different software? The article below will guide you through 3 ways to record your Macbook screen with sound in the simplest and fastest way.
The simplest way to record Macbook screen with sound
How to record Macbook screen with sound with Screenshot Toolbar
Screenshot Toolbar is a famous default macbook screen recording tool launched by Apple on Mac OS Mojave and you can easily use it.
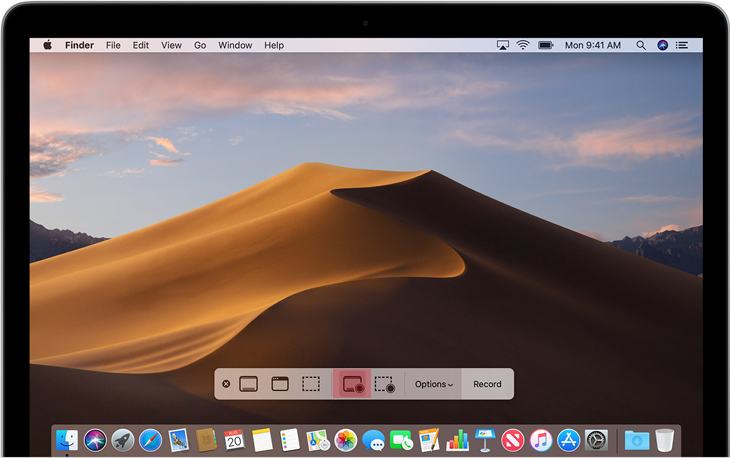
Step 1: Press Shift + Command + 5 to open Screenshot Toolbar
Step 2: Select Record Option, you can record the entire screen or the area you want to record.
To return to full screen video
- After the video is recorded, a thumbnail of the video will appear in the right corner of the screen, the video will be automatically saved. You need to click here to open the video.
You can cut the recorded video with the tool available on this screen recording software for Macbook. In addition, you can drag this thumbnail to save the video to any file on the screen.
To record a part of the screen
- After selecting the Record Portion button in the on-screen controls. Drag to select the area of the screen to record. To move the entire selection, drag from within the selection.
- To start recording, press the Record button in the on-screen controls.
- To stop recording your screen, click the Stop Recording button in the menu bar. Or press Command-Control-Esc.
With this default tool, you can easily record the screen on Macbook and record the sounds of Macbook.
Record Macbook screen with QuickTime
QuickTime is a tool that helps you record your Macbook screen effectively with sound and many settings options. The software helps you record everything that happens on your Macbook, and it can also play videos in many different formats.
The advantage of QuickTime comes from recording, you can choose the audio source to play on Macbook with just one click.
Step 1: Start QuickTime
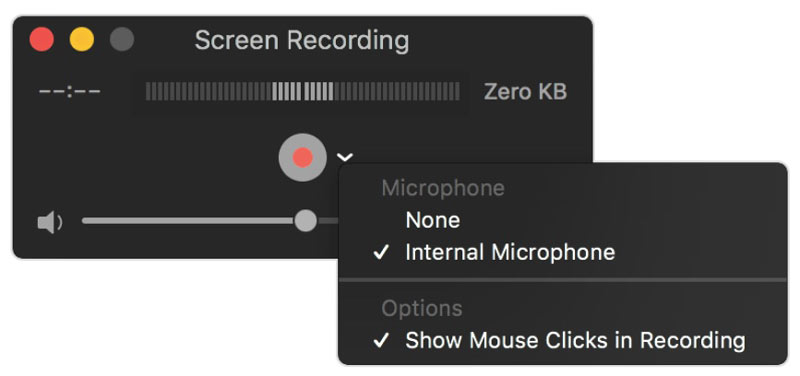
Step 2: Open Screen Recording and select New Screen Recording
Step 3: Turn on Recording feature
Step 4: Click Red Circled to start the screen recording process.
How to record screen with Wondershare DemoCreator
DemoCreator is a powerful application used to record Macbook computer screen with sound. DemoCreator not only helps you record Macbook screen with sound but also supports many powerful image editing tools. The software allows you to customize audio sources, even allows you to annotate the video while recording the screen. You can record and edit screen recording videos with the following steps:
Step 1: Launch DemoCreator
If you have not downloaded this software, you can search and download DemoCreator easily on internet platforms.
After installation, open the application to continue.
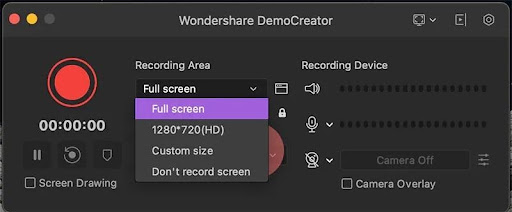
Step 2: Set up Image/Sound options
DemoCreator gives you a variety of video and audio options when recording with very simple buttons. Choose the video quality and audio source you want to record by clicking on the option.
Step 3: Click on the start icon to start recording the video
Step 4: Export video
Press Shift + Cmd + 2 to end the recording and the clip will then open in the editor. You can edit the video again before saving using the video editing tools provided by the app.
Some notes when recording screen video on Macbook
- When you automatically save a screen recording, your Mac will save the video file as Screen Recording day at time.mov.
- Cancel recording Macbook screen video, press Esc before selecting Record.
- You can open the screen recording video file with QuickTime Player, iMovie or any application that supports video viewing and editing.
- Some applications like DVD Player will not allow users to record video of their application window screen.
Conclude
You can record your Macbook screen without any background noise with the above 3 methods. All kinds of activities can be recorded on Mac without any maximum time limit. So you can record Mac screen video with conversation and computer sound. Of course, you can also record Mac screen with your favorite music. Just play your favorite song and check if you have enabled the recording function. It is also supported to record Mac screen with your face for YouTube and more. For any questions, please contact hotline: 19001903 for the best advice and support.