Table of Contents
This guide provides a clear overview of display settings, including 1. Using the Start Menu, 2. Use the Desktop Context Menu. Use it to understand the topic, compare the available options, and make a more informed decision.
The improved Settings app in Windows 11 offers more options in the Display section; namely HDR, adjustable refresh rate and Night Light. In addition to using the usual Settings application, there are many methods to open Display Settings on Windows 11.
1. Using the Start Menu
The Start menu is the easiest and widely used method to access any application. You can even search for apps and files directly from the Start menu. Here's how to do it:
- Press the Win key to launch the Start menu.
- Enter Display Settings and click the Open option on the right to go to the Display Settings section.
2. Use the Desktop Context Menu
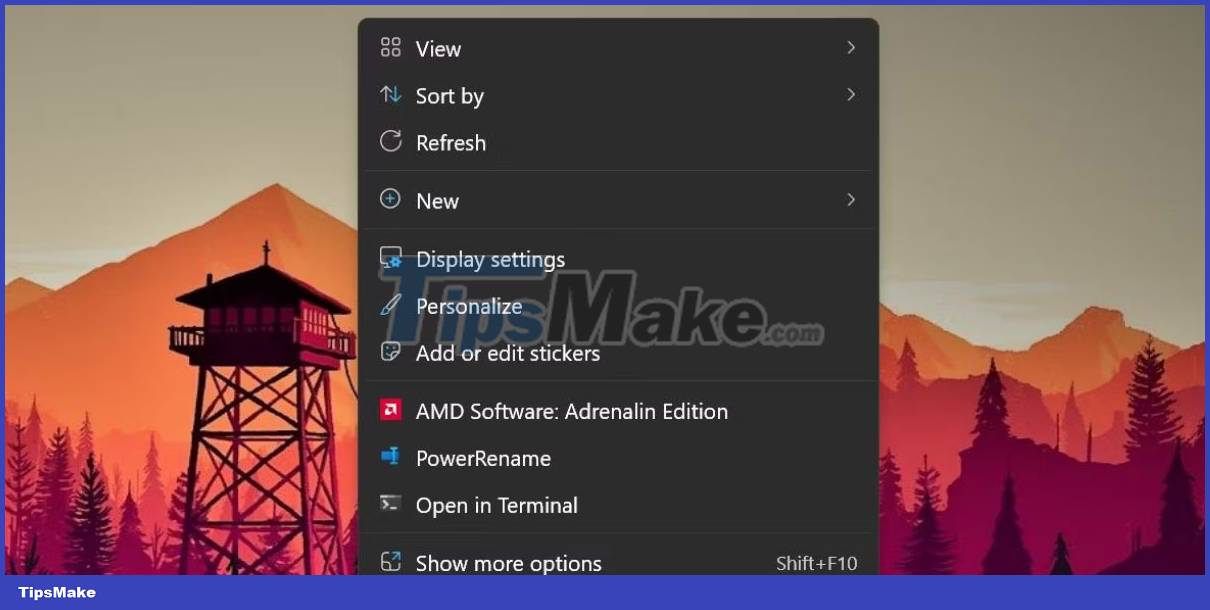
Like previous versions of Windows, this version also includes the option to launch Display Settings from the desktop. Microsoft has hidden many options to provide a more concise context menu in Windows 11, but you don't have to struggle much to launch Display Settings. Follow these steps:
- Press Win + D to go to the desktop.
- Right-click on the desktop to open the context menu. Click the Display Settings option in the context menu.
3. Use Windows Search
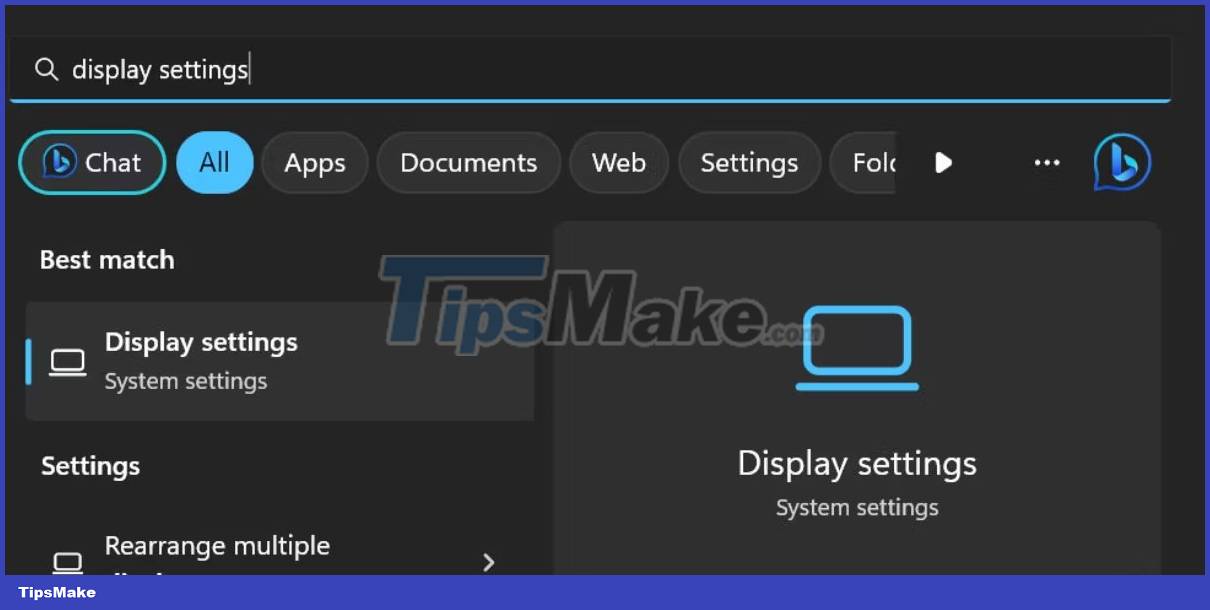
Windows 11 has a powerful search app that now integrates Bing AI with it. You can use it to find and launch programs installed on your system, or search for it on the web.
- Press Win + S to launch Windows Search.
- Type Display Settings in the search bar. Press Enter to launch the Display Settings section in the Settings app.
4. Using the Run Dialog Box
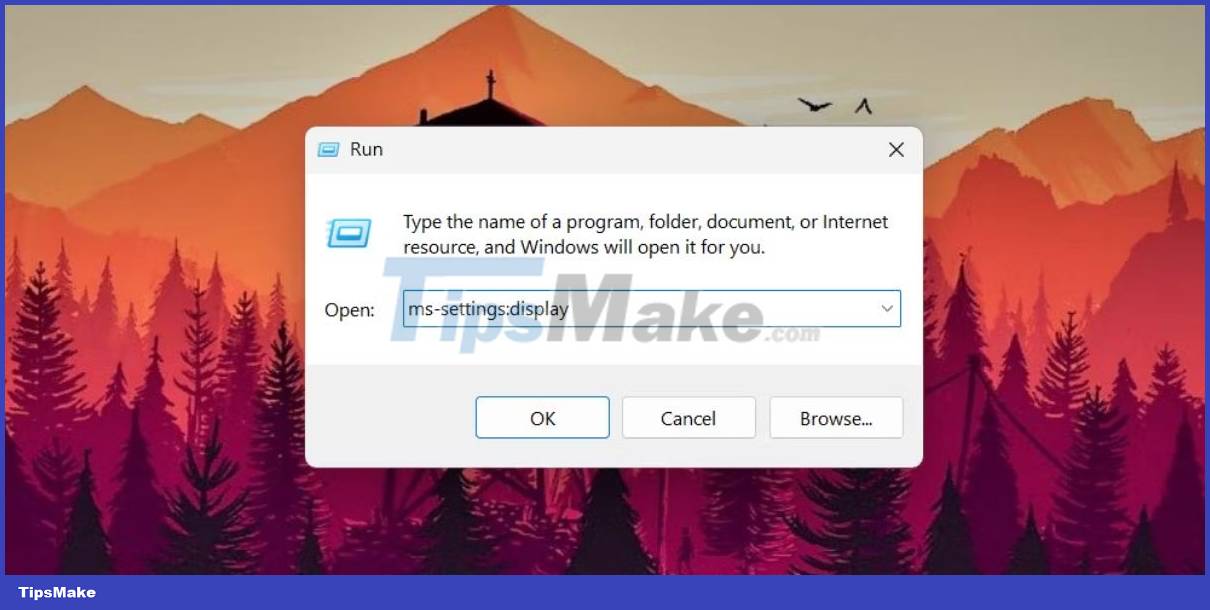
The Run dialog box in Windows provides a faster way to access any application or file location. You can launch any app or a subsection of the Settings or Control Panel app if you know the exact shortcode. Follow these steps:
- Press the Win + R key to launch the Run dialog box.
- Type ms-settings:display in the text input box. Click the Open button to launch Display Settings on Windows 11.
5. Use the Settings App
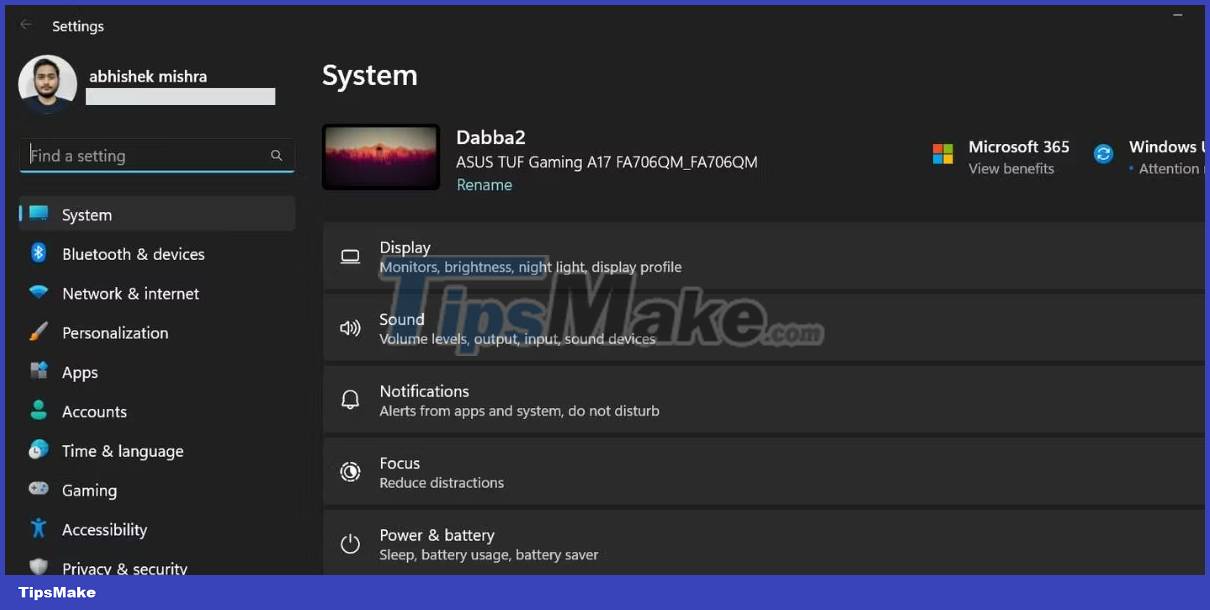
The old version of Display Settings has appeared in the Control Panel. But most of the customization options are moving to the Settings app in Windows 11. So you can also adjust the screen resolution using the Settings app.
- Right-click the Start button to launch the Power User menu. Click the Settings option.
- Go to the right pane in the Settings app and click the Display option.
6. Use Task Manager
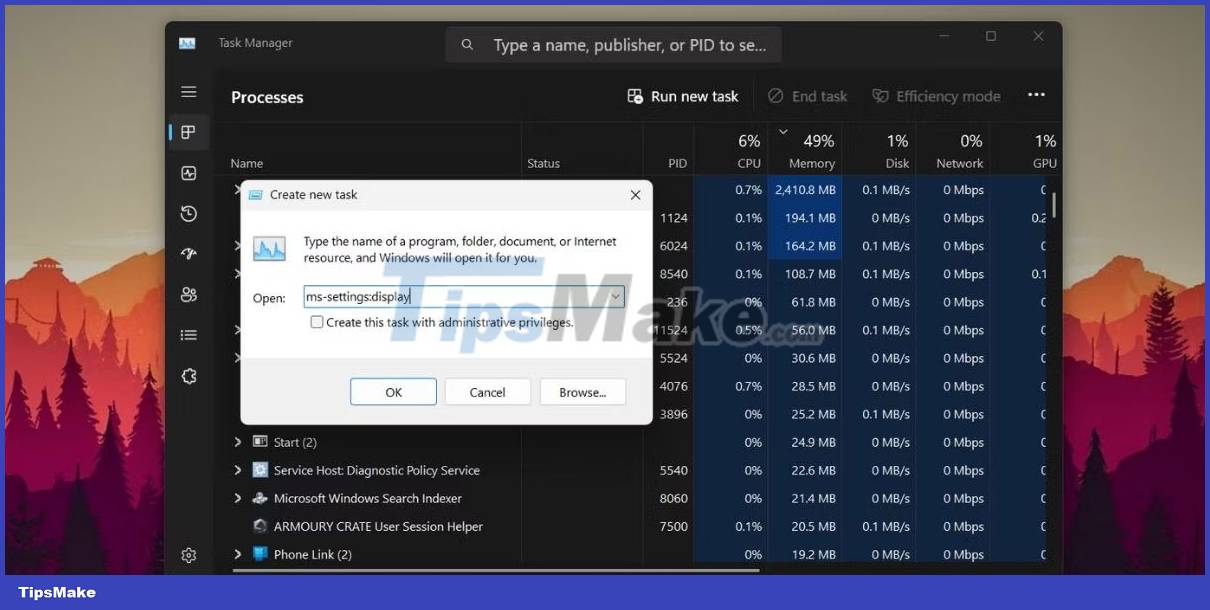
The Settings app and its subsections can be launched using the Task Manager. Task Manager Windows 11 can now search for processes by both name and PID. So you can use the Run new task feature to launch Display Settings. Follow these steps:
- Press Ctrl + Shift + Esc keys simultaneously to launch Task Manager.
- Click the Run new task button and enter ms-settings:display in the text box.
- Click the OK button to launch the Display Settings window.
7. Using Command Prompt
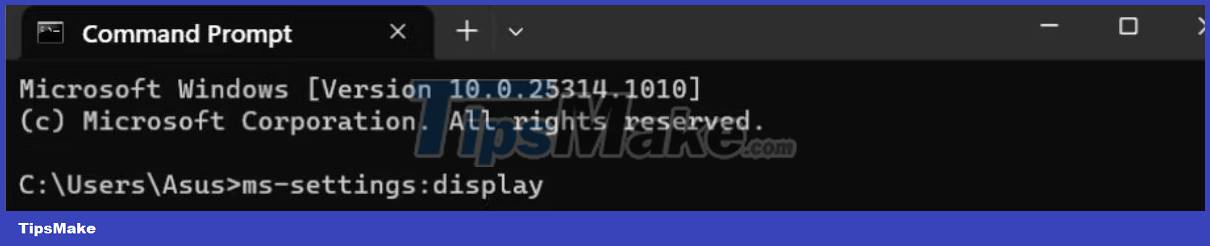
If you prefer using the terminal to open files and folder locations, you can open Display Settings without exiting the Command Prompt. Here's how to do it:
- Press Win + R to launch the Run dialog box. Type CMD and press Enter key to launch Command Prompt. No need to run Command Prompt with admin rights.
- Type start ms-settings:display in the terminal and press the Enter key to launch the Display section of the Settings app.
8. Using Powershell
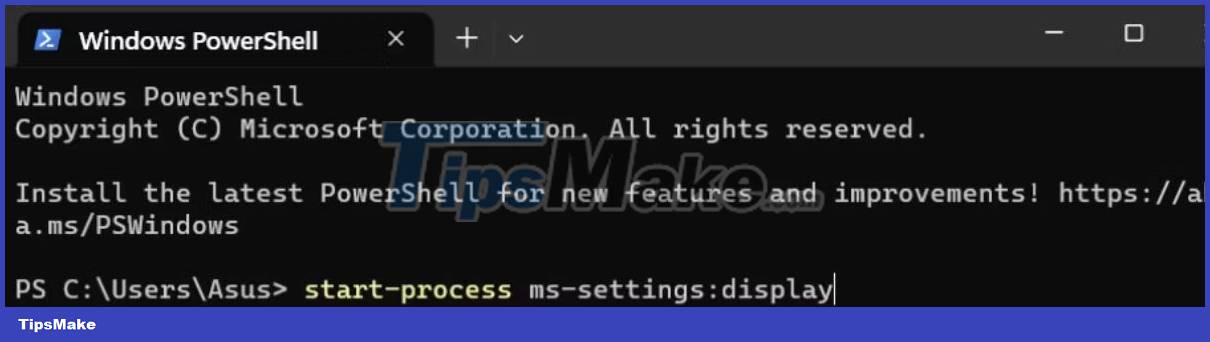
Like the Command Prompt method, you can access Display Settings using the Start-process cmdlet in PowerShell. Follow these steps:
1. Press Win + X to open the Power User menu. Click the Terminal option from the list.
2. By default, the Terminal application opens PowerShell in a new tab. Type the command start-process ms-settings:display in the Terminal and press the Enter key.
3. The Display Settings page will launch.
9. Use Desktop Shortcuts
Unfortunately, there is no direct application file to launch Display Settings. So you have to create a desktop shortcut manually and use the shortcode to launch this particular page in the Settings app. Repeat the following steps:
1. Press Win + D to open the desktop. Alternatively, you can click the Show Desktop icon at the right end of the taskbar.
2. Right-click an empty space on the desktop and select the New > Shortcut option.
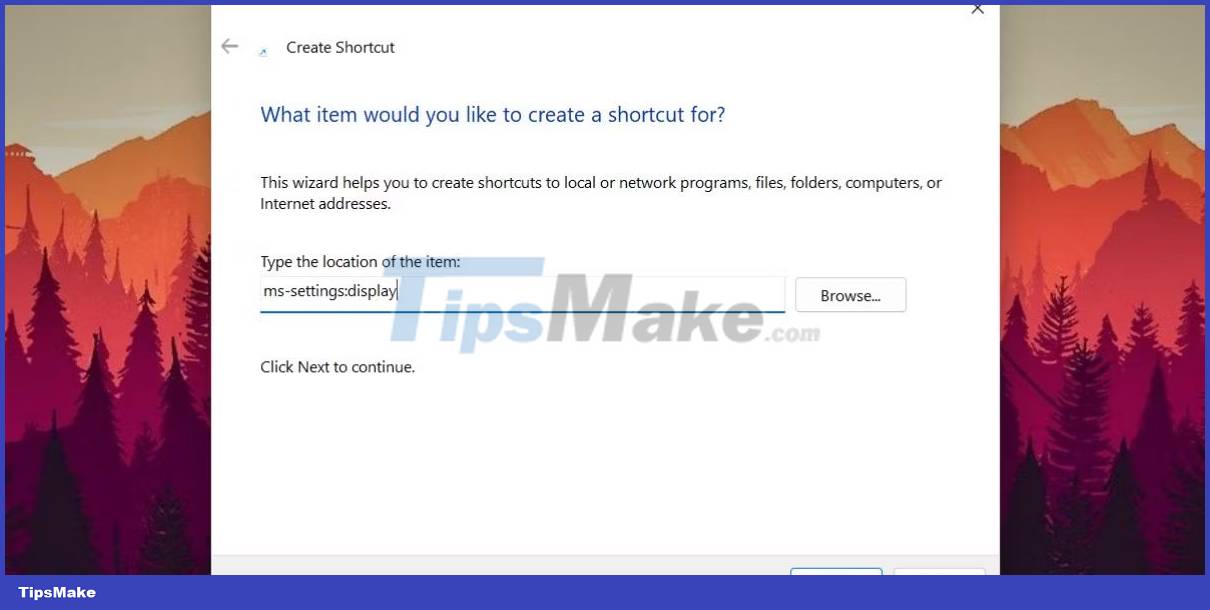
3. The Create Shortcut window will open.
4. Go to the Type the location of the item: text box. Type ms-settings:display in the text box and click the Next button.
5. Now you have to give the shortcut a name. Type Display Settings in the text box and click the Finish button.
6. Press Win + D to switch to the desktop. Double-click the newly created Display Settings shortcut to adjust related settings.
10. Use Keyboard Shortcuts
If you frequently switch between multiple screens with different resolutions and orientations, you can map the shortcut combination to the shortcut you created using the above method. That way, you don't even need to switch to the desktop to run the shortcut. Here's how to do it:
1. Press Win + D to switch to the desktop.
2. Right-click the Display Settings shortcut you created earlier. Select the Properties option from the context menu.
3. In the Properties window, go to the Shortcut Keys option and click on it. Press Ctrl + Shift + D keys simultaneously. This will now become your new custom shortcut to launch Display Settings.
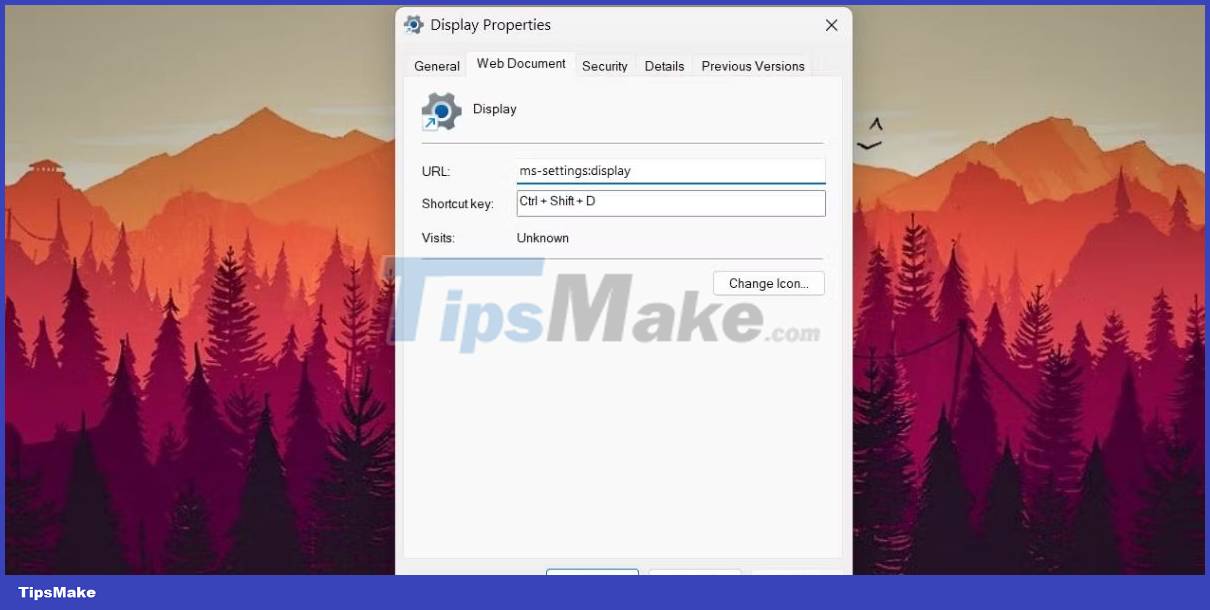
4. Click the Apply button and then click OK. Close the Properties window. Try the keyboard shortcut to test it.
Conclusion
Understanding Display Settings makes it easier to compare options, avoid common mistakes, and apply the information in this guide more effectively. Review the relevant requirements before making changes or choosing a solution.
FAQ
What is Display Settings?
In addition to using the usual Settings application, there are many methods to open Display Settings on Windows 11.
Why is Display Settings important?
Understanding Display Settings helps you evaluate features, compatibility, performance, and potential limitations before you choose a product or follow a procedure.
What should you consider when using or choosing Display Settings?
Consider your specific goal, compatibility requirements, available features, cost, security, and the practical recommendations described in this guide.
Related Articles
 5 Ways to Open Sound Settings on a Windows PC5 minutes read
 How to Restore Display Settings on Windows 114 minutes read
 How to Access Settings in Windows 10, How to Open Settings on Windows 105 minutes read
 Summary of Several Ways to Quickly Access the Settings4 minutes read
 4 Ways to Quickly Open the Network Connection Tool on Windows4 minutes read
 Steps to Open Sound Settings on Windows PC8 minutes read
Reader Comments 0
Sign in with email or Google to join the discussion.