4 ways to delete Microsoft Defender protection history on Windows 10/11
Windows Defender is Microsoft's antivirus software built into Windows PCs to protect you from viruses, malware threats, and attacks. It maintains a log of its scans and actions in the Protection History folder.
While Protection History will be removed after a while, you may want to have more control by deleting it yourself. So let's see how you can clear Protection History.
What is the protection history of Microsoft Defender? Why delete it?
One of the best antivirus for your PC, Windows Defender keeps getting better with some powerful upgrades. The detections made by Windows Defender will appear on the Protection History page - meaning you can see the actions Microsoft Defender Antivirus has taken on your behalf. These will be the scans performed to identify and block malware and other threats, and also recommendations (marked in red or yellow) for actions you should take.
You also have access to all of this information in a clear and understandable form, including Potentially Unwanted Apps that have been removed or key services that have been disabled. Protection History will also show the findings that appear while performing an offline scan of Windows Defender.

Although Windows Defender keeps its detection history for 30 days, you can delete it before that point if needed - for example, when a lot of scan logs have accumulated. Clearing Protection History will help you free up space on your PC and keep Defender running smoothly. Remember that you must be logged in with admin rights to clear Protection History, so check that you have admin rights.
Now let's see 4 easy ways to clear Protection History in Windows 10 and 11.
4 ways to delete Microsoft Defender protection history on Windows 10/11
1. How to delete Microsoft Defender's Protection History folder
You can manually clear Protection History by deleting the contents of the Services folder in the Windows Defender folder using File Explorer. Here's how to do it:
1. Press the Windows + R keys to bring up the Run box.
2. Copy and paste the below path and click OK or press Enter :
C:ProgramDataMicrosoftWindows DefenderScansHistory 
3. You can also paste the path C: ProgramDataMicrosoftWindows DefenderScansHistory into the File Explorer navigation bar and then press Enter.
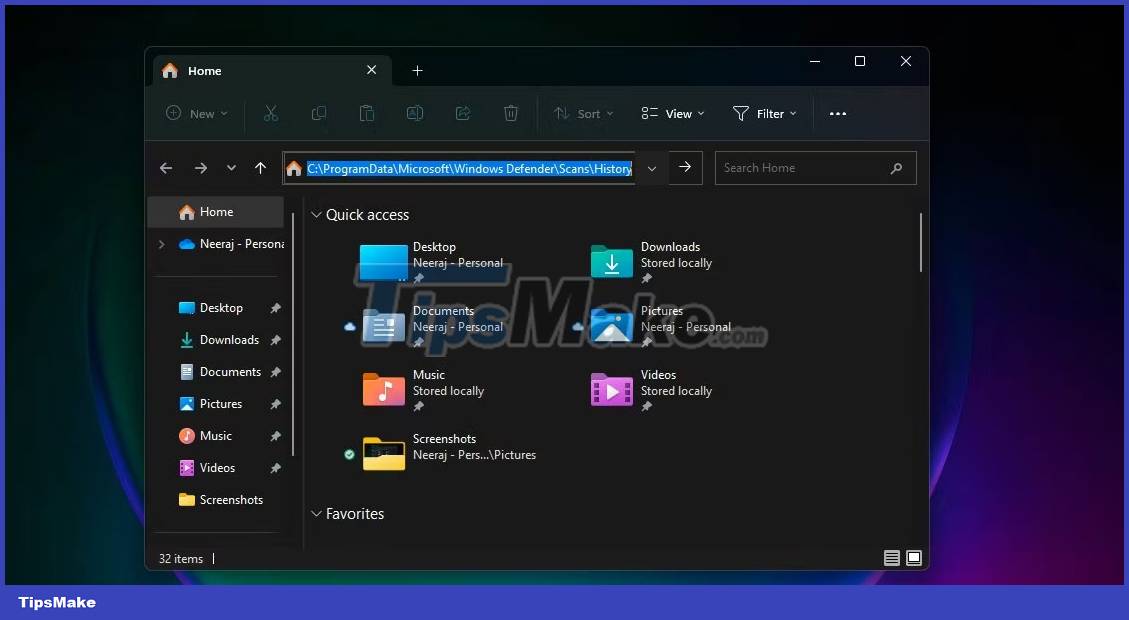
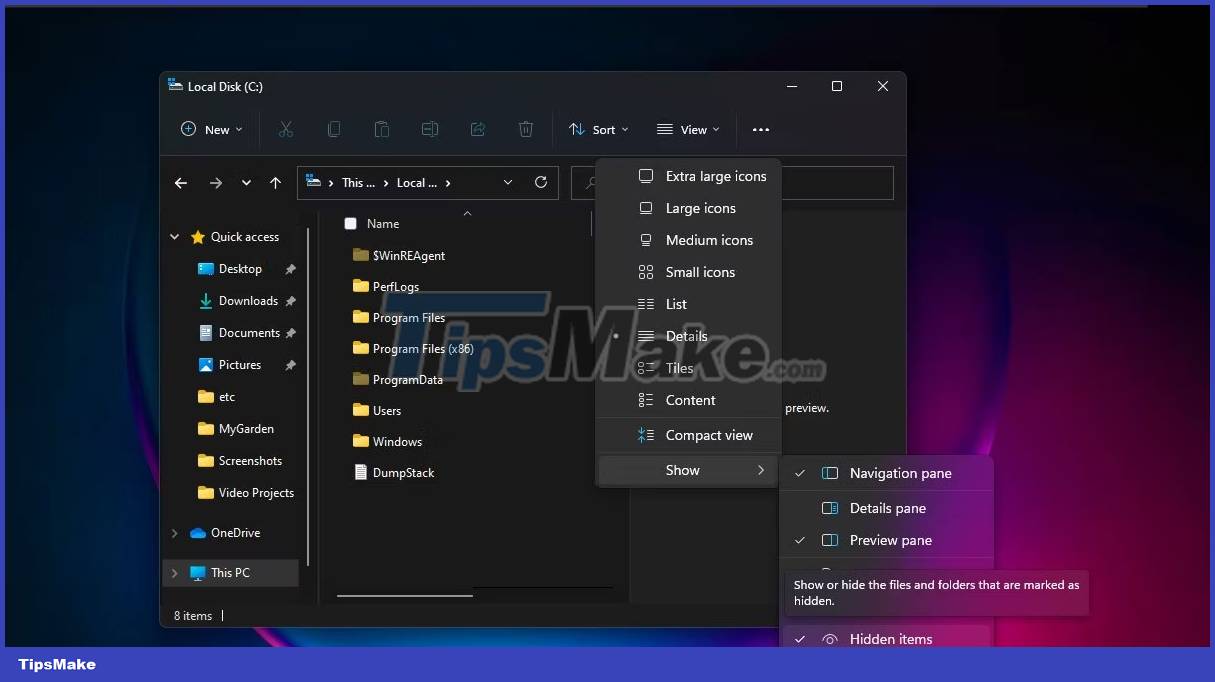
4. Alternatively, you can navigate to the Defender Protection History folder using the above link in File Explorer. If you don't see the ProgramData folder when you open Local Drive, select View and then check the box next to Hidden items .
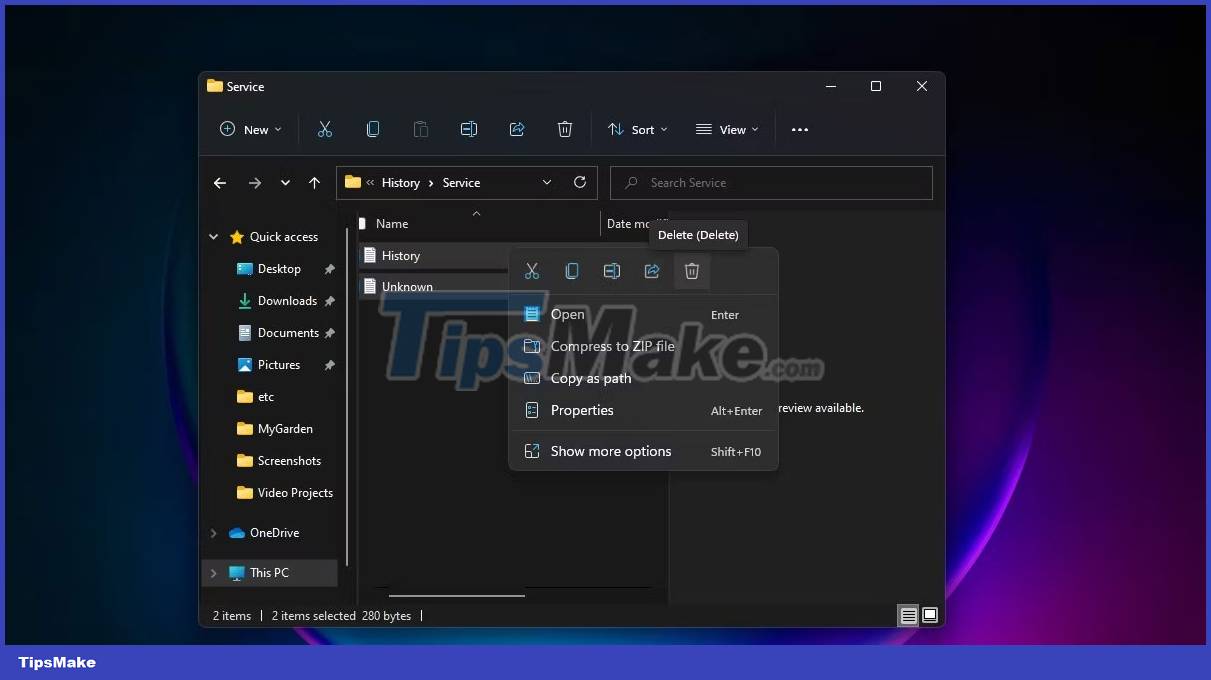
5. Open the Service folder and select all the files inside it. Right-click and select Delete to delete all files. Then exit File Explorer.
6. Next, search for Windows Security and open it.
7. Under Virus & threat protection , click Manage settings .
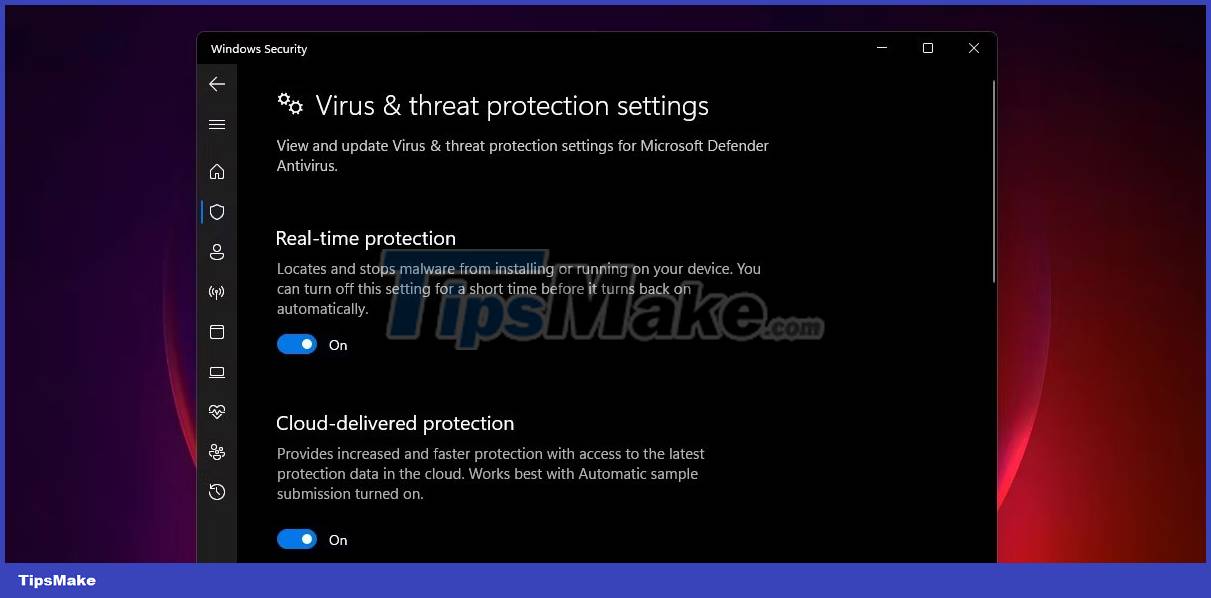
8. Finally, switch the toggles for Real-Time protection and Cloud-delivered protection to Off and then On again .
2. How to delete Microsoft Defender's Protection History with Event Viewer
You can also manually delete Defender's Protection History via Event Viewer - a useful application for analyzing event logs on your device. Here's how to do it:
1. First, do a Windows search for Event Viewer and click on the best match to open Event Viewer.
2. In the Event Viewer (Local) on the left, expand Applications and Services Logs .
3. In Applications and Services Logs , click the drop-down arrow next to the Microsoft folder.
4. Click Windows on the left to open the list of Windows files in the middle.
5. Scroll down the list of files in the middle to find Windows Defender .
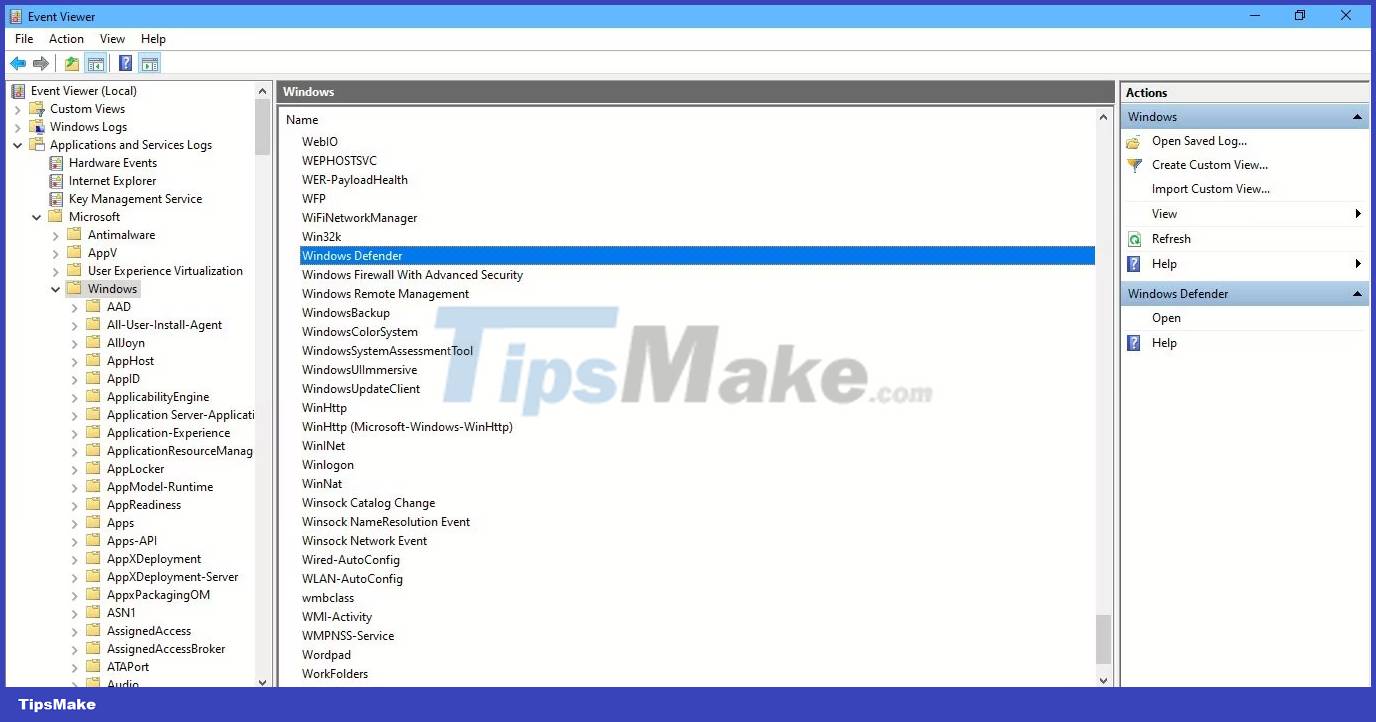
6. Double-click Windows Defender.
7. Then right click on Operational and select Open to see all past logs.
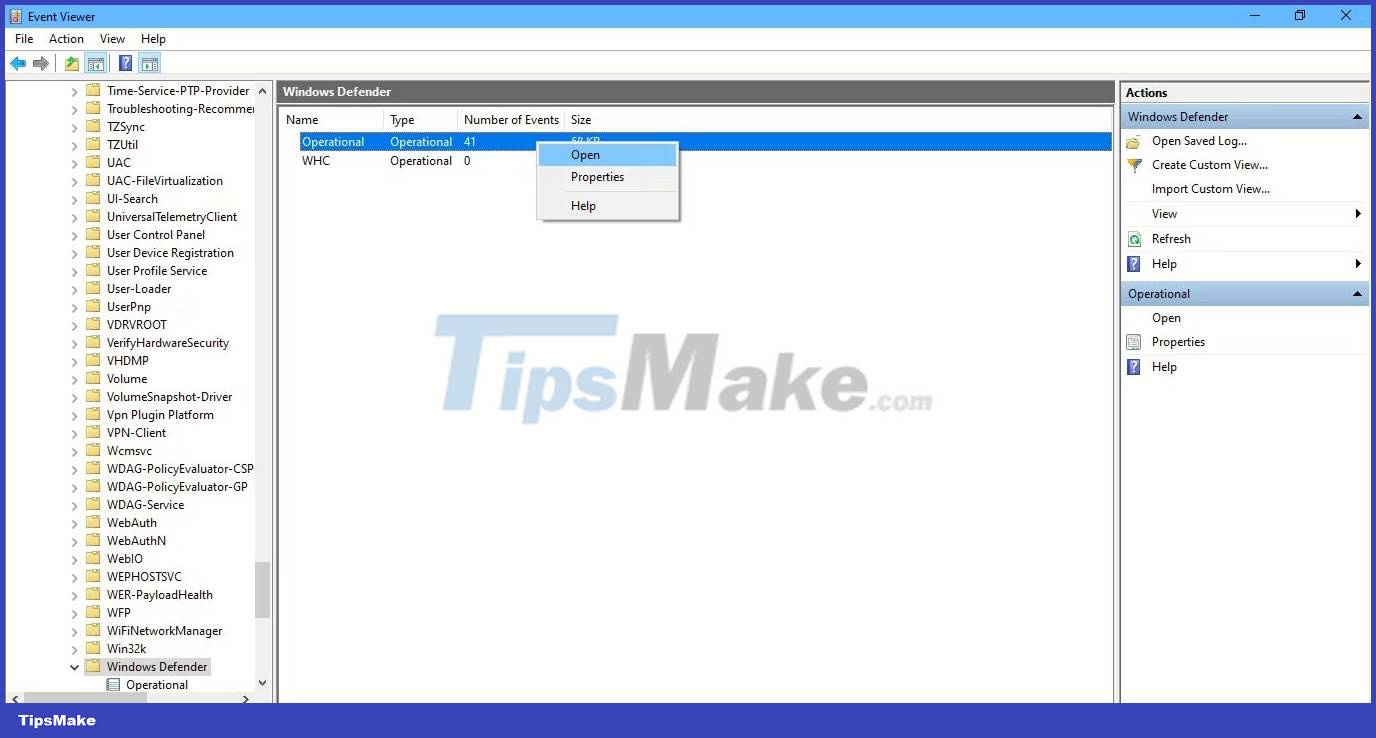
8. Now you can right-click Operational on the left side and select Clear Log. Or click Clear Log on the right under Actions .
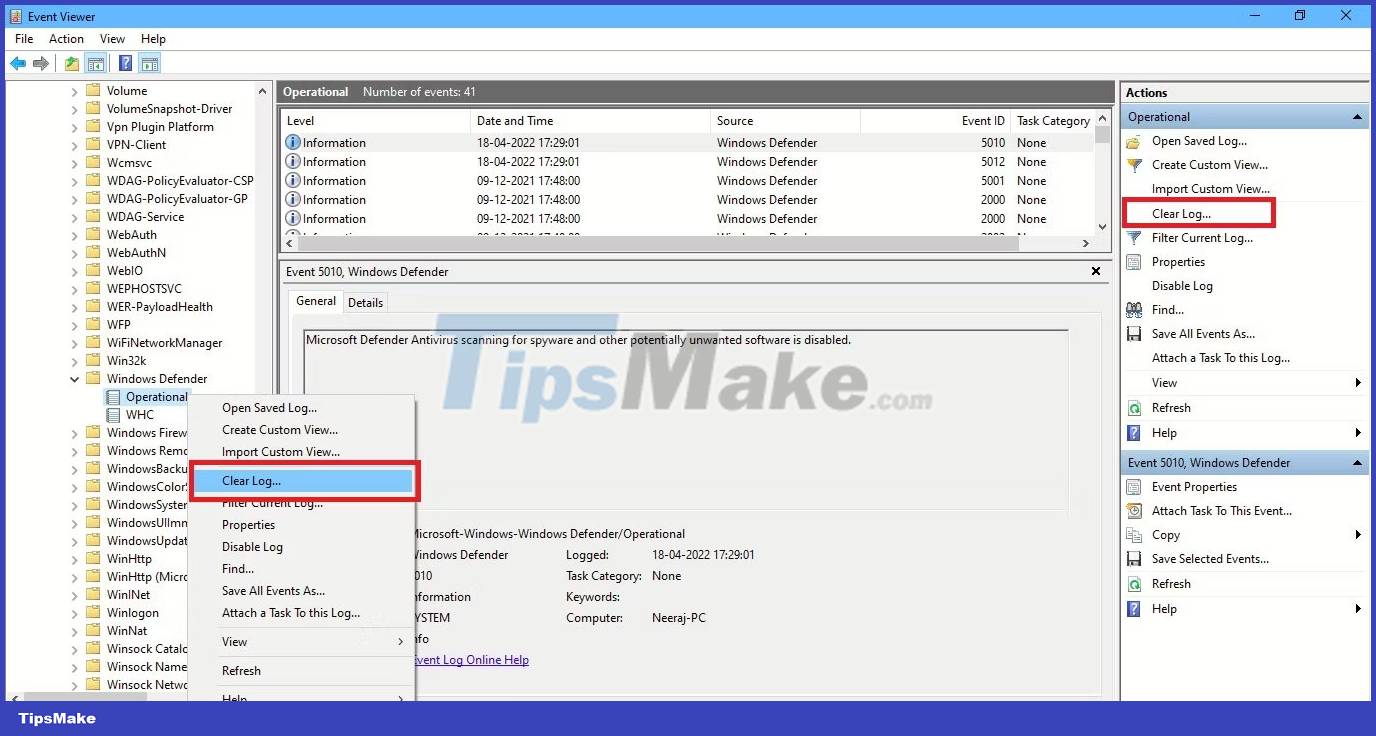
9. Select Clear to clear Protection History. If you want to save the Protection History logs for later reference before deleting them, select Save and Clear .

3. How to delete Microsoft Defender's Protection History via PowerShell
What if you want Protection History to automatically delete after a specific number of days? You can also use the PowerShell command to do that.
1. Type PowerShell in the search bar. Right click on Windows PowerShell below the best match and select Run as administrator . Or select Run as administrator on the right search pane.
2. Click Yes on the UAC prompt that appears.
3. Administrator window : PowerShell will open. Type or copy and paste the following command and then press Enter :
Set-MpPreference -ScanPurgeItemsAfterDelay 7 
The 7 at the end of the command is the number of days after which the Protection History log will be deleted. Just change that number to specify when you want to delete Protection History. And the history will be deleted automatically.
4. How to delete Microsoft Defender's Protection History with Group Policy Editor
If you have a PC running Windows 10 Pro, Windows 11 Pro, or higher, you can also use Group Policy Editor to automatically delete Defender's Protection History. Although there are also solutions to access the Group Policy Editor on Windows Home. But let's see how to clear Protection History via Group Policy Editor in Windows Pro and higher versions:
1. Press Win + R key to open Run box. Type gpedit.msc to open the Local Group Policy Editor. Or just type gpedit in the search bar and click Edit Group Policy below the best match to open it.
2. In the Local Group Policy Editor, on the left pane under Computer Configuration , expand Administrative Templates by clicking the drop-down arrow next to it.
3. Inside the Administrative Templates folder , click Windows Components and a list of its components will appear in the middle pane of the Group Policy Editor.
4. Then scroll down to find Windows Defender Antivirus and double click on it.
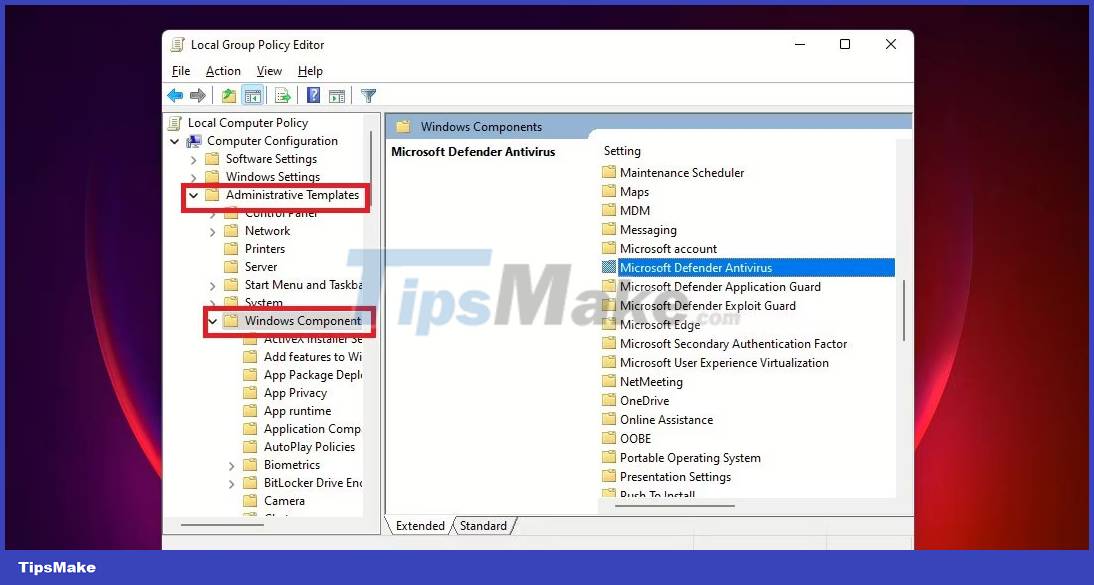
5. In the list of Windows Defender items, double-click the Scan folder.
6. On the right, double-click Turn on removal of items from scan history folder . Or click Edit policy setting in the middle pane. This policy setting determines the number of days items will be kept in the scan history folder before being permanently deleted.
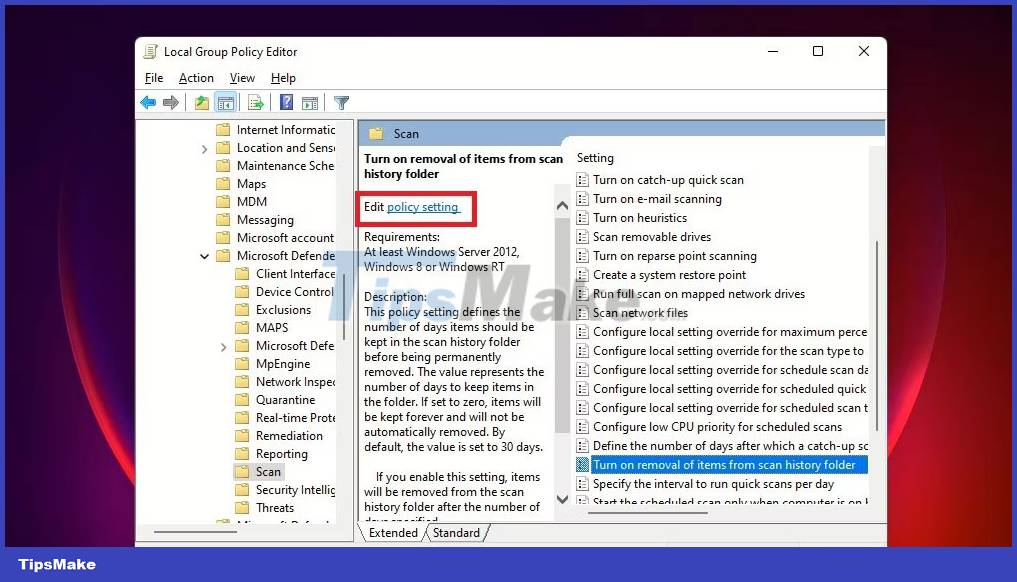
7. Next, select Edit policy setting to open the policy window. It will show Not Configured by default. To set the number of days, select the button next to Enabled . Then the default number of days of 30 will be set. If you set the number of days to 0, items are kept forever and are not automatically deleted. So just change the date to whenever you want to remove items. Finally, click Apply > OK.
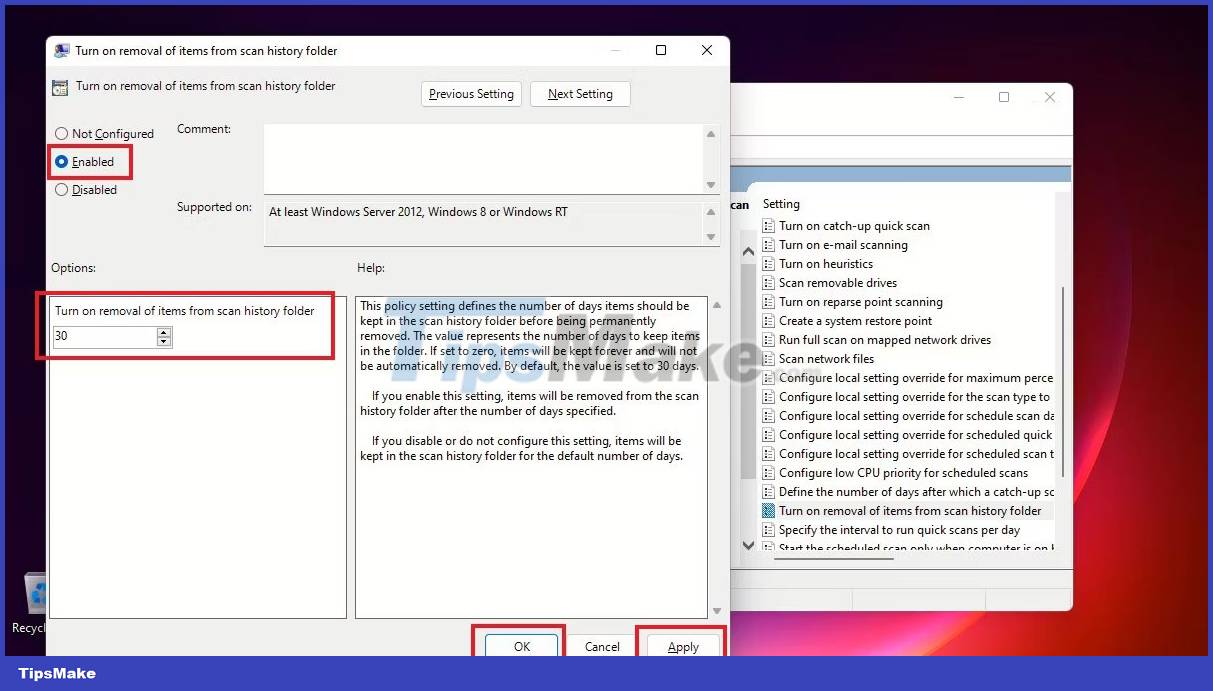
Now you won't need to manually clear Protection History every time - items in the scan history folder are automatically deleted after the dates you specified.