Your computer requires entering a password after starting from Sleep mode, this is a fix
When you leave the computer in sleep mode (Sleep), by default after booting the computer, Windows will ask you to enter the login password. To save time and effort, you can set Windows to automatically log in after each time you start your computer from Sleep mode (sleep mode).

Part 1: On a Windows 10 computer
1. Through Settings settings
1. First open the Settings app.
2. On the Settings window, find and click on Accounts .
3. Next click Sign-in options .
4. In Require sign-in, click Never from the Menu dropdown to finish.

If you want to display a password entry message when starting your computer from Sleep mode, follow the same steps, then go to Step 4 and select When PC wakes up from sleep .
2. Use Group Policy
If you are using Windows 10 Pro, you can use Group Policy Editor to prevent the operating system from stopping the password entry when the laptop uses the battery or when plugging in the charger.
To do this thing:
1. Press the Windows + R key combination to open the Run command window.
2. Next enter gpedit.msc in the Run command window and press Enter or click OK to open Local Group Policy Editor.
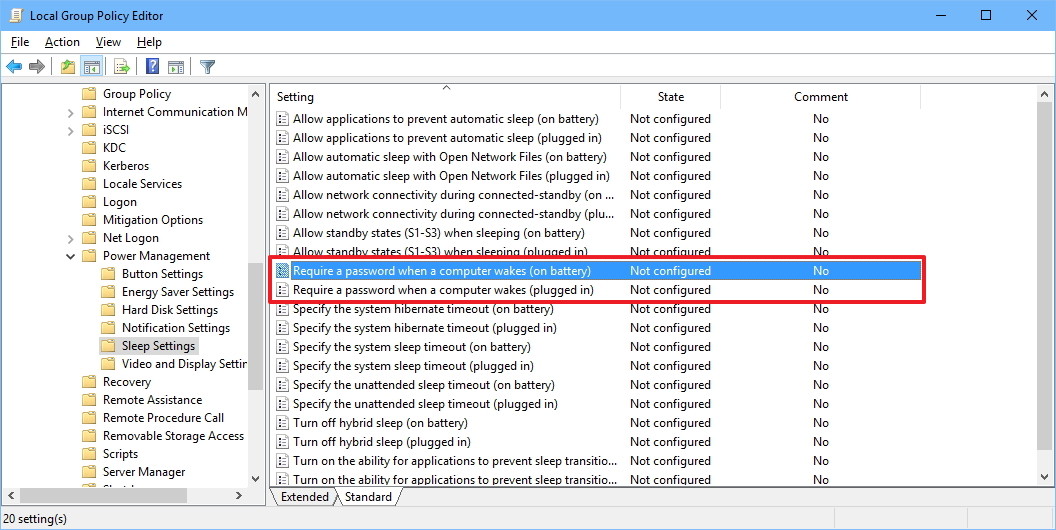
3. On the Local Group Policy Editor window you navigate to the key:
Computer Configuration> Administrative Templates> System> Power Management> Sleep Settings
4. Next, find and double-click policy Require a password when a computer wakes (on battery) or Require a password when a computer wakes (Plugged in).
5. On the next window click Disable in the left pane.
6. Click Apply .
7. Click OK to complete the process.
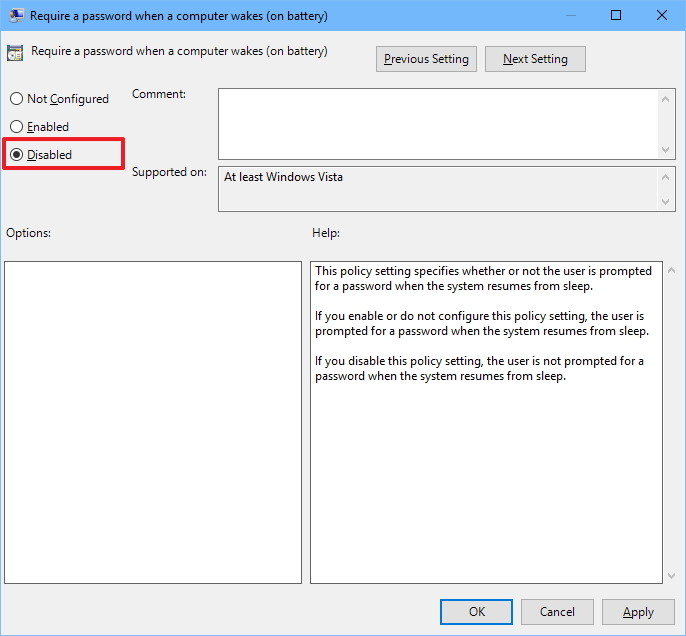
After completing the steps, from now on when you start your computer from Sleep mode, you will no longer have to enter the access password.
In case, if you want to display a password entry message when starting your computer from Sleep mode, follow the same steps, go to step 5, select Not configured option is done.
3. Use Command Prompt
If you are using Windows 10 Home, and you cannot access the Local Group Policy Editor (only available on Windows 10 Pro, Enterprise, and Education), then you can use the Command Prompt.
To disable the password entry request when Windows 10 starts from Sleep mode, follow the steps below:
1. Press Windows + X key combination to open Power User Menu, where you click the Command Prompt (admin).
2. If you want to disable the login option when your computer uses the battery, enter the following command into the Command Prompt and press Enter:
powercfg / SETDCVALUEINDEX SCHEME_CURRENT SUB_NONE CONSOLELOCK 0
If you want to disable the login option when your device plugs in, enter the following command into the Command Prompt window and press Enter:
powercfg / SETACVALUEINDEX SCHEME_CURRENT SUB_NONE CONSOLELOCK 0

To enable the option to require a password when starting your computer from Sleep mode, follow the steps below:
1. Press Windows + X key combination to open Power User Menu, where you click the Command Prompt (admin) .
2. If you want to activate the login option when your computer uses the battery, enter the following command into the Command Prompt and press Enter:
powercfg / SETDCVALUEINDEX SCHEME_CURRENT SUB_NONE CONSOLELOCK 1
If you want to activate the login option when your device plugs in, enter the following command into the Command Prompt window and press Enter:
powercfg / SETACVALUEINDEX SCHEME_CURRENT SUB_NONE CONSOLELOCK 1
Part 2: On Windows 7, 8
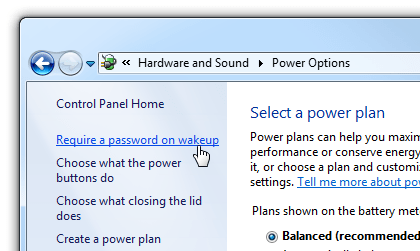
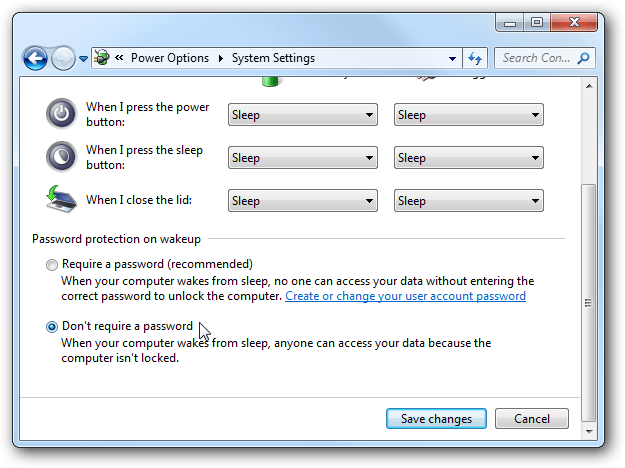
On Windows 7, 8 or Windows 10, open Power Option in Control Panel then click Require a password on wakeup in the left pane.
Next click on the Change settings link that are currently unavailable.
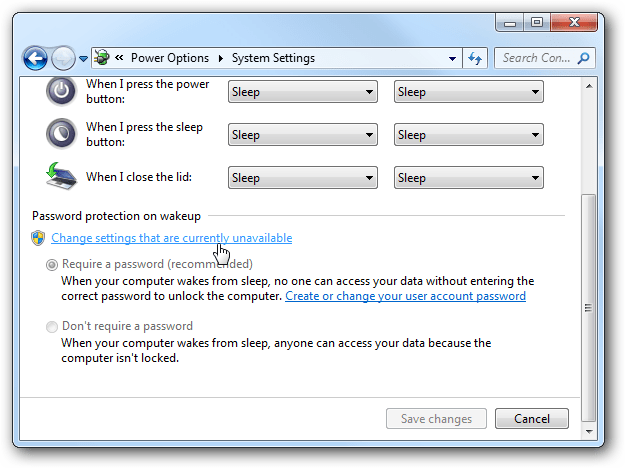
Finally click select Don't require a password and save your changes.
Part 3: Sensors use Windows 8 operating system
If you are using a tablet running Windows 8, you can follow the instructions below:
First open PC Setting , then click on Accounts .
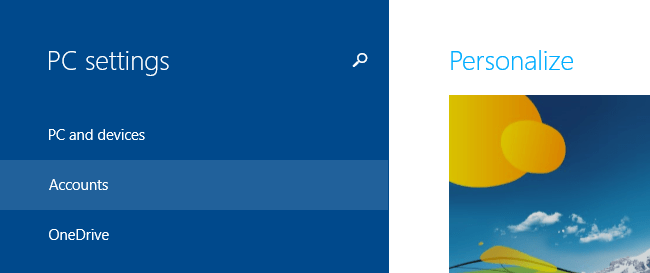
On the Account interface, click on the option Sign-in Options in the left pane.
In this option, you can choose to access the device with a picture password or PIN instead of using a normal password.
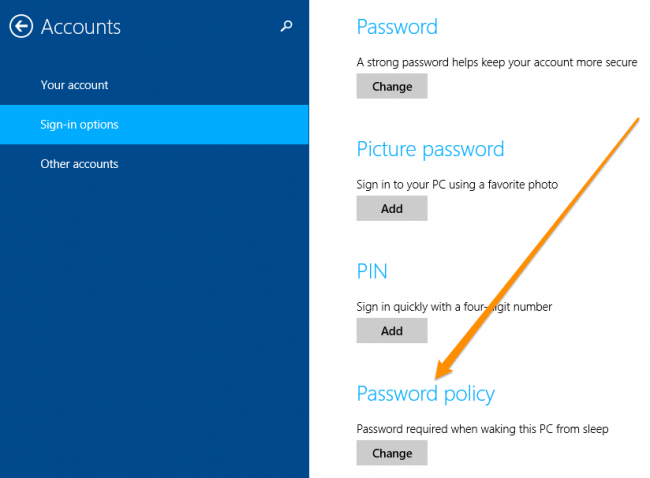
Or if you want to remove the login password, you can select Password policy. Then click Change so that Windows stops asking for a password when you start the device.
Part 4. On Windows Vista
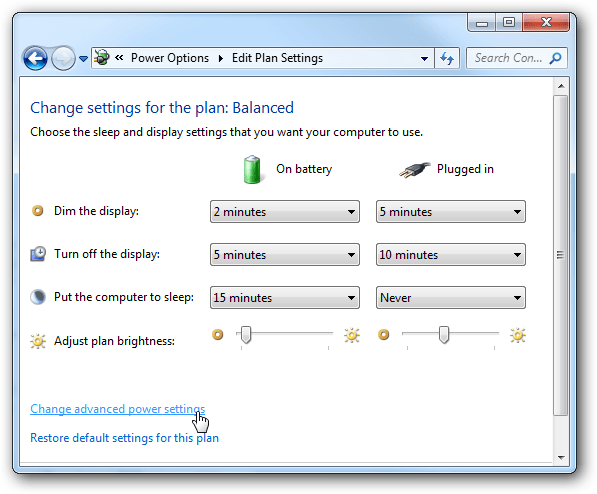
Open Power Options in Control Panel, find the Power Plan you are using, then click on the Change plan settings link .
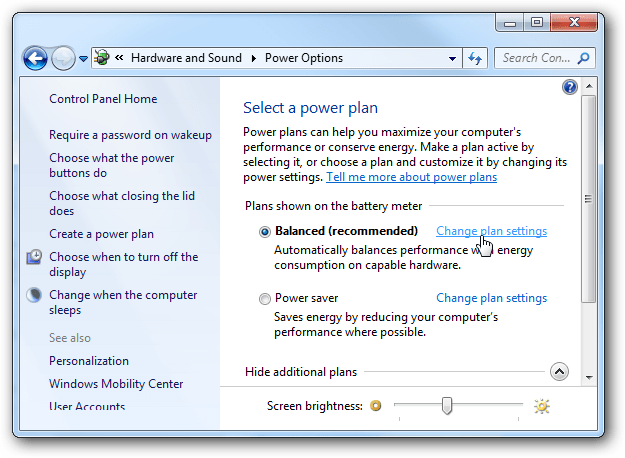
Next click on the Change advanced power settings link at the bottom of the interface.
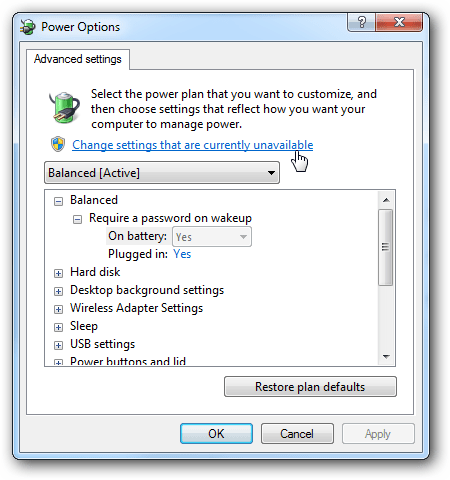
Select Change settings that are currently unavailable .
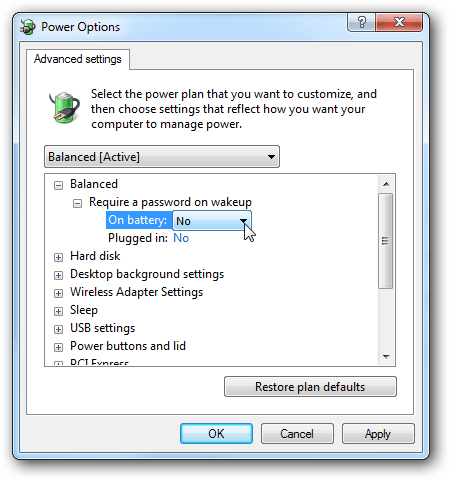
Finally, in the option Require a password on wakeup , change the On Battery and Plugged in value from Yes to No.
Part 5. On Windows XP
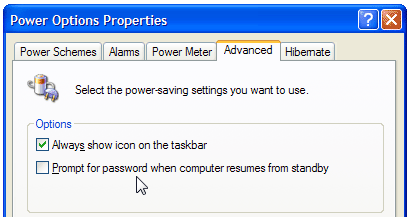
On Windows XP, simply open Power Options in Control Panel, find the Advanced tab, and then uncheck the box at Prompt for password when computer resumes from standby.
You can refer to more:
-
11 tips to help you fix 100% Full Disk error on Windows 8.1
-
How to disable / enable Windows Firewall in Windows 7, 8
-
Instructions for fixing Windows 10 errors do not turn off on computers and laptops
Good luck!
You should read it
- ★ Configure Auto-Login for Windows 7 Domain or Workgroup PC
- ★ Forget Windows 10 password, this is how to break password Win 10 without using 3rd tool
- ★ Install image password in Windows 8
- ★ Create Windows Password Reset Disk on Windows 7 with USB Flash Drive
- ★ Reset pass Windows 10 from the login screen