Table of Contents
This updated guide examines Use Edit Points to Change Shape Shapes in Powerpoint and organizes the essential facts, background, and practical takeaways in clear American English.
In this article, TipsMake.com will guide you how to use Edit Point to change the shape of the shape very easily.
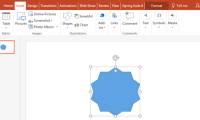
First, open PowerPoint and select the shape you want to change, redraw. If no shape is available, you insert it by clicking Insert> Shapes> Select Shape . Try doing with an isosceles triangle.
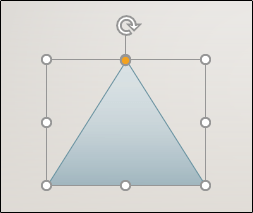
After selecting the shape, go to the Shape Format tab .
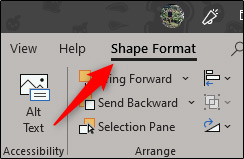
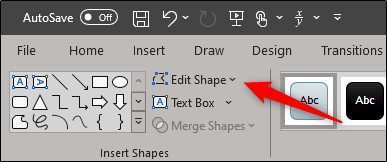
Next, go to Insert Shapes group and click Edit Shape.
From the drop-down menu, select Edit Points.
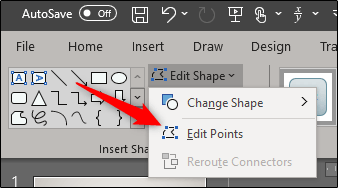
Now, to change the shape, click and drag the black edit points to the desired position.
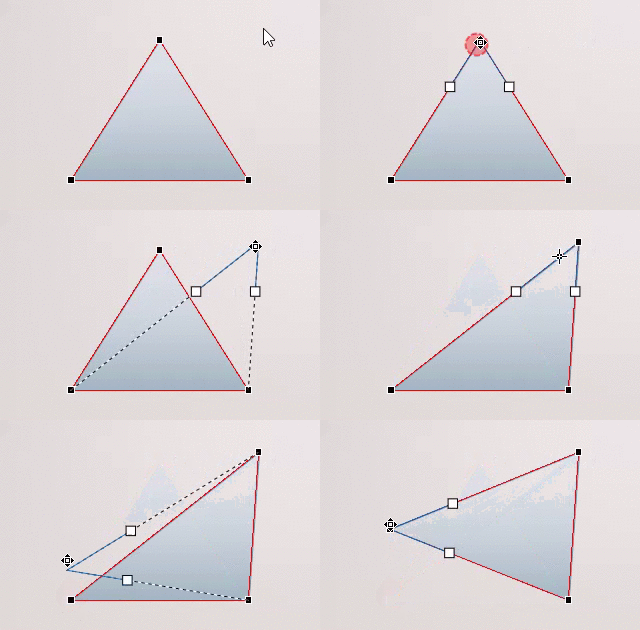
There are several white correction points that appear, use them to change the curvature of the line between two black correction points.
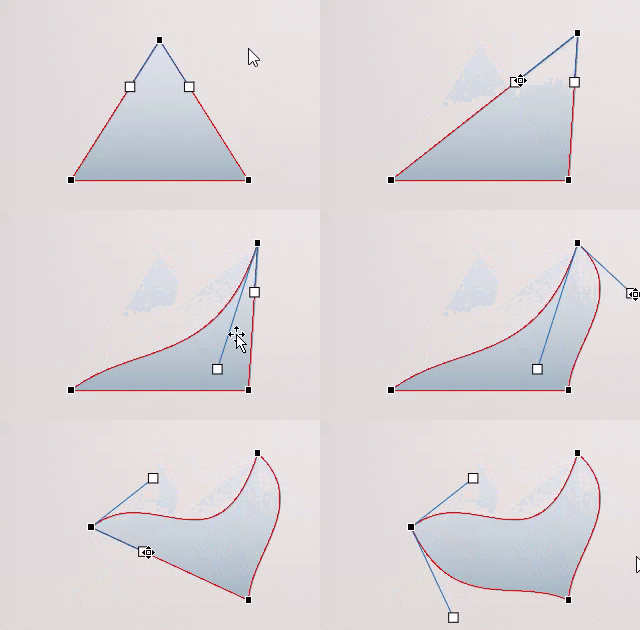
This feature has allowed you to completely change the original shape shape structure. While simple, Edit Points can bring about interesting results, depending on your creativity.
Please try it.
FAQ
What is Use Edit Points to Change Shape Shapes in Powerpoint about?
It provides a structured overview of Edit Points, explains the main context, and highlights practical takeaways for readers.
Why does this topic matter?
Understanding the main concepts helps readers evaluate the issue, avoid common mistakes, and make better-informed decisions.
How should readers use this information?
Use the guidance as a practical starting point, confirm details that may have changed, and follow current product, safety, or security recommendations.
Related Articles
 Shapes Powerpoint: How to Include Shapes in Powerpoint3 minutes read
 Lesson 24: Working with Shapes: Word 20075 minutes read
 Manipulate Shapes in PowerPoint 20166 minutes read
 PowerPoint 2019 (Part 16): Shapes: Explained7 minutes read
 PowerPoint 2016: Working with Shapes8 minutes read
 Tutorial for Word 2016 (Part 18): How to Add Shape Shapes5 minutes read
Reader Comments 0
Sign in with email or Google to join the discussion.