Table of Contents
You can take a photo inside Instagram, add a live camera effect for a Story, or import a photo from your phone and apply a post filter. The controls differ between Stories and feed posts, but good lighting, clean framing, and accurate focus matter more than any filter.
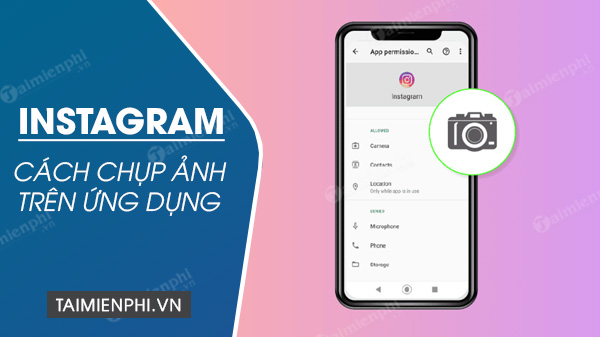
Choose the right Instagram camera workflow
- Story camera: Best for quick photos, live effects, stickers, text, and content that is designed for a vertical Story.
- Feed post: Best when you already have a photo in your library and want to crop, adjust, filter, and publish it to your profile.
- Phone camera first: Best when you want the highest-quality original, more camera controls, or a reusable file that is not tied to Instagram.
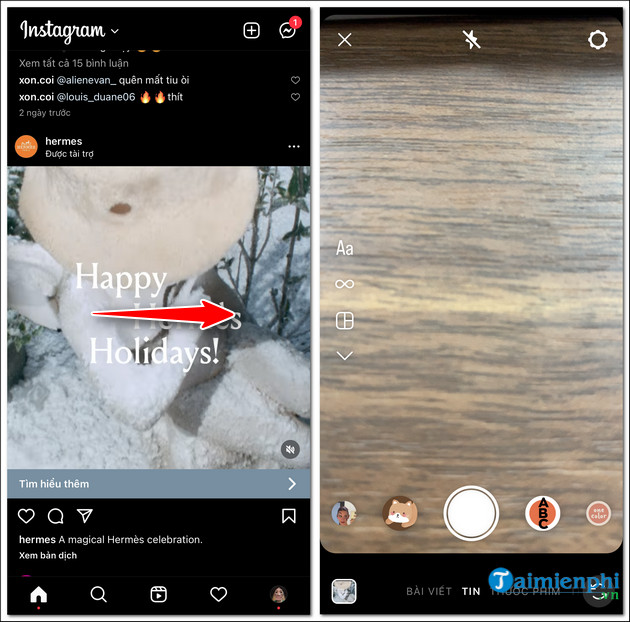
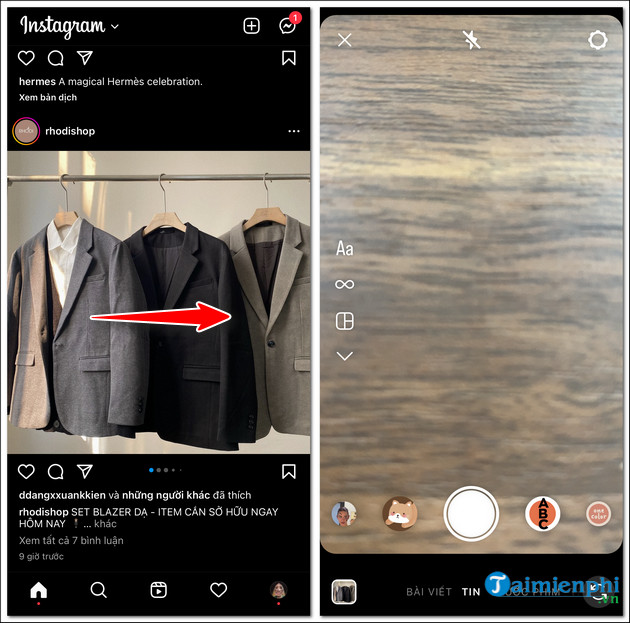
Instagram changes the position of its create and camera controls periodically. If a swipe gesture shown in an older screenshot no longer opens the camera, use the create button and choose Story or Post.
Take a photo in Instagram without an effect
- Open Instagram and tap the create button.
- Select Story to open the in-app camera.
- Make sure no face effect or decorative camera effect is selected.
- Tap the screen on the subject to set focus and exposure when that control is available.
- Hold the phone steady and tap the shutter button.
- Review the photo, then save it, edit it, share it to your Story, or discard it and try again.
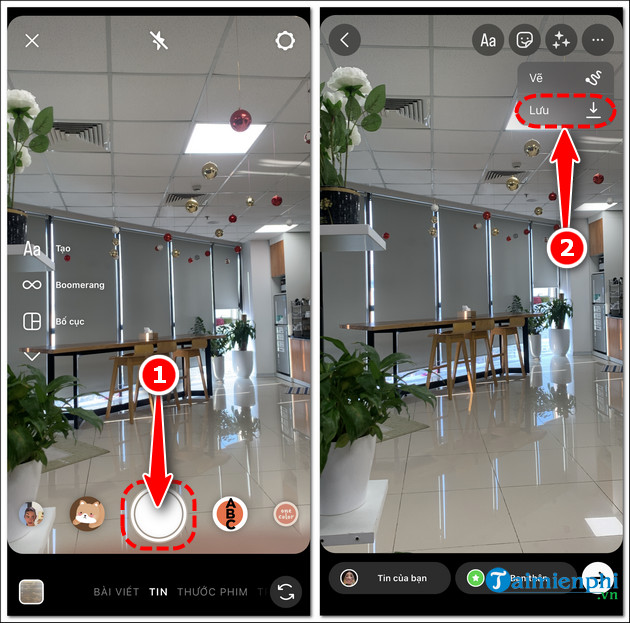
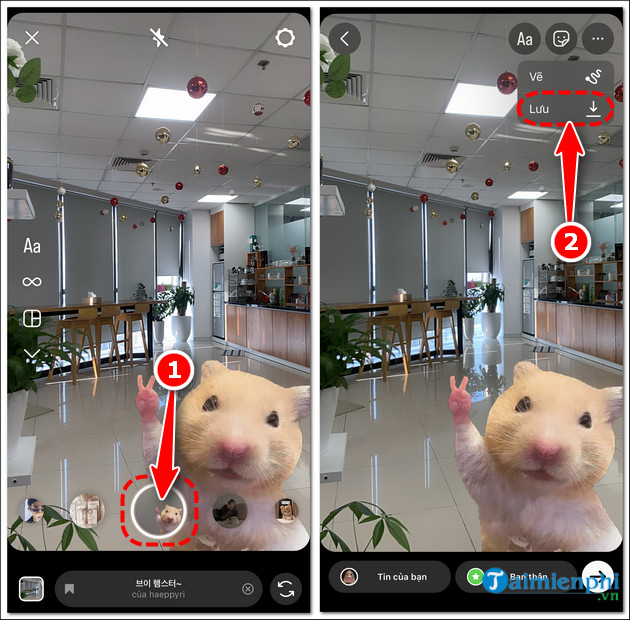
Saving options can vary by device, app version, account settings, and the elements used in the Story. Check your Photos or Gallery app after saving, especially when the Story contains music or interactive stickers.
Take a Story photo with a camera effect
Instagram's Story camera effects can modify color, lighting, facial features, backgrounds, or the entire scene while you compose the photo.
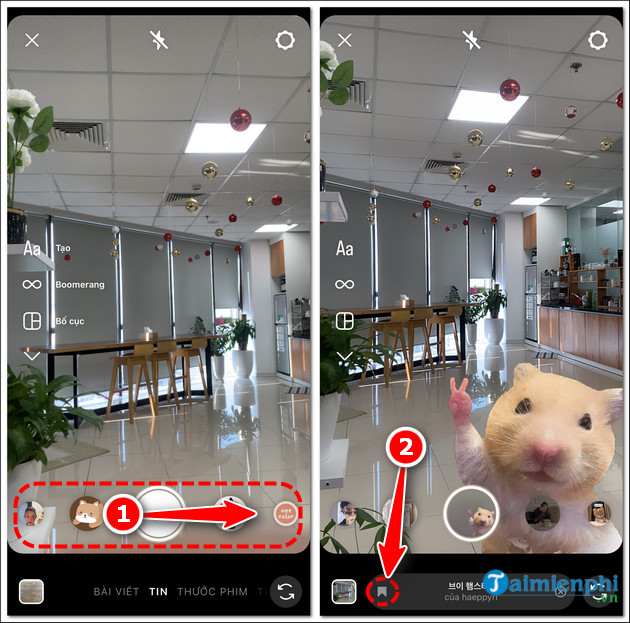
- Open the Story camera.
- Swipe through the effect icons near the shutter button.
- Tap an effect to preview it. If Instagram provides an effect browser, use it to find additional options.
- Frame the subject and check that the effect tracks correctly.
- Tap the shutter button to capture the photo.
- Add text, stickers, drawings, or music only when they support the image rather than cover its main subject.
Apply a filter to a feed photo
For a regular feed post, tap the create button, choose Post, and select a photo from your library. After cropping or adjusting the frame, continue to the filter screen. Tap a filter to preview it. If Instagram shows an intensity control when you tap the selected filter again, reduce the strength until skin tones, shadows, and highlights still look natural.
You can also use manual editing controls such as brightness, contrast, highlights, shadows, warmth, saturation, structure, sharpening, and vignette when they are available. Make one change at a time and compare the edited version with the original before publishing.
TipsMake's lists of Instagram filters for different photo styles and free Android photo-editing apps can help if you want more options. iPhone users can also compare these photo-editing apps for iOS.
Five changes that improve a photo before filtering
1. Clean the lens
A fingerprint on the phone lens reduces contrast and creates a hazy glow around bright areas. Wipe it gently with a clean microfiber cloth before shooting.
2. Use soft, directional light
Face a window or stand in open shade for portraits. Avoid mixing several light sources with different colors, and be cautious with strong overhead light that creates deep eye shadows.
3. Simplify the background
Move distracting objects out of the frame or change your camera position. A clean background gives filters less visual clutter to exaggerate.
4. Protect the highlights
If the sky, a lamp, or a white shirt looks completely blank, lower the exposure slightly before taking the photo. It is usually easier to brighten a controlled shadow than recover a clipped highlight.
5. Leave room for Instagram's crop
Keep faces, text, and important objects away from the extreme edges. Preview the final post or Story format so Instagram does not crop a key detail.
When an Instagram filter does not appear
- Update Instagram through the official app store for your device.
- Close and reopen the app, then check the Story and feed workflows separately.
- Confirm that Instagram has permission to use the camera and access the selected photos.
- Try another effect; creator-made effects can be removed or become unavailable.
- Use a built-in editing control or a trusted photo editor if a specific filter is no longer offered.
A subtle filter can make color and contrast more consistent, but it cannot fix motion blur, missed focus, or poor composition. Capture the cleanest original you can, then use effects as a finishing choice.
Related Articles
 15 Best Instagram Filters for Your Photos10 minutes read
 Instructions for Properly Using 16 Instagram Filters: Smartphone4 minutes read
 The 12 Top Instagram Filters for Your Photos: Expert Selection Guide9 minutes read
 5 Apps for Computers That Help You Create Instagram-Branded Photos6 minutes read
 Top Hot Filters on Instagram in 20234 minutes read
 How to See How Old You Are on Instagram3 minutes read
Reader Comments 0
Sign in with email or Google to join the discussion.