Table of Contents
Combining several images into one PDF creates a single ordered document that is easier to review and attach than a folder of separate files. The PDF is not guaranteed to be smaller than the images; file size depends on image resolution, format, page settings, and compression.
Prepare the images
- Rotate and crop each image before creating the PDF.
- Rename files with numbers such as 01-cover.jpg, 02-page.jpg, and 03-page.jpg so their order is clear.
- Keep an original copy of every image.
- Use an offline method for identity documents, medical records, financial information, or other private material.
Method 1: Use Microsoft Print to PDF in Windows
Windows 11 and Windows 10 include Microsoft Print to PDF, so no extra converter is required.
- Open the folder containing the images. Select them in the order you want, or sort the numbered filenames first.
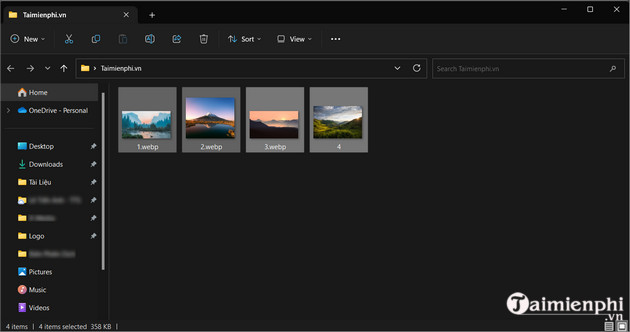
- Right-click the selection. In Windows 11, choose Show more options if the classic menu is hidden.
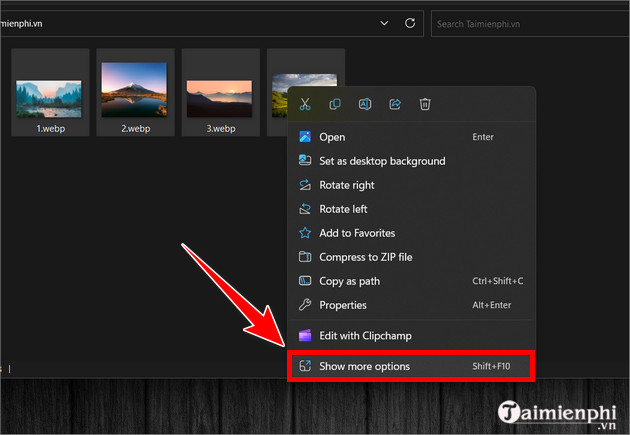
- Select Print.
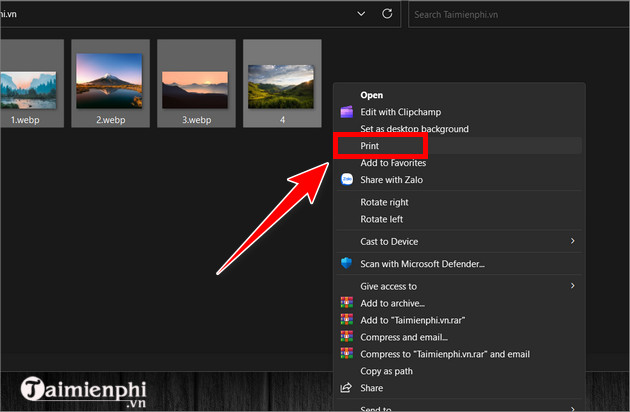
- In the Print Pictures window, choose Microsoft Print to PDF as the printer.
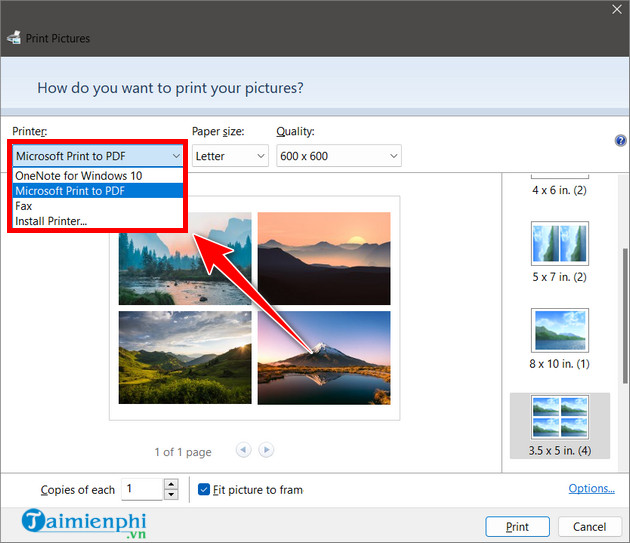
- Choose the paper size, quality, and layout. Select a full-page layout for one image per PDF page, or a contact-sheet layout for several images on one page.
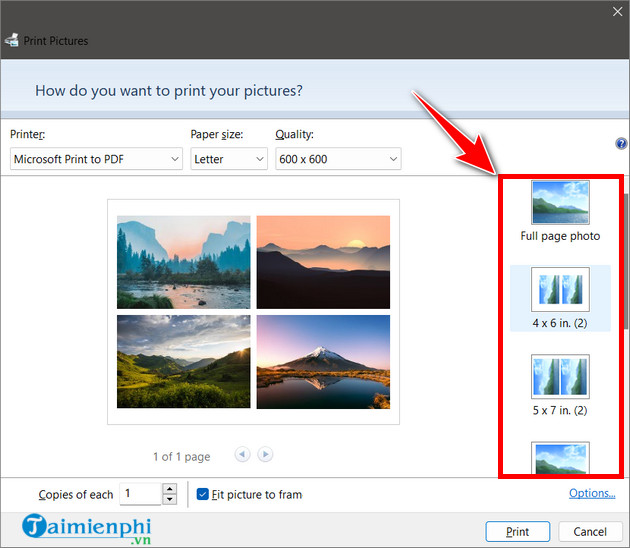
- Check the preview. The option to fit the picture to the frame can crop image edges, so clear it when the whole image must remain visible.
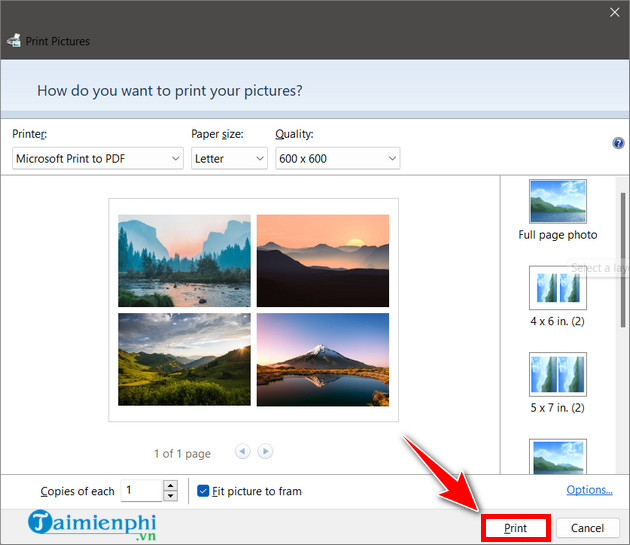
- Select Print.
- Choose a folder and filename for the PDF, then select Save.
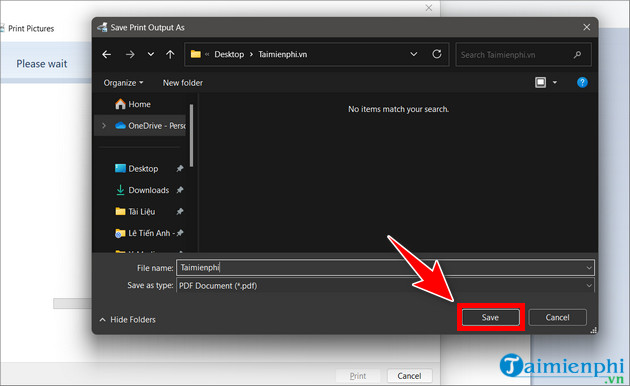
Windows builds the PDF.
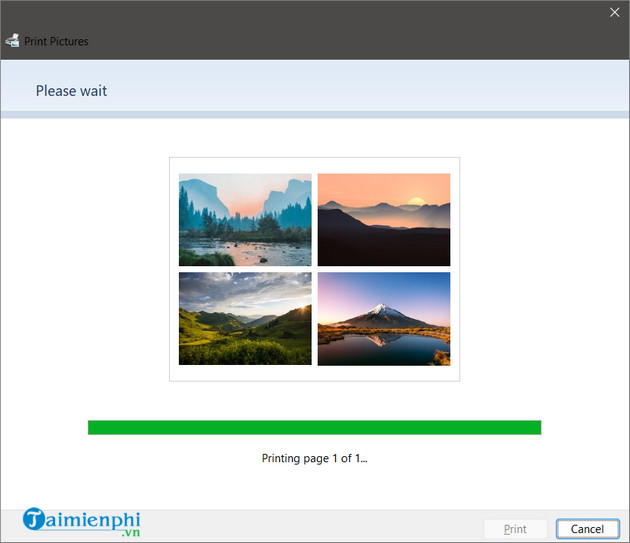
Open the result and check every page for order, orientation, cropping, and readability.
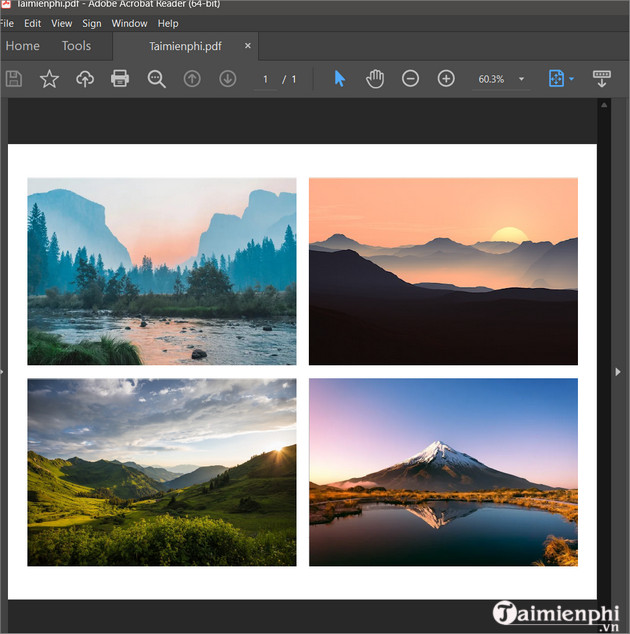
If the pages are in the wrong order
Cancel and rename the source images with leading numbers, then sort the folder by name before selecting them. File Explorer's selection order is not always the order used by the print dialog.
Method 2: Use XConvert online
An online converter can provide more control over margins, page dimensions, placement, and compression. Uploading is necessary, so do not use it for material that should remain on your computer.
- Open the XConvert image-to-PDF tool.
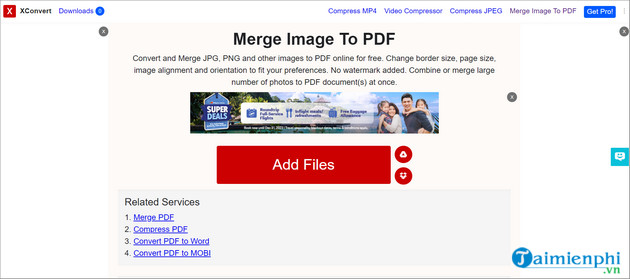
- Select Add Files and choose the source.
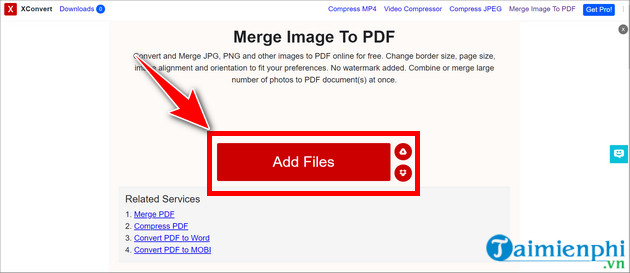
- Select the images and choose Open.
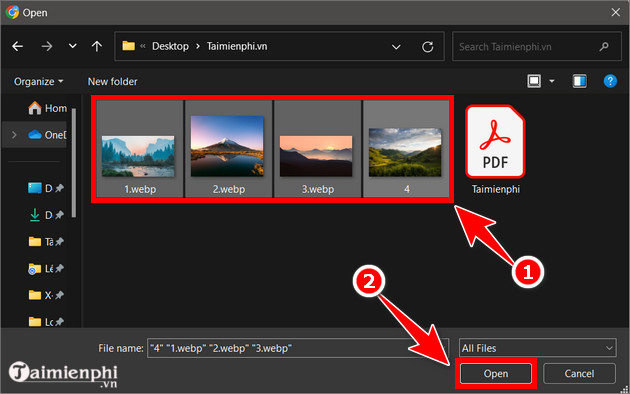
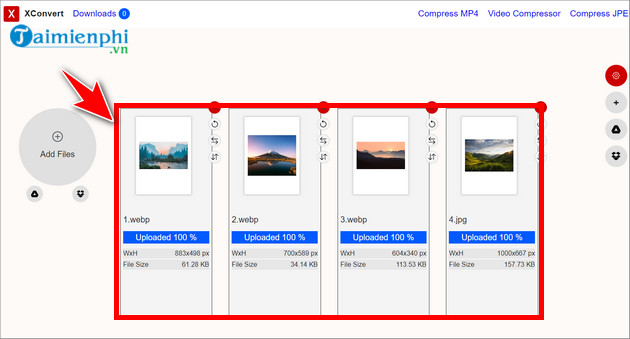
- Drag the thumbnails into the required page order and choose Single PDF.
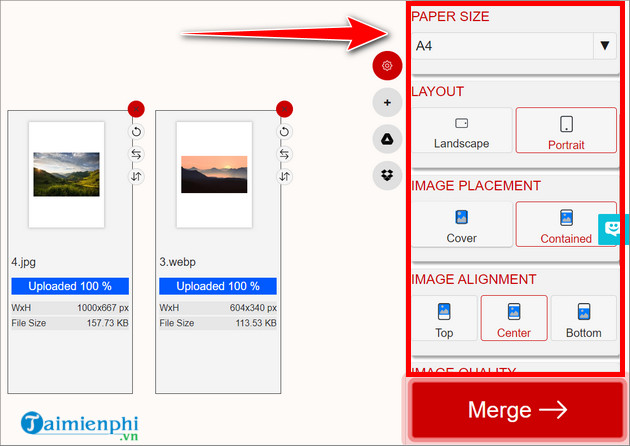
- Set paper size, portrait or landscape orientation, margin, image placement, and quality. Use a contained or fit option to avoid cropping; use cover only when edge cropping is acceptable.
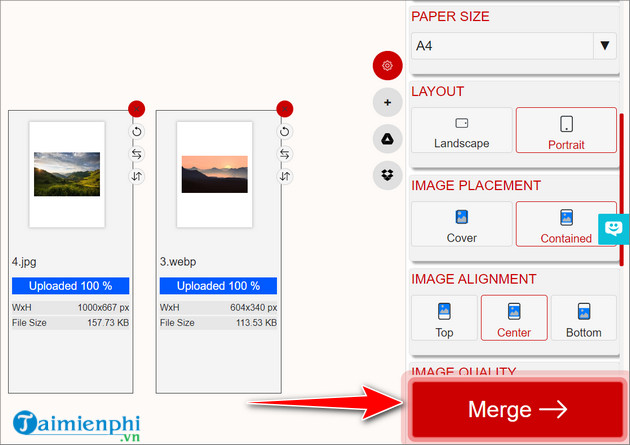
- Select Merge.
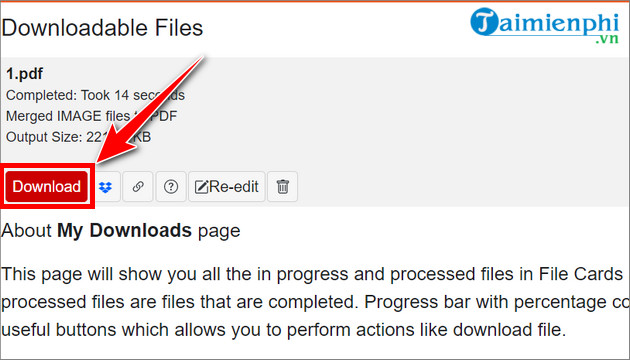
- Download the completed PDF and inspect it before deleting the source images.
Online tools can change their features and retention policies. Review the service's current privacy terms before uploading documents.
Image quality and file size
- For screen viewing: moderate JPEG quality often keeps the PDF manageable.
- For printing or archiving: retain more resolution and avoid repeated JPEG recompression.
- For screenshots and diagrams: PNG can preserve sharp edges, but an online converter may re-encode it.
- For mixed page sizes: use an original-size option or choose a common A4 or Letter page and contain each image within it.
If you need more software and device options, see TipsMake's comparison of JPG-to-PDF methods.
Make image text searchable
A PDF created from photos normally contains images, not selectable text. Run optical character recognition (OCR) if recipients need to search, copy, or use assistive technology with the text. TipsMake's PDFgear overview describes a desktop option with OCR.
Final checks
- Open the PDF in a reader and confirm the page order.
- Zoom in to verify that small text remains readable.
- Check for cropped edges and sideways pages.
- Confirm that the PDF opens on another device if it will be shared.
- If it will be emailed, check the final size rather than assuming the PDF is smaller. TipsMake's PDF-opening guide lists common readers for different platforms.
Related Articles
 How to Merge Photos on Macbook, Merge Multiple Photos into 16 minutes read
 Instructions to Combine Clouds Into Beautiful and Simple Photos6 minutes read
 How to Combine Live Photos into Videos in iOS 134 minutes read
 3 How to Rotate a PDF File and Save It as the Simplest New File4 minutes read
 How to Combine Photos in Word, Combine 2 Photos Into 1 Frame4 minutes read
 How to Stitch Photos in Word: Step-by-Step Guide4 minutes read
Reader Comments 0
Sign in with email or Google to join the discussion.