Table of Contents
To merge videos in Corel VideoStudio, import the source clips, place them in order on the main video track, trim or split unwanted sections, preview the transitions and audio, then export the project as one video file. The screenshots below show an older interface, but the timeline workflow remains similar in newer releases.
Prepare the project
Copy all source videos, images, and audio to a local project folder before editing. Keep the originals unchanged. Open VideoStudio, create a new project, and choose project settings that match your main footage, especially the aspect ratio, resolution, and frame rate. Matching the source reduces unnecessary conversion and timing problems.
1. Import the video clips
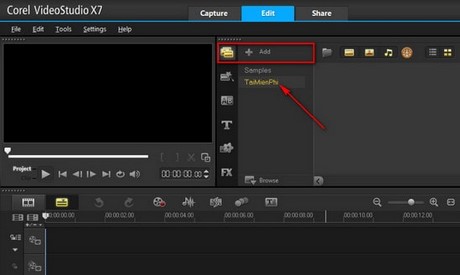
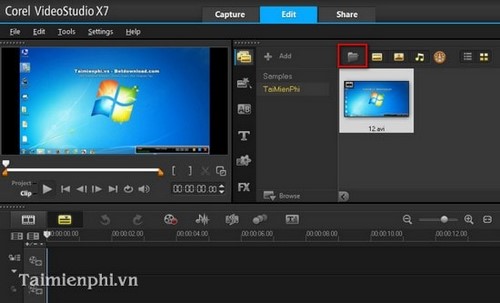
In the Edit workspace, create a library folder if you want to organize the project, then use the Import Media or Open File button to add the videos. Importing adds references to the library; it does not combine or alter the source files.
2. Add clips to the timeline
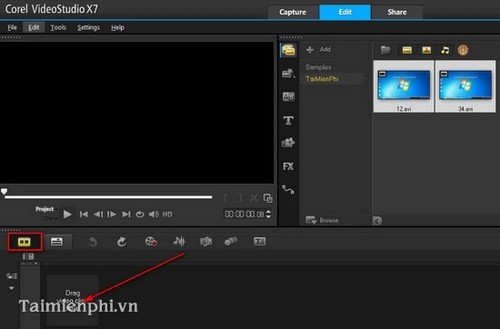
Drag the clips from the library to the main video track in the order they should play. Drop each clip immediately after the previous one to avoid an unintended black gap. You can rearrange the sequence later by dragging clips to new positions.
3. Split a clip at the playhead
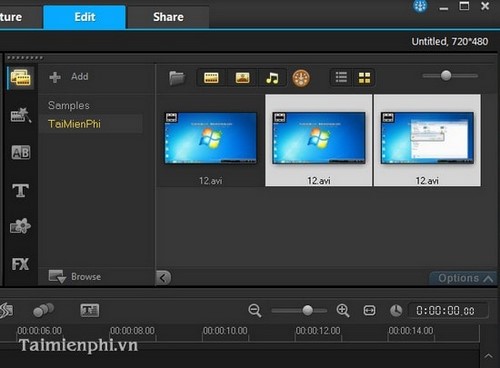
Select the clip on the timeline, play or scrub to the required cut point, and pause on the correct frame. Click the Split Clip or scissors button. The operation creates two timeline segments that still reference the original media.
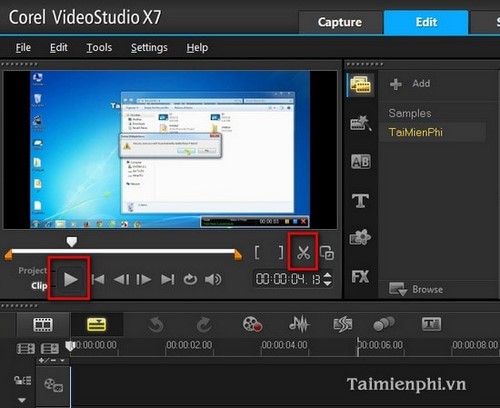
Repeat the split at the other end of an unwanted section, select that middle segment, and press Delete. If deleting it leaves a gap, move the following clip left or use the ripple-edit option available in your version.
4. Trim the beginning or end
For a simpler edit, select a timeline clip and drag its left or right trim handle inward. This shortens the visible part without creating extra segments. Zoom in on the timeline for precise edits and use frame controls when a cut must land exactly between two frames.
If one long source contains several sections you want to keep, VideoStudio’s Multi-Trim Video tool can mark multiple in and out points in one operation.
5. Join the clips into one sequence
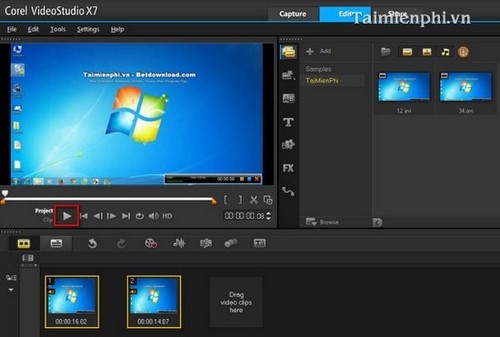
Place the trimmed clips next to one another on the main video track. VideoStudio treats the complete timeline as one project, so no separate “merge” command is required.
Switch the Player panel to Project mode and click Play to preview the full sequence, rather than only the selected clip.
6. Add transitions only where they help
A direct cut is often the cleanest way to move between related shots. If a transition is useful, drag it between two adjacent clips and keep its duration short. Avoid applying a different decorative transition at every edit; it can distract from the content.
7. Balance the audio
- Listen across every cut for sudden changes in volume or background noise.
- Add a short audio fade at edits that click or change abruptly.
- Mute duplicate sound if overlapping clips play the same audio twice.
- If you separate audio from a clip, keep it synchronized with the video unless the edit intentionally changes timing.
8. Export one finished video
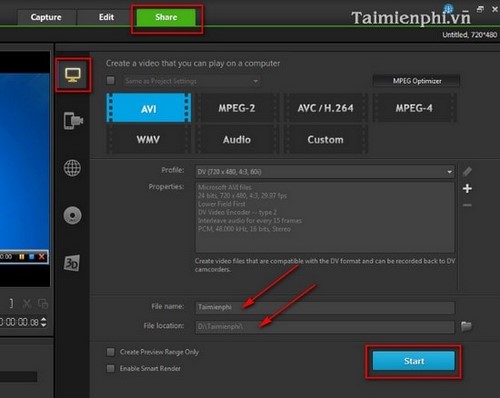
Open the Share workspace, choose a computer or file output, and select a format that suits the destination. MP4 with H.264 video is a practical choice for broad playback and web sharing. Use the project or source-matching option when it produces the resolution and frame rate you need.
Enter a filename and destination on a drive with enough free space, then start rendering. Exporting creates a new file; saving the VideoStudio project alone does not create a playable finished movie.
Check the exported file
- Play the beginning, every join, and the ending in a separate media player.
- Confirm that audio remains synchronized and no gaps or black frames appear.
- Check resolution, orientation, frame rate, and total duration.
- Keep the project file and source media until the final delivery is approved.
The official VideoStudio help explains how to trim and split clips. For other tools, compare TipsMake’s video-cutting software and video editors.
Related Articles
 How to Cut and Merge Videos with Corel Videostudio Simply5 minutes read
 How to Blur Photos in Corel3 minutes read
 Corel Draw: What Is Corel DRAW - Introduction12 minutes read
 How to Combine Photos Using Google Flow3 minutes read
 Corel Shortcuts - All Shortcuts in Corel Draw You Need to Know4 minutes read
 TOP AI Tools for Realistic Face Swapping in Photos and Videos7 minutes read
Reader Comments 0
Sign in with email or Google to join the discussion.