Table of Contents
CapCut can record narration directly into a mobile video project, so you can explain a tutorial, add commentary, or replace the original audio without switching apps. The basic workflow is: import the video, position the playhead, open the audio recording tool, record in short sections, adjust the voice track, and export a test copy.
CapCut’s labels and feature availability can change by app version, device, region, and plan. If you do not see Voiceover, look for Record audio, a microphone icon, or the recording option under Audio.
Prepare a cleaner recording
- Write a short script or bullet outline and rehearse difficult names.
- Record in a quiet, soft-furnished room away from fans and traffic.
- Place the phone 15–20 cm from your mouth and slightly off to one side to reduce breath noise.
- Use wired earphones or headphones if the video’s existing audio might leak into the microphone.
- Record a short test and check for distortion, echo, and background noise before narrating the whole video.
Add a video to a new CapCut project
Step 1: Open CapCut and tap New project. Select the video or clips you want to narrate, then tap Add. Grant access only to the media needed for the project when your phone offers that choice.
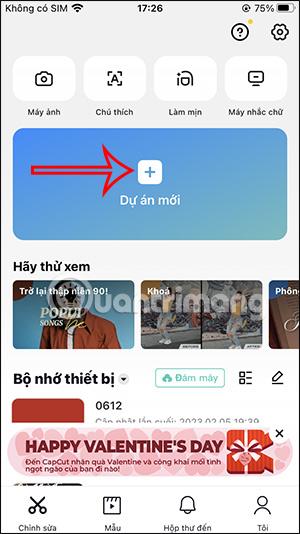
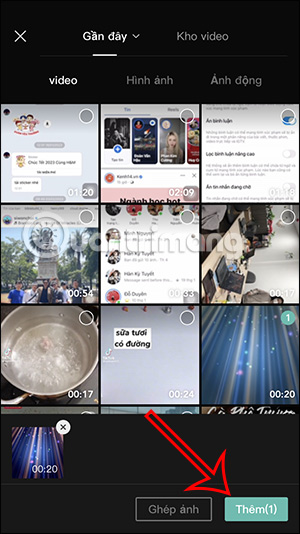
Play the timeline once and trim obvious mistakes before recording. Major timing changes after narration can make the voice track harder to synchronize.
Open the voice recording tool
Step 2: Move the timeline playhead to the point where the narration should begin. Tap Audio, then select Voiceover or Record audio.
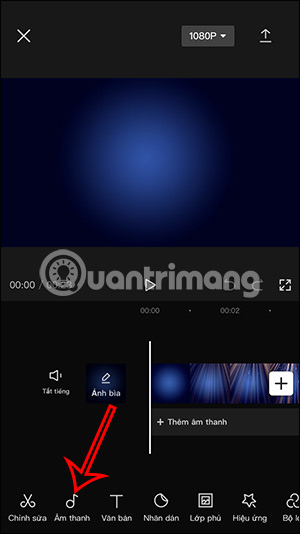
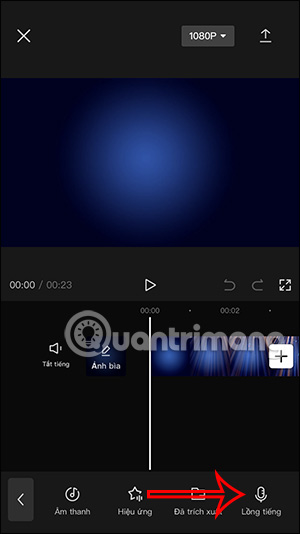
If CapCut asks for microphone access, allow it while using the app. You can later review this permission in the phone’s app settings.
Record the narration
Step 3: Press and hold the microphone button—or tap Record in versions that use a start/stop control—and speak while the video plays. Stop when the section is complete.
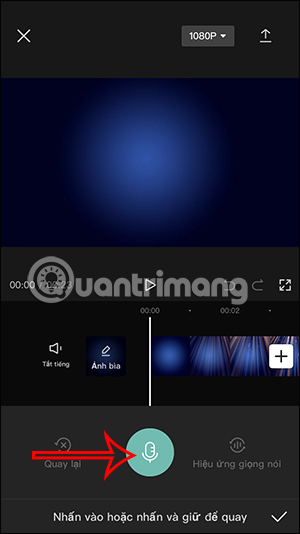
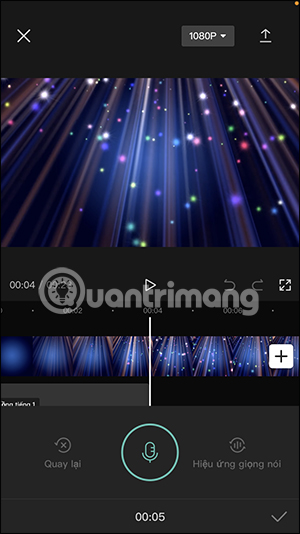
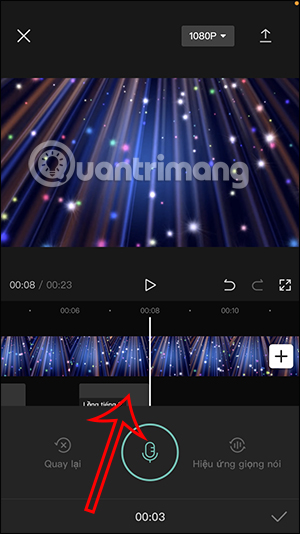
Record in short logical sections rather than one long take. If you make a mistake, undo or delete only that audio segment, return the playhead to the correct point, and record again.
Trim, position, and balance the voice track
Tap the recorded audio clip in the timeline. Depending on the version, you can split it, trim its ends, change volume, add fades, reduce noise, enhance voice, or adjust speed.
- Drag the clip so each sentence starts with the matching visual.
- Split out long silences and unwanted breaths instead of speeding up the entire narration.
- Lower background music while speech is present. Narration should remain intelligible on a phone speaker, not only through headphones.
- Use fade-in and fade-out on music or ambient tracks to prevent abrupt changes.
- Preview every edit around cuts to catch clicks, clipped words, and timing jumps.
Apply a voice effect only when it supports the video
Step 4: Select the voiceover clip and open Voice effects or Voice changer. Preview the available effects, choose one if appropriate, and tap the checkmark to apply it.
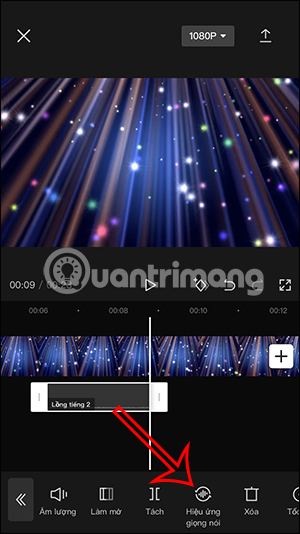
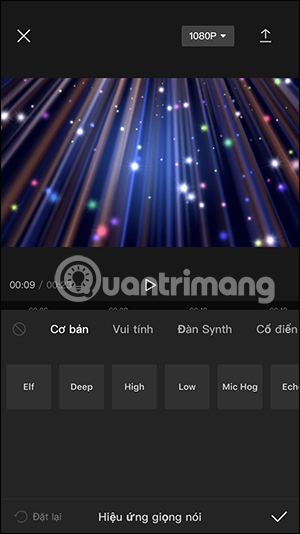
Effects can suit comedy, characters, or stylized shorts, but heavy processing reduces clarity. For tutorials, interviews, and educational videos, a natural recording with light noise reduction is usually better.
Optional alternatives to live recording
- Import a recording: record in a dedicated voice-recorder app or with an external microphone, then import the audio for more control.
- Text to speech: add a text layer and use CapCut’s text-to-speech option when it is available. Review pronunciation and disclose synthetic narration when the context requires it.
- Desktop or web recording: CapCut’s desktop and browser editors also include recording tools, although controls differ from the mobile screenshots.
Export and verify the finished video
- Watch the complete project with headphones and again through the phone speaker.
- Confirm that narration starts at the right time and music never masks important words.
- Tap Export and choose a resolution and frame rate appropriate for the source and destination.
- Open the exported file outside CapCut and check audio sync, volume, image quality, and the first and last seconds.
- Keep the editable project and original recording until the final upload is approved.
CapCut’s official voiceover guide covers recording, imported sound, and text-to-speech options. For alternatives and a broader mobile-editing comparison, see TipsMake’s overview of video editing apps for TikTok and short-form video.
Fix common problems
- No microphone option: update CapCut, check under Audio or Record, and confirm that you opened an editable project rather than a finished template.
- No sound is recorded: allow microphone access, disconnect an unintended Bluetooth microphone, and test the phone’s recorder.
- Echo or doubled speech: mute the original clip or use headphones while recording.
- Voice is too quiet: raise the voice clip modestly and lower music; avoid extreme gain that introduces noise or distortion.
- Voice drifts out of sync: return the narration speed to normal, check project frame rate, and split/reposition the affected segment.
Related Articles
 How to Create AI Manga Videos on Capcut3 minutes read
 How to Insert Google Voice into Video on Capcut3 minutes read
 Instructions for Cutting, Flipping, and Rotating Videos Using CapCut Explained6 minutes read
 Instructions for Inserting Text into Videos Using Capcut: Main Insights4 minutes read
 How to Add Subtitles and Lyrics Automatically on CapCut5 minutes read
 How to Combine Videos on Capcut, Combine 2 Videos into 13 minutes read
Reader Comments 0
Sign in with email or Google to join the discussion.