Efficiently exploit printers in Windows Server 2003 (Part 1)
In recent years, printers have become something that is not too expensive for your costs. However there are many solutions to know who is printing on the network printer in your network.
In recent years, printers have become something that is not too expensive for your costs. However there are many solutions to know who is printing on the network printer in your network. For example, the company's account paying office has a printer to print checks. You can configure this printer in this way so that people with domain user accounts can print it. It is also important to know if an unauthorized user has used it to print and check the checks if a valid user is printed.
You may also have seen some companies use a limited number of expensive printers. For example, a company has a 36x24 inch photo printer. You can imagine, printing large-sized photos is not cheap and it takes a lot of ink to print with that size. Therefore, only a small number of people are allowed to print to this machine, so the company decided to check the performance on the printers to ensure that the supplies are not lost with those Printing jobs are not needed.
Obviously there is no problem with restricting this printer. If your company makes reasonable use of the printer, this is a good idea to check the printer, making sure it is not being used for unauthorized purposes. In this article, we will show you how to test the printer and explain to you what their various testing options are.
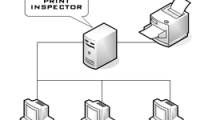
Indeed, limiting and testing printers is extremely easy if this print string is configured on a server that uses Windows Server 2003. You have to keep in mind here that this does not mean that the printers must be attached to the server by physical route. The server can configure the print string for a network printer. For example, in a company, we have a printer with a private network card. In the usual way, it is possible to print to these printers without connecting this printer to the server. However, if the user is allowed to print directly to such a printer, we cannot check its performance.
If you are interested in limiting and testing such a printer, you will feel more interesting with creating a print string on one of the servers and dealing with network printers as if it were has been connected to the server (though not).
To see how, click on the server's Start button and select Control Panel | Printers and Faxes | Add Printer from the Start menu. When you do, Windows will launch the Add Printer wizard .
Click next to bypass the wizard's Welcome screen. After you click, you will see a screen similar to Figure A. As you can see in the picture, this screen asks if you want to use a printer attached to the server or if you prefer to use it. A network printer does not. This screen is a bit misleading because even though we are creating a print string for a network printer, Windows does not recognize it this way. If you have selected the Network Printer option, Windows will assume that you have connected to a configured printer on the Internet or to a printer that is being configured by another Windows. That means you will have to connect to the printer by entering the URL, UNC based on their shared name or by executing an Active Directory query. For the purpose of this article, acknowledge that we are trying to test a stand-alone printer, so no options apply. In that case, let's go straight and select the Local Printer option even if the printer is not really local.
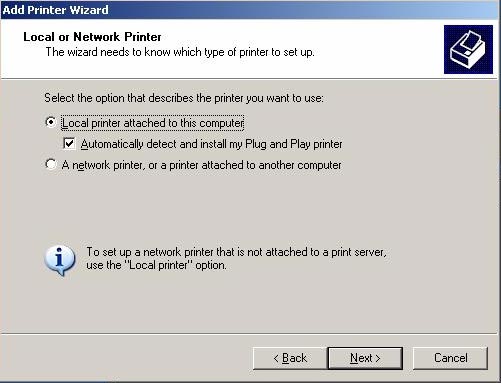
Figure A : Windows asks you to choose to connect to a local printer or network printer.
You should now see a screen similar to the one shown in Figure B. As you can see in the figure, Windows assumes that the printer is connected to the server via a parallel port (LPT1). You cannot use the LPT1 option when the printer is not directly connected to the server. All other options in the Use the Following Port drop-down list also mention local ports. So you will have to choose the Create a New Port option .
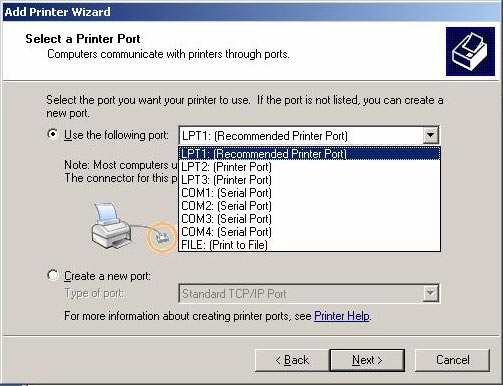
Figure B : By default, the Add Printer Wizard connects to a locally attached printer.
The Create a New Port drop-down list includes two options; Local Port and Standard TCP / IP port. Select the Standard TCP / IP port option and click Next , Windows will launch Add Standard TCP / IP Printer Port wizard . Click Next to bypass this screen. You will see a screen like Figure C, which asks for the name of the printer or IP address and port name.

Figure C : You must enter the printer's IP address and the port name.
The printer has an IP address assigned to it, so you just need to enter that address in the space. You can enter any port name here but keep in mind that the port name must be unique. By default, Windows will create its port name with IP_ in front of the printer's IP address. You can use this port name or create the port name you like to change.
Click Next and you will see a window displaying the options entered as shown in Figure D. Notice in this figure that the port you are configuring is set to accept RAW print data on excess port 9100 and Windows. Receive that the printer uses the HP Jet Direct interface
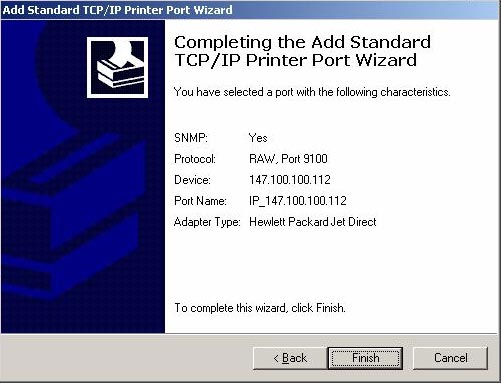
Figure D : Windows shows the options you have selected
Click Finish and you will return to the Add Printer wizard . The next window that you will see requests to type in the type of printer being set up. You can choose the right type of printer from the list or use the option on the Have Disk hard drive to provide your own print drive.
Click Next and you will see a screen asking for the name of the printer and whether you want Windows to use as the default printer. Answering those questions is absolutely easy for you. After completing the selected sections, click Next .
You will see a window similar to Figure E, this window asks if you want to share the printer. Windows has admitted that you set up the printer to print it from the server. If your purpose is to check the use of the printer, then share it.
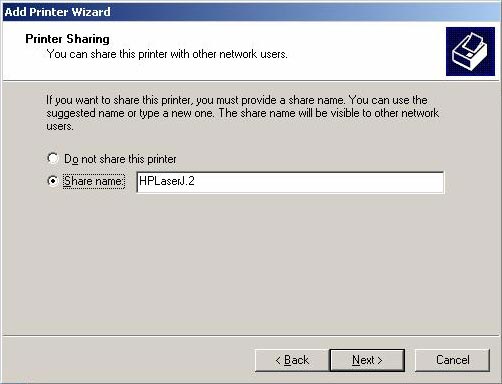
Figure E : You should choose to share the printer
Your goal is the jobs that were previously planned for the printer through the machine being configured. By doing so, you will restrict access to the printer (if necessary), and will check the problem of using the printer.
We should also mention the important issue here that you only set up a server to share this printer. On the other hand, if there are multiple servers to use the printer at the same time, how can the printer refuse.
Click Next and you will see a command window to enter the printer's location and an optional prompt. This information is intended to help users calculate its print string.
Click Next and you will receive a test page printed. After doing this, click Next again then Finish . The server will be set up to manage the printer's print jobs. Remember that you have to send it again to workstations so that they print the server's UNC shared name (server nameshare name) better than printing from the printer directly.
Conclude
In this part 1, we showed you how to configure a server to manage a network printer. In Part 2 of this series, I will continue the discussion by showing you how to protect and test print strings.
Efficiently exploit printers in Windows Server 2003 (Part 2)
Was this article helpful?
Your feedback helps us improve.
Related Articles
 Efficiently exploit printers in Windows Server 2003 (Part 2)8 minutes read
 Efficiently exploit printers in Windows Server 2003 (Part 3)8 minutes read
 Managing printers in Windows Server 2008 - Part 16 minutes read
 Managing printers in Windows Server 2008 - Part 36 minutes read
 Top 5 best printers of 20266 minutes read
 Managing printers in Windows Server 2008 - Part 25 minutes read
Reader Comments 0
Sign in with email or Google to join the discussion.