Self-assemble computers, build desktops (P3): BIOS settings
Until this part, you have been introduced to select the appropriate components for your computer and how to assemble them together to form a computer properly.Now is the time to turn on the device and set up the internal components.In this article, I will show you how to test some BIOS settings and perform some tests.
- Self-assembling computers, build desktops (P2): Assembling hardware
BIOS settings
- General introduction
- Access the BIOS
- Update your BIOS or UEFI (Optional)
- Check your storage drive
- Other options you can make
General introduction

BIOS stands for Basic Input-Output System (basic input-output system).It is a small program that is stored on a small memory chip in the motherboard and runs on your computer before the operating system runs, thereby, setting everything up and allowing you to change the settings. basic of the system.More specifically, the BIOS includes features that allow you to install a new operating system, overwrite an old operating system or perform more technical tasks such as overclocking the processor.If you are new to the BIOS, please refer to our article 'BIOS - Basic information for beginners' to get detailed information.When you turn on the device, you will see a dialog box telling you that you can press a key to enter setup (usually the Delete key).The settings you see here will vary depending on the different motherboards used, or if the board is the same but different from the BIOS version, so we only introduce what is common. most about internal options.
In addition, technically, most new motherboards including our motherboards have a more advanced pre-boot environment called a unified extension software interface. Unified Extensible Firmware Interface - UEFI.UEFI also has a lot of new and useful features to better support modern hardware.But people still call it BIOS because these two platforms support basically the same tasks.
Things to note when using UEFI instead of BIOS
Access the BIOS
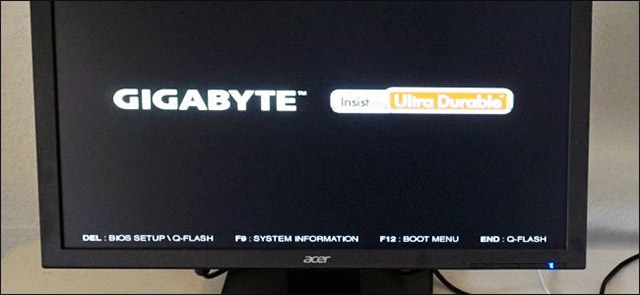
If you do not install the operating system on the storage drive, the UEFI / BIOS program will start immediately when you turn on the computer.If not, check the splash screen (the screen has the system logo or motherboard name), there will be instructions on how to start UEFI / BIOS.

Normally, you can do this by quickly pressing the F1, F2, F11, F12, Delete or some other sub-keys on the keyboard depending on the task you want to perform (as you can see in the example illustrated).If you do not see this screen appear, simply turn off your computer and try restarting again.
Update your BIOS or UEFI (Optional)
Chances are, your motherboard is not running the latest UEFI version.Updating will help support new features, fix bugs and security holes, and in general, updating UEFI / BIOS is recommended.Also, because UEFI will be launched before the operating system, there is no way to automatically update it over the Internet that will need to be done manually.
Note that you usually don't need the latest firmware version of the motherboard, unless you encounter specific problems with compatibility between features and hardware.For example, if you are using an older generation motherboard and a new generation CPU, while the two parts are not compatible, you may need to update the motherboard firmware to CPU can work normally.Updating the system is sometimes recommended for specific, important security purposes or to patch.
You can check your latest UEFI / BIOS version by typing the model number into Google and adding the keyword 'BIOS update' (check the box or one of the UEFI menus if you don't know model number) his motherboard).On the manufacturer's website, you will find a list of updates, usually in the Support section.Please download the latest version for your UEFI / BIOS.

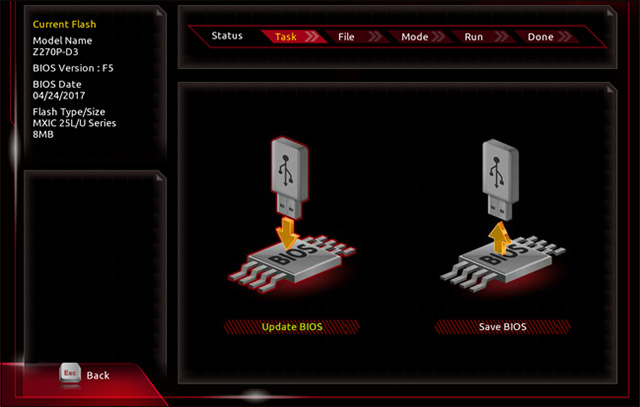
Again, for each manufacturer, this process will be a little different, but more or less all manufacturers will usually provide some means for users to update UEFI / BIOS program. without having to install the operating system.In the case of Gigabyte motherboards as an example in the article, the update process will take place as follows:
Step 1: Download the updated UEFI file from the Gigabyte website (of course, you must use another computer connected to the network to do this).
Step 2: Transfer the file you just downloaded into USB.
Step 3: Plug the USB drive into the computer you need to update, start UEFI and press F8.
Step 4: Follow the instructions on the screen to install the latest UEFI version.
Step 5: Reboot the system.
Updating your motherboard and BIOS / UEFI will usually have to follow the same general steps, but not necessarily exactly as the steps above.About the update process for each device separately, you can completely look up on the Internet quickly.If for some reason the update process doesn't work smoothly, don't worry, motherboard manufacturers also regularly provide programs that can update BIOS / UEFI after start and run Windows.
Check your storage drive
Next, check to make sure your motherboard can 'recognize' the storage drive.Otherwise, the Windows setup utility in the next section will not be possible.
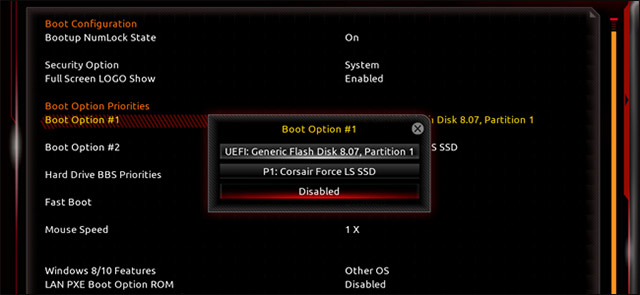
Unfortunately, the instructions here will be difficult to be able to clear up step by step because each UEFI program of each different developer will be laid out in different ways.Overall, all we have to do is find the management of the system's storage drives.For example, on our Gigabyte motherboard, the management of storage drives is found in the BIOS tab (as you can see, the new UEFI will include all the old BIOS settings).

In the example, boot option # 1 (Boot Option # 1) has been selected, this will be the first option that the BIOS will try to boot.If option 1 boot fails, it will continue to try the second option.In the list available, you can see the Corsair solid state drive we installed in the previous article.If you install your operating system with a DVD drive, make sure you can also see its appearance on this page (sometimes both labeled SATA for motherboard connections).
If you do not see your drives appear, check the connection of the power cable and the SATA data cable in your CPU tree to see if it is loose or malfunctioning.If you are sure that the connections are completely standard but still cannot see the drives appearing in the BIOS, you may have to replace them.
Other options you can make

There are many other interesting things you can do with UEFI or BIOS on your computer, but nothing is really affecting the booting and running the operating system.So feel free to 'play' the setup options you like, such as powering on your computer when you touch the mouse or keyboard.However, if during the setup you encounter difficult parts, do not rush to harass but spend some time searching on Google first.Here are some interesting options in BIOS and UEFI that we recommend trying if you want:
- Enable Intel XMP to optimize RAM speed.
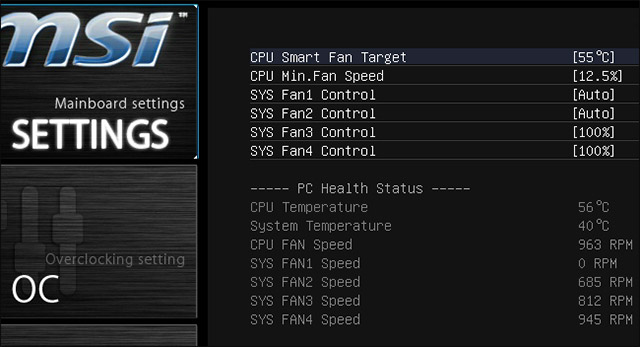
- Automatic setting controls the cooling fan so that the PC operates more smoothly.
- Enable Intel VT-x in the BIOS or UEFI firmware for virtual machines.
- Protect your computer with BIOS or UEFI passwords.
- Pros and cons of fast startup mode in Windows 10 on BIOS.
When you have completed all the necessary settings in BIOS and UEFI, go to the next article to start installing Windows.Note that you will need to have another computer with Internet access if you do not have an installation disc or USB drive available.
Good luck!
See more:
- 5 tips for using the BIOS to help you master your computer
- Why Intel killed the BIOS, switched to UEFI?
- How to block Internet connection software, Windows 10 applications
- Self-assembling computers, build desktop computers (P1): Choose hardware