Instructions for upgrading BIOS, how to update BIOS
Upgrading your computer's BIOS can help your system boot faster, fix some compatibility issues, and improve performance..
Upgrading your computer's BIOS can help your system boot faster, fix some compatibility issues, and improve performance.
A tiny BIOS chip hidden deep inside every computer, it not only supports the computer but also helps protect it. BIOS stands for basic input and output system and BIOS is the first software that the computer will load when it boots, before all other devices in the computer such as the CPU, GPU and motherboard chipset. But a few years ago, motherboard manufacturers in partnership with Microsoft and Intel introduced an alternative to traditional BIOS chips called UEFI (Unified Extensible Firmware Interface). best).
Most motherboard products today have a UEFI chip and not a BIOS chip, but both have the same purpose: preparing the system to boot into the operating system. That being said, most people still refer to UEFI as "BIOS" because of the familiarity of the term.
Why you should (or shouldn't) upgrade your BIOS
Understanding UEFI is important in order to understand how to take advantage of the feature updates and bug fixes that come with BIOS updates provided by motherboard manufacturers.

The motherboard can use any firmware revision that the motherboard manufacturer has built. Throughout the life of a motherboard, manufacturers will release new firmware packages or BIOS updates, allowing support for new processors and memory or resolving common errors. For many years, the only real reason to update to a new firmware version was to resolve some bug in UEFI or swap out a newer CPU for the motherboard.
However, Duo's report points out that UEFI firmware attack is a dangerous attack. Anti-virus software may not detect it. Some people want to regularly check and update the UEFI firmware package. However, doing this may damage the motherboard. It's best not to update your UEFI's firmware unless it updates what you need. However, BIOS updates can be updated if you own a new chip or motherboard platform.
How to upgrade BIOS
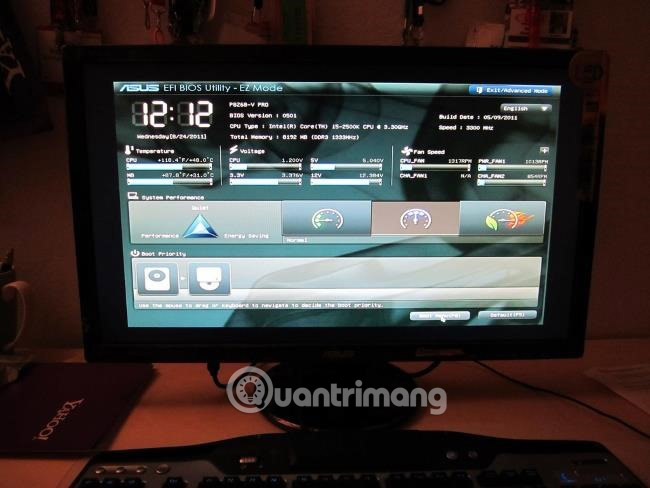
When you start your computer, you will see notification text indicating the button to press to enter the UEFI BIOS. Hit it! (The exact button is required because the UEFI control panel design of all motherboards is different).
While not all motherboards offer this feature, with certain models you can boot into the UEFI console and use a built-in update utility to connect to Latest Internet and firmware from manufacturer's server.
If your computer does not have this direct support utility, please follow the steps below.
Step 1: Determine your current BIOS version

Your computer's BIOS version is displayed in the BIOS setup menu, but you don't have to restart your computer to check this version number. There are several ways to see the BIOS version from within Windows, and they work similarly to traditional BIOS or newer UEFI firmware.
Check the BIOS version using System Information
The easiest way to find the BIOS version is to open the System Information application in Windows – just type msinfo32 into the search bar (Windows 7/Vista) or Run box (XP) and click System Summary; Your BIOS version will now be displayed on the right, under the processor speed display. Note down your version number (and the date that appears after that version number if applicable).
Check BIOS version at Command Prompt
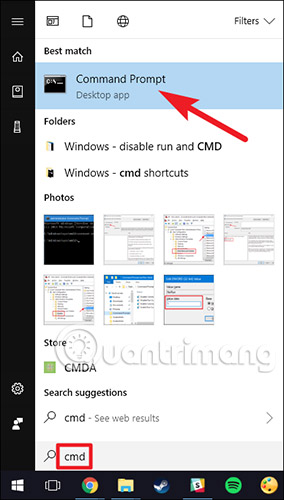
To check your BIOS version from Command Prompt, click the Start menu, enter 'cmd' in the search box, then click the 'Command Prompt' result. Note that you do not need to run with admin rights.
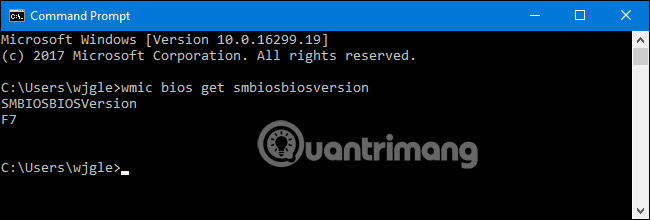
At the prompt, type (or copy and paste) the following command, then press Enter:
wmic bios get smbiosbiosversionYou will see the version number of the BIOS or UEFI firmware in the current PC.
For the Windows 10 version, please refer to the article: Display BIOS information on Windows 10 using Command Prompt for detailed instructions.
Step 2: Check the motherboard manufacturer's website
Most computer manufacturers perform BIOS upgrades based on a certain make or model, so visit your BIOS manufacturer's support page and check its list. If you download and install BIOS software for another model, your computer will definitely not work (however, most BIOS upgraders have the ability to intelligently notify you that you are install it on the wrong hardware). If there is an upgrade file for your BIOS in the list, download the upgrade file to your computer, along with any accompanying documentation, as warnings and specific instructions will be included in the documents. Read Me data.
In the process of searching for BIOS upgrades from the motherboard manufacturer's website. If you can't remember the manufacturer's model number, then you can look it up without opening the case by downloading and running CPU-Z, then clicking the Mainboard tab .
Different motherboards use different utilities and processes, so there are no instructions that are suitable for all motherboards. However, the basic implementation process is the same on all motherboards.
If you purchased a pre-built computer, go to the computer manufacturer's website, search for the computer model, and view the manufacturer's download page. You will find any available BIOS updates there.
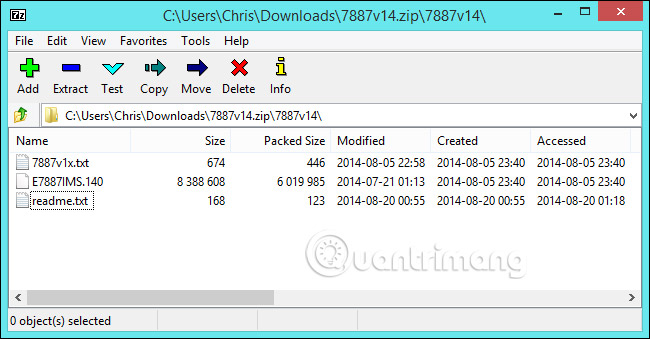
BIOS updates are usually downloaded in ZIP file format. Let's extract the contents of that file. Inside the extracted folder, you will find several types of BIOS files. In the screenshot below, it is file E7887IMS.140.
You need to choose one of many different types of BIOS flashing tools, depending on the motherboard you're using and what it supports. The BIOS update comes with a README file that will recommend the ideal option for your hardware.
Step 3: Read the accompanying documents
The BIOS upgrade file may include a list of patches and new functions, often to support new hardware. For example, when performing a BIOS upgrade for a Lenovo Thinkpad T500 computer, the upgrade software supports the new AC adapter and 1600x900-pixel screen resolution on the external display; This upgrade also fixes fan speed and Webcam issues, which cannot be fixed by upgrading Windows.
More important, though, are the notes in the Read Me file: If you're using Vista on a T500 like our tester, you'll need to make sure you have a patch of some sort installed; And if the T500 has a different graphics card, you will need to upgrade the driver for it on this version before upgrading the BIOS. Read the documentation carefully or you will most likely make your computer unable to boot without knowing why.
Step 4: Upgrade BIOS
Most new computers have an easy BIOS upgrade procedure: Just download the .exe file from the manufacturer's website, exit all programs, run the .exe, and it will do the job itself. work for you; then reboot. If your computer suddenly shuts down during the BIOS upgrade process, you won't be able to boot, so make sure you don't let your laptop's battery run out.
However, older computers may require you to set up a boot disk to upgrade the BIOS. You can download an application to configure USB, blank CD/DVD, or even a floppy disk to do this, or an ISO image file used in a disc burning application to create a BIOS upgrade CD. . Other systems will force you to copy a few files to the boot disk, restart and open the BIOS during startup (usually pressing a key for installation options), and change the boot order so the system finds The device boots before loading the operating system from the hard drive.
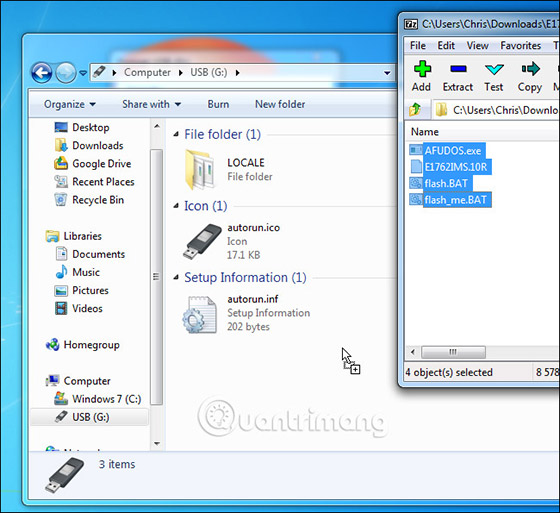
Some manufacturers offer the option to flash BIOS directly in their BIOS or as a special key press option when you boot your computer. You copy the BIOS file to the USB drive, restart the computer, then go to the BIOS or UEFI screen. From there, you select the BIOS update option, select the BIOS file copied to the USB drive and update the BIOS to the new version.
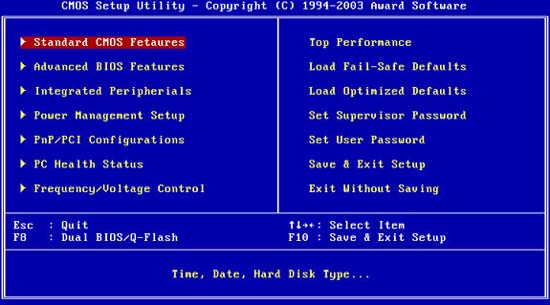
Usually users can access the BIOS screen by pressing the appropriate key while the computer is booting. It is usually displayed on the screen during the boot process and will be noted in the motherboard or PC manual. Common keys to access BIOS are usually Delete and F2. The process to access the UEFI setup screen may vary slightly on each computer.
There are also more traditional DOS-based BIOS flashing tools. When using those tools, you create a live DOS USB drive, then copy the BIOS flash utility and BIOS file to that USB drive. Then, restart your computer and choose to boot from the USB drive. In the minimalist DOS environment that appears after a reboot, you run the appropriate command, usually one similar to flash.bat BIOS3245.bin, and the tool will inject the new BIOS version into the firmware.
DOS-based flash tools are usually provided in the BIOS archive (downloaded from the manufacturer's website). If desired, users can download this section separately. Look for a file with the extension .bat or .exe.
Previously, this process was performed with floppy disks and bootable CDs. But on modern hardware, using USB is the most convenient way.
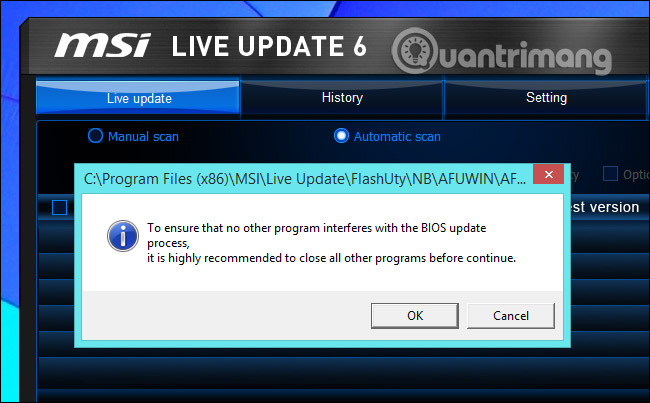
Several manufacturers offer Windows-based flashing tools. Users can run them on Windows desktop to flash BIOS and then reboot. Use of these is not recommended, and even if the manufacturer provides these tools, you should use them with caution. For example, MSI advises users to use the BIOS-based menu option instead of their Windows-based utility in the README file of the BIOS update used as an example in this article.
Flashing the BIOS from within Windows can lead to more problems. All software running in the background, including security programs, can interfere with the BIOS writing process in the computer, causing the process to fail and corrupt the BIOS. Any system crash or 'freeze' can also result in a corrupted BIOS. Safety comes first so you should use a BIOS-based flashing tool or boot into a minimalist DOS environment to flash the BIOS.
After running the BIOS flashing utility, restart the computer and load the new BIOS or UEFI firmware version. If there are problems with the new BIOS version, you can downgrade by downloading the old version from the manufacturer's website and repeating the flashing process.
Again, updating your computer's BIOS can provide many benefits, but it's important to understand the risks. Don't touch it without a clear, compelling reason to update the UEFI firmware.
How to update BIOS on Lenovo devices
In addition to the general way above, for each computer line, there will be separate ways to update BIOS.
Lenovo BIOS auto-update tools
Lenovo System Update : Lenovo System Update is used to update and install drivers, BIOS, and Lenovo applications. Lenovo System Update is supported on the following systems: ThinkPad, ThinkCentre, ThinkStation, and Lenovo V, B, K, E-Series.
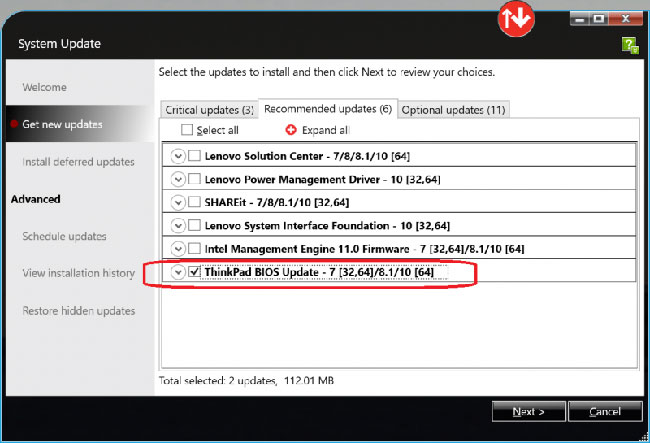
Note : Lenovo recommends that you run Windows Update before using Lenovo System Update.
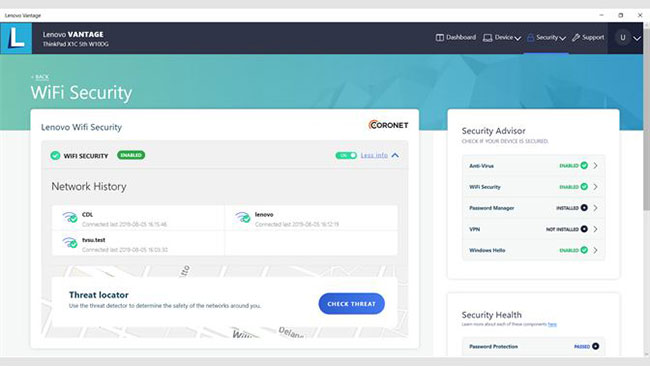
Lenovo Vantage : Lenovo Vantage makes it easy to get the most out of your device. This tool includes BIOS and driver update functions.
Use Winflash to install BIOS updates
Note : Depending on the system, there may be different download options available.
1. Download the latest BIOS for Windows Desktop for easier use. Use these steps to find and download the BIOS:
- Open the Lenovo support website ( support.lenovo.com ).
- Enter the system type or product name.
- On the product page, click Drivers & Software .
- Filter by BIOS/UEFI and select the corresponding operating system information.
- Download and install the BIOS following the readme file.
2. Right click on the BIOS flash package and select Run as administrator .
Note : Double-clicking the BIOS flash package will not execute this program in Windows Vista.
3. Windows will display a self-extracting window, click the Install button.
4. Click the Flash BIOS button.
5. A warning window will be displayed to remind the user to connect the system to a charger and provide other flash information.
6. Click the OK button. The BIOS update flash program will run automatically.
Note : Please wait until the BIOS update flash program completes the installation process.
7. When the BIOS update is complete, the system will automatically reboot.
How to update BIOS on HP devices
On your HP computer, first go to HP Software & Driver Downloads. You will then need to determine the product's type and serial number. Click the product type and enter the serial number by allowing HP to detect the product or enter the serial number manually, if you already know it.
Find the product's serial number
There are two ways you can find the HP product serial number: On the product label or using the system's Control Panel.
Option 1: Find the serial number on the product label
Search in one of the following locations:
- On the bottom or back edge of the laptop
- Inside the battery compartment is removable
- On the underside of the stand
- On the back of the screen on your PC
- On the side of the desktop
Option 2: Find the serial number from Control Panel
1. Open Command Prompt.
2. In the window, type wmic bios get serialnumber and press Enter.
3. View system information and update BIOS
Once you have entered the serial number on the product identification page, select the operating system as 'Windows 10'. Once here, you will be able to find the product's driver and software information.
Note : Only install BIOS updates from HP. Improperly downloading BIOS updates can affect your computer's ability to boot and endanger memory.
If your computer is managed by an IT company, contact them directly to ensure you have the BIOS installed correctly. If you have questions about software updates, please chat with HP technical support.
If Windows can boot
1. Open the full BIOS tab to find BIOS version history and any available updates. If there is a higher version number compatible with your processor, continue with steps 2 - 9.
Note : If no updates are listed, your computer does not require a BIOS update.
2. If you see an updated version of the BIOS, click Download. Follow the HP Download and Install Assistant prompts to save the file to your computer. Do not select the option to run the file.
3. Close any open applications.
4. Temporarily disable antivirus software by searching for "security" in Windows search. Then, open Security and Maintenance settings and click Security to access antivirus protection settings.
5. Navigate to the folder or desktop where you saved the BIOS update file.
6. Once you have found the file name, double-click to start installing the BIOS update.
Note : Do not turn off or restart the computer until the update process is complete.
7. Once the update is complete, follow any additional instructions on the screen, and then restart your computer.
Note : If '251' or CMOS error appears after reboot, refer to: How to fix CMOS Checksum error to resolve the issue.
8. If BitLocker is suspended, search for 'bitlocker' in Windows, then click Resume Protection .
9. Reactivate anti-virus software.
If Windows cannot start
If you cannot start Windows on your computer, you will need to use a second computer with Internet access to get the BIOS update.
Set up BIOS file on USB:
1. Using a second computer, follow steps 1 - 2 above using the original computer to fill in the software information.
2. In the InstallShield Wizard window , click Next.
3. Select I accept the terms in the licensing agreement , then click Next.
4. Select Create Recovery USB flash drive , then click Next.
5. Select your USB from the list, then click Next.
6. When the BIOS file is copied to the USB, the message 'The recovery flash drive was created successfully' will appear, click Finish.
Update BIOS on original computer:
7. Initially turn on the computer and immediately press the Esc key repeatedly, about once per second, until the Startup menu opens.
8. Press the F2 key to open the HP PC Hardware Diagnostics UEFI menu .
9. Plug the USB containing the BIOS update file into an available USB port on the original computer.
10. Click Firmware Management or BIOS Management .
11. Click BIOS Update.
12. Click Select BIOS Image to Apply .
13. Click HP_TOOLS-USB Drive , then select Hewlett-Packard.
14. Click BIOS, then select CURRENT or NEW.
15. Select the BIOS update file that matches the System Board ID.
16. Click Apply Update Now and enter the admin password if prompted.
If the BIOS update works, the computer will automatically restart after 30 seconds to complete the update process.
If the BIOS update fails, you will see an error message indicating that the update was not performed. The system can run BIOS restore after reboot. Do not restart or shut down the computer manually if the update fails.
As with any major software change, if you are unsure whether you should complete an update or reboot your system, consult your IT company or support team to help you figure it out. resolve any technical issues.
How to update BIOS on Dell devices
Dell recommends that you update the BIOS as part of a scheduled update cycle. BIOS updates can often fix problems, add features, or do both in the BIOS. BIOS updates include feature improvements or changes that help keep system software up to date and compatible with many other computer modules (hardware, firmware, drivers, and software). BIOS updates also provide security updates and increased stability.
Dell provides an easy-to-use, self-installing BIOS update utility. Important BIOS updates are also performed through Windows Update.
WARNING:
- Make sure to back up your data before attempting to update the BIOS. Errors during the BIOS update process can lead to possible data loss.
- Disconnect devices such as external USBs, printers, and scanners before updating the BIOS on the computer.
- Dell laptop batteries must be charged at least 10% before you begin updating the BIOS. Dell recommends that you run your laptop on AC power before continuing with the update process.
CAREFUL:
Turn off BitLocker before continuing to update the BIOS on your Dell computer. If BitLocker is not frozen, the next time you restart your computer, it will not recognize the BitLocker key. You will be prompted to enter the recovery key to proceed, and the computer will request the recovery key after each restart. If the recovery key is unknown, this could lead to data loss or unnecessary reinstallation of the operating system.
NOTE:
- You must be logged in with admin rights to install BIOS updates on your Dell computer.
- You must be logged in as admin to download and install the SupportAssist application on your Dell computer.
- Before you begin, temporarily disable BitLocker protection in Windows. BitLocker protection automatically resumes when the computer is restarted.
1. Browse to:
https://www.dell.com/support/drivers2. Identify Dell computers in one of the following ways:
- Click Download & Install SupportAssist to automatically detect your Dell computer. Follow the on-screen instructions to install Dell SupportAssist .
- Enter the Service Tag, Express Service Code or serial number of your Dell computer and click Search.
- Click Browse all products to manually select your Dell computer from the catalog.
3. Select the operating system installed on the computer.
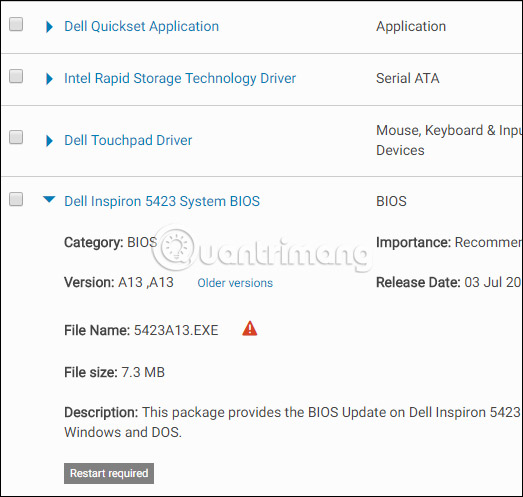
4. In Category , select BIOS.
5. Locate the latest system BIOS.
6. Click Download and save the file to your computer.
7. Using File Explorer (also known as Windows Explorer), browse to the location where the downloaded file is saved.
8. Double-click the downloaded BIOS setup file and follow the on-screen instructions to complete the installation process.
9. The computer will reboot and complete the BIOS update process.
How to update BIOS on ASUS devices
There are two operating environments for updating BIOS for ASUS devices:
- Update BIOS in Windows
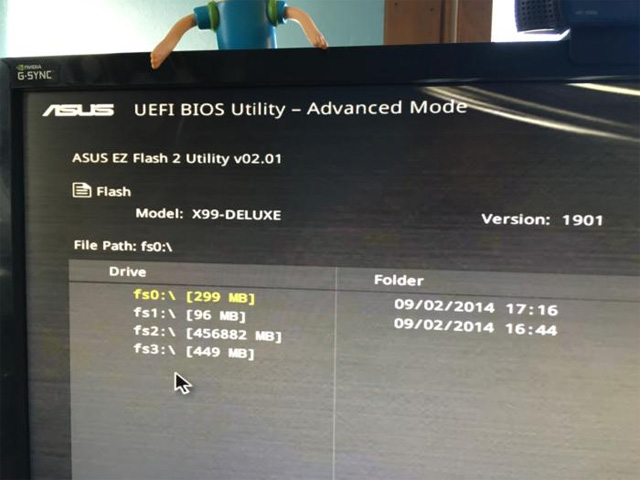
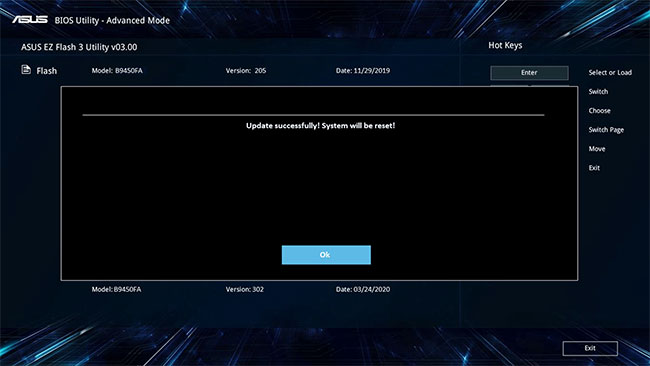
- Update BIOS in BIOS Utility (using the EZ Flash tool)
Because using BIOS Utility to update BIOS is a bit complicated, this article will only introduce how to update BIOS in Windows.
Before starting the BIOS update process, you need to download the related utility. There are two methods to download.
- Download the BIOS update utility from MyASUS
- Download the BIOS update utility from the ASUS support website
Note : If you encounter any problems during the BIOS update process, please contact the ASUS service center.
Method 1: Download the BIOS update utility from MyASUS
1. Type and search for MyASUS in the Windows search bar, then click New.
2. In MyASUS, select Customer Support .
3. Select Live Update , then select Latest.
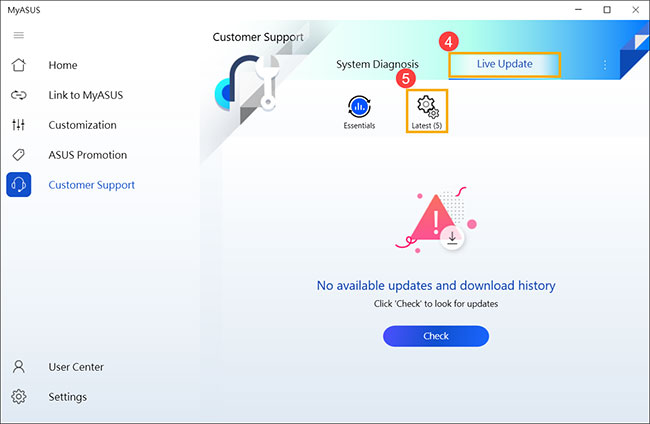
Note : If there is no Live Update tab in MyASUS, your computer does not support this function, please proceed to method 2.
4. Search for BIOS Update for Windows in the BIOS Update(Windows) category. Then, click Download.
Method 2: Download the BIOS update utility from the ASUS support website
1. Visit the ASUS support website with the laptop model name.
2. In the support page, search for BIOS Installer for Windows located in the BIOS Update (Windows) category . Click Download. If you don't see BIOS Installer, go to the next step.
3. Search for Windows BIOS Flash Utility (also known as WinFlash) located in the BIOS-Utilities category . If you see the file, click Download.
How to use BIOS Installer to update BIOS
1. After downloading the BIOS Installer file, right-click on the file and select Extract All .
If the downloaded file type is Application (.exe) , please go to step 3.
2. Select Destination and click Extract.
3. Once the extraction process is complete, go to the folder and double-click BIOS Update application .
4. If the file name is BIOS Installer , double-click BIOS Installer application .

5. The setup wizard will guide you through the BIOS update process, click Next.
6. Select I accept the agreement , then click Next.
7. Click Next.
8. Click Install.
9. Select Yes, restart the computer now , then click Finish. The computer will automatically reboot and complete the BIOS update installation process.
Note : Make sure the device is plugged in when updating the BIOS. Also, please do not force shutdown during the update process to avoid any problems.

10. After the computer can access Windows, it means the BIOS has been updated successfully.
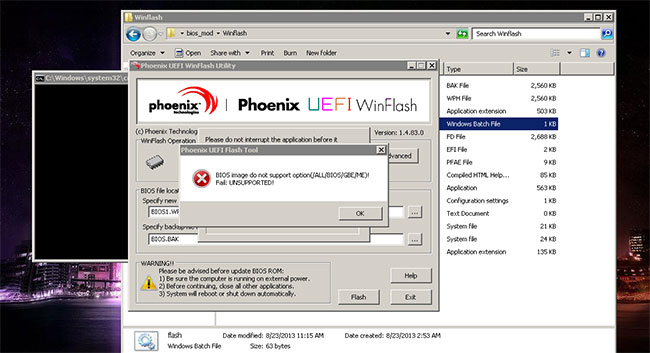
How to use WinFlash to update BIOS
How to install the WinFlash utility
1. After downloading the WinFlash file, right-click on the file and select Extract All .
2. Select the destination and click Extract.
3. Once extracted, go to the folder and double-click Setup application.
4. The installation wizard will guide you through the WinFlash installation process, click Next.
5. Select I Agree , then click Next.
6. Click Next.
7. Click Next.
8. Click Close. WinFlash has been installed successfully.
How to perform BIOS update via WinFlash
1. Type and search for WinFlash in the Windows search bar, then click Open.
2. Click Next.
3. WinFlash provides two ways to download BIOS files, users can choose the appropriate way. Select one of the two icons below to move to the next step.

Note : The Get BIOS from the Web option only supports Intel Huron River platforms and above with BIOS versions released after January 1, 2014.
If you choose Get BIOS from Device , you first need to download the BIOS file to your computer.
Tip : If the downloaded BIOS file is compressed, you must decompress the BIOS file before importing it.
4. After receiving the new version BIOS file, click Update.
5. Please be patient until the BIOS update is completed.
6. Click Exit. The computer will automatically reboot and continue the BIOS update process.
Note : Make sure the device is plugged in when updating the BIOS. Also, please do not force shutdown during the update process to avoid any problems.
7. When the computer can access Windows, it means the BIOS has been updated successfully.