Table of Contents
Compatibility note: This tutorial uses Photoshop CS6. The core tools remain familiar in newer releases, although panel locations and some options may differ.
In previous lessons, we learned how to create and save files , as well as keyboard shortcuts in Photoshop CS6 . Next, let's learn how to crop images in Photoshop CS6.
Cropping images is one of the basic operations that every Photoshop user must learn when starting out. Let's learn how to crop images as desired, according to a given aspect ratio, and how to crop circular and square images in Photoshop. Additionally, we will also learn about image manipulation, such as cutting people/objects out of an image and merging them into another image.
Instructions on cropping images using the Crop tool.
Crop images in CS6 to your desired size using the Crop Tool.
The Crop Tool is a tool that allows you to crop images to a specific size or customize them as you wish. First, let's learn how to freely crop an image using the Crop tool.
Step 1: After opening the file you want to crop, click the Crop icon on the toolbar or press the Shift + C key combination.
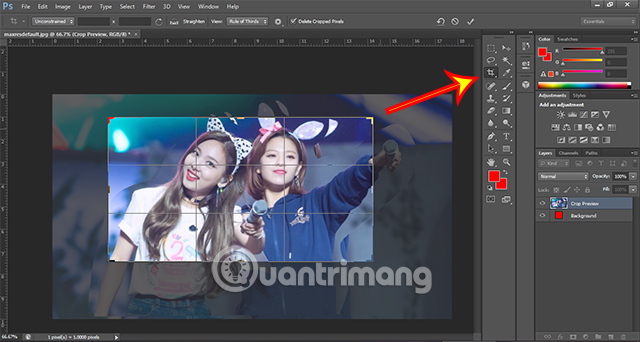
Step 2: Left-click on the starting point where you want to crop the image and drag it to the end point of the image you want to crop.
Please note that the cropped image will be measured diagonally from the starting point to the ending point.
Step 3: After selecting the start and end points, the selected area to be cut will be lighter than the rest.
If you want to adjust the cropped image, you can move your mouse to the corners of the image to customize it to your liking.
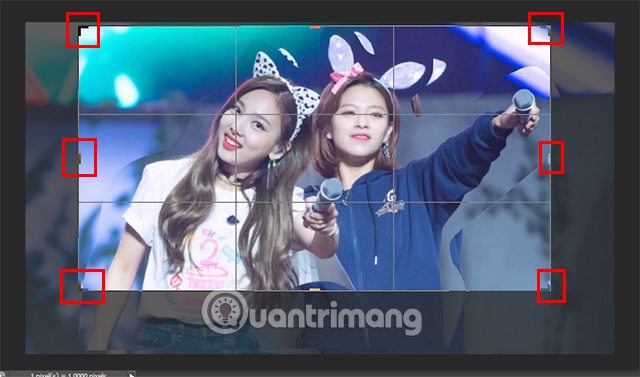
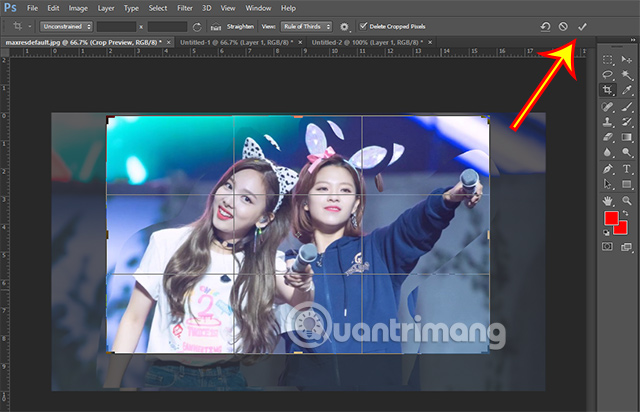
Step 4: After customizing the desired cropped portion of the image, click the checkmark icon (✓) on the toolbar or press Enter to apply the changes.
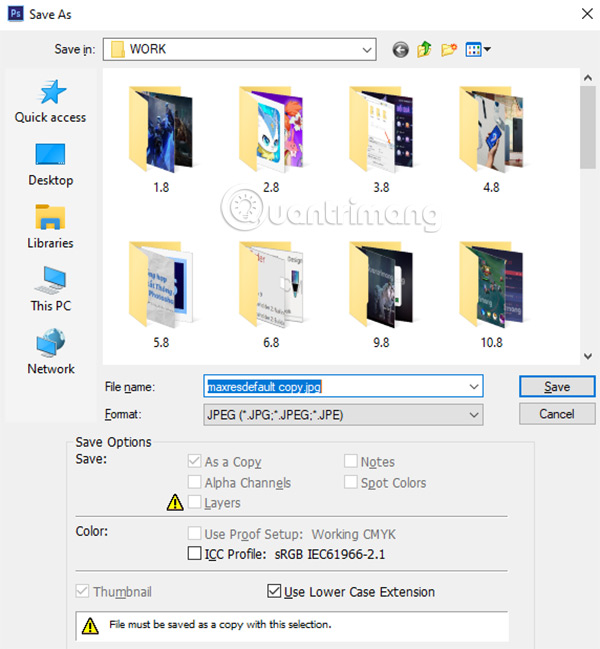
Step 5: Finally, you can press Ctrl + Alt + S to save the image in Save As mode .
The final image you will get will look like the one below.

Crop images in CS6 to size using the Crop Tool
This tool not only allows you to crop images freely but also to crop images according to predefined sizes and aspect ratios.
To crop an image to the desired aspect ratio, before cropping, you need to right-click on the image and select the desired size, for example, 1:1, 4:5, 2:3 , and the most common 16:9.
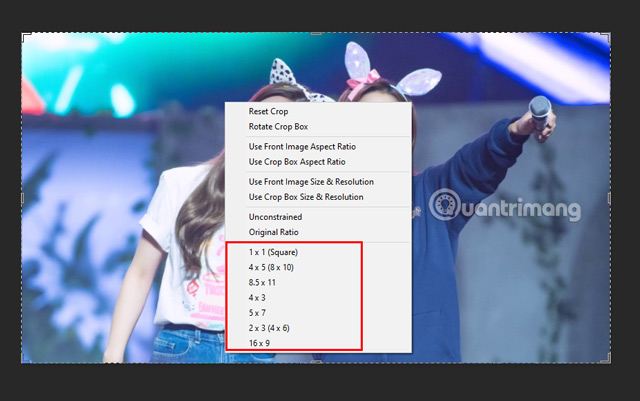
Next, you perform the image cropping operations as usual.
How to crop an image using the Marquee Tool
In addition to cropping images using the Crop tool, users can also use the Marquee Tool to crop images into various shapes. The content below will guide you on how to crop an image into a circle; for squares and rectangles, you can do the same.
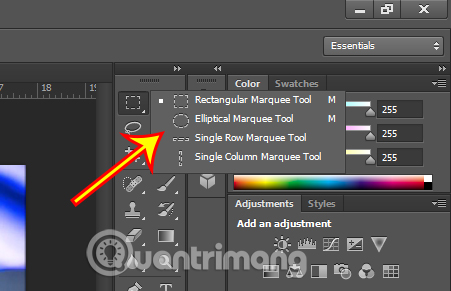
Step 1: Right-click on the Marquee Tool in the toolbar, and you will see the following options:
- Rectangular Marquee Tool: Creates square or rectangular selections.
- Elliptical Marquee Tool: Creates circular or elliptical selections.
- Single Row Marquee Tool: Creates a single-row selection.
- Single Column Marquee Tool: Creates a selection of a single column.
Select the Elliptical Marquee Tool to create a circular area.
Step 2: Press and hold the Shift key and the left mouse button simultaneously, then use drag and drop to create a circular selection area.
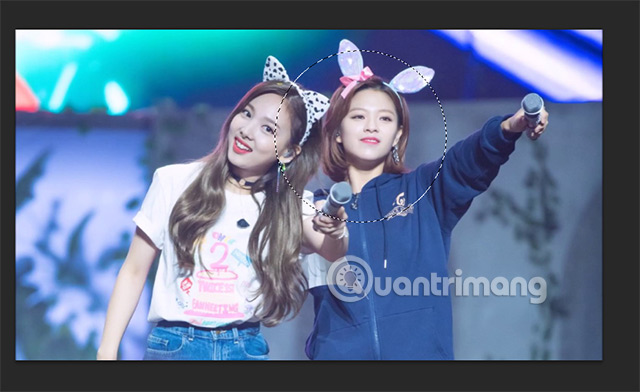
Note: If you do not press the Shift key, the selected image area will be an ellipse.
Step 3: After creating the selection, release the Shift key and continue using the left mouse button to move the selection to the area where you want to crop the image into a circle.
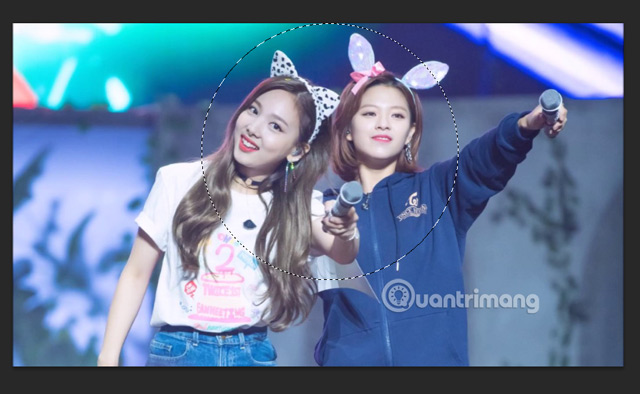
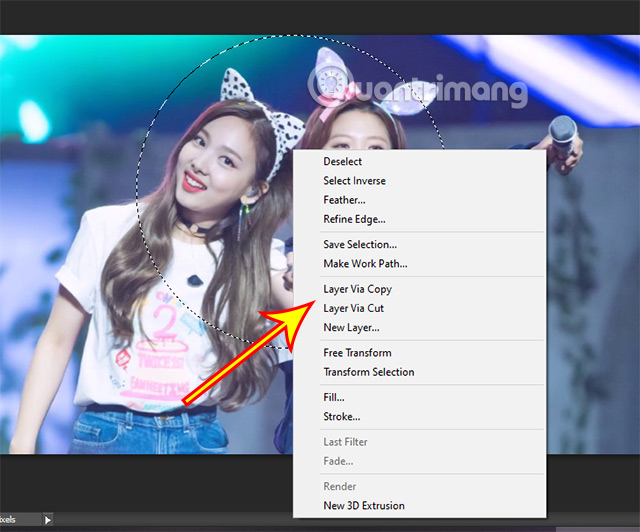
Step 4: Right- click on the selected area and choose Layer Via Copy.
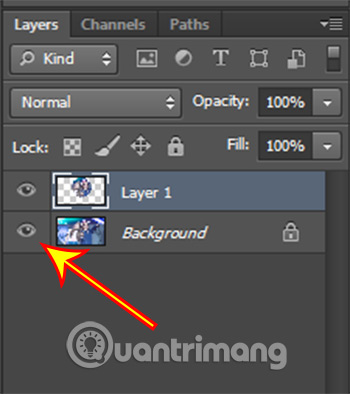
Step 5: Immediately after, the selection will be moved to a new layer . Click the eye icon in the original image to hide it.
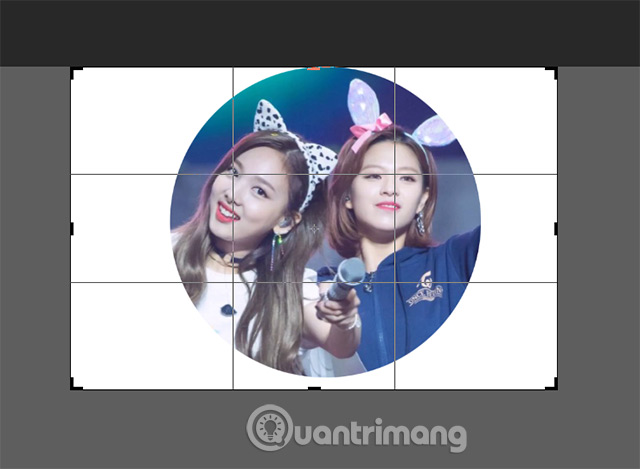
Step 6: Use the Crop tool to resize the edges of the image as shown in the illustration below.
Step 7: Press the Ctrl + Alt + S key combination to save the image.
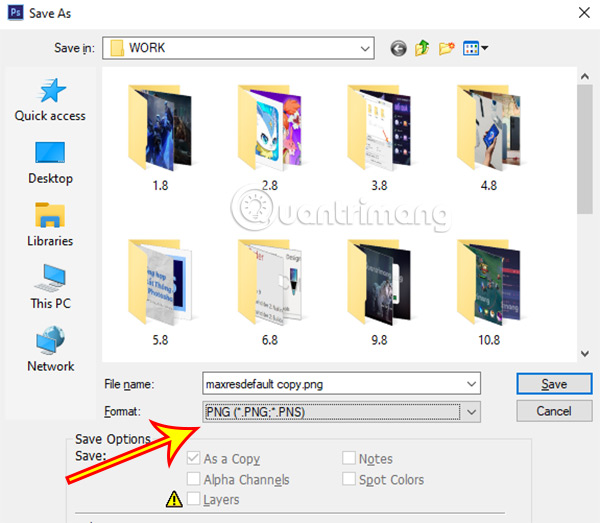
Note: You should save the image in PNG format so that the output image has no background. If you choose a different format, the background will be square or rectangular instead of circular.
The result we obtained is shown in the image below.

Through this article, you have surely grasped the basic image cropping operations in Photoshop CS6. In the following articles, we will explore more advanced and detailed image cropping and merging techniques.
Related Articles
 How to Crop Photos in Photoshop8 minutes read
 How to Crop an Image into a Circle in Photoshop4 minutes read
 How to Crop Images in Excel4 minutes read
 How to Remove Background Online, No Need to Install Photoshop5 minutes read
 How to Quickly Cut an Image into Two Parts4 minutes read
 In This Way, Resizing Images in Bulk Will Not Take Much Effort as3 minutes read
Reader Comments 0
Sign in with email or Google to join the discussion.