Compatibility note: These steps use the Photoshop CS6 interface. Tool names are broadly similar in newer Photoshop releases, but panel locations and available options may differ.
In this tutorial, we will design a simple Christmas card with decorative snowflakes using Adobe Photoshop CS6.
To begin, create a new document ( Ctrl + N ) in Adobe Photoshop CS6 with dimensions of 1920px x 1200px ( RGB color mode ) at a resolution of 72 pixels per inch . Create a new layer, click the Add a layer style icon at the bottom of the Layers panel , and select Gradient Overlay .
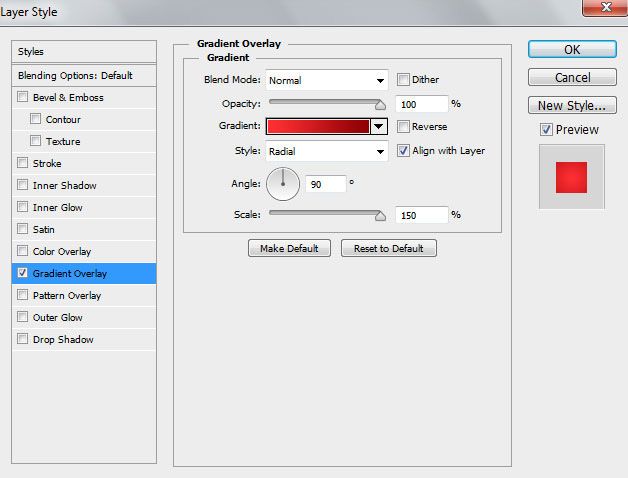
Click the color bar to open the Gradient Editor and set the color stops as shown. Press OK to close the Gradient Editor dialog box .
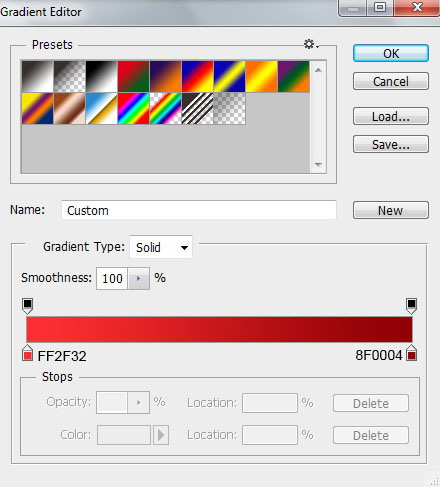
We have the following background:

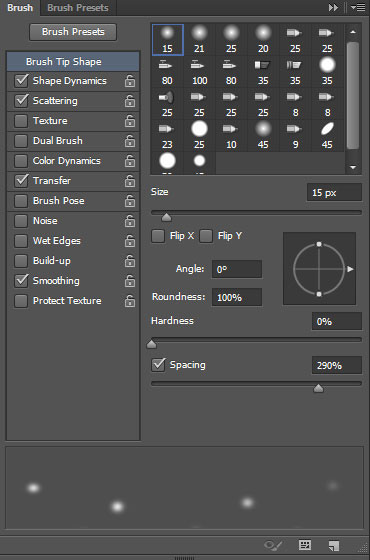
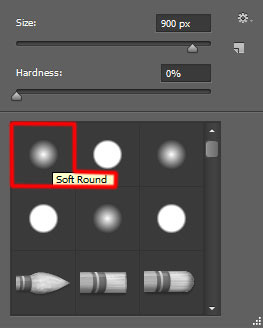
Create a new layer and select the Soft Round brush from the Brush Tool (B) . We need to customize the brush in the Brushes panel (F5), select Brush Tip Shape . Click and drag any slider to change the size, spacing, and angle of the brush as shown. The Preview window will show the changed brushstrokes.
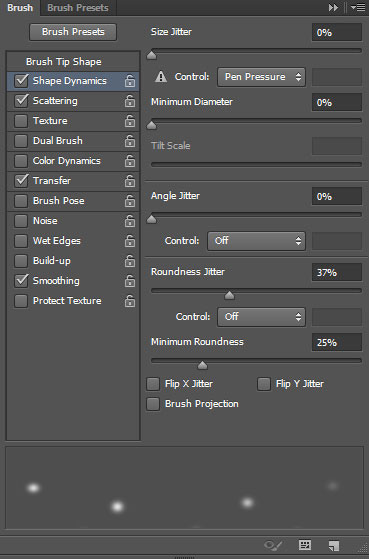
Go to Shape Dynamics and apply the following settings:
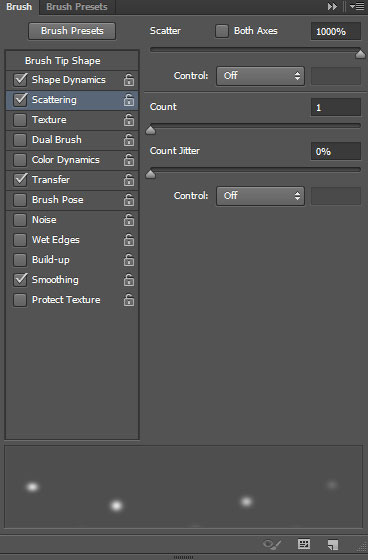
Apply Scattering :
Select Transfer:
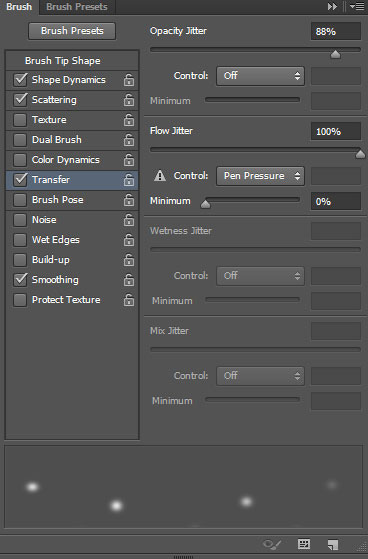
Now use this white brush to represent the snow.

Next, download a set of custom shapes called Decorative Snowflakes Shapes .
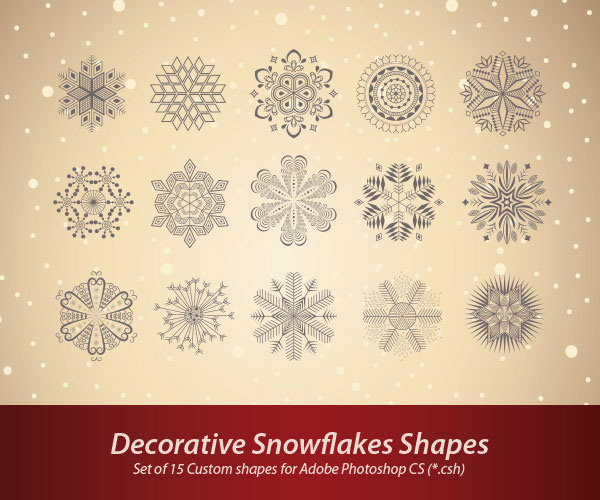
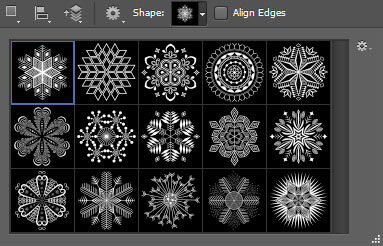
Create a new layer and select the Custom Shape Tool (U) in the Tools bar . In Options , click Shape to open the selection menu. Find the next shape at the bottom of the menu and then double-click a thumbnail to select it.
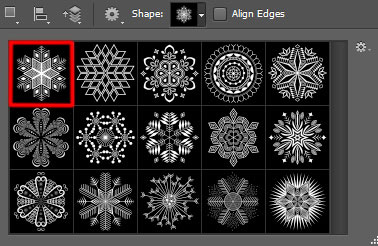
Click and drag to draw the snowflake in color #EE282B .

Next, create multiple copies of the layer containing the snowflakes and select the Free Transform command (Ctrl + T) to resize the copies and rotate the elements, positioning them as shown in the following image:

Group all the red snowflake layers together (press CTRL to select the necessary layers and hold down the left mouse button while dragging the selected layers to the Create a new group icon at the bottom of the Layers panel ). Set the Fill to 39% for this new group.

Next, we will draw a rectangle. Apply the Rectangle Tool (U) to draw the rectangle and insert some anchor points at the top, bottom, and middle. Use the Add Anchor Point Tool and Convert Point Tool to make the necessary modifications. The rectangle color is #D70010 .

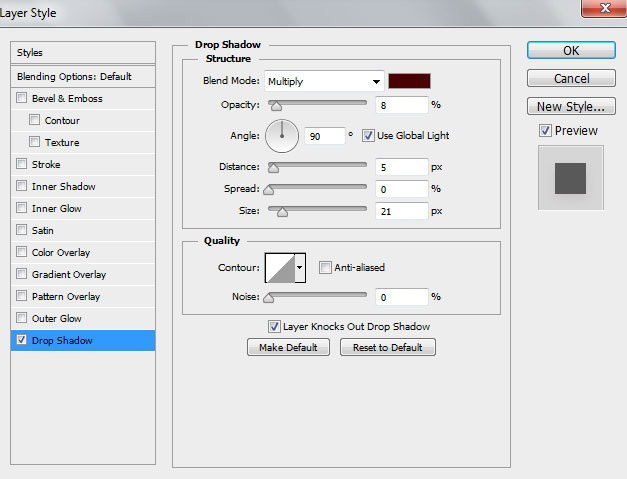
Click the Add a layer style icon at the bottom of the Layers panel and select Drop Shadow .
We now have the following result:

Darken the edges of the rectangle by creating a new layer and selecting the Soft Round brush to paint the edges of the rectangle with the color #99161A.
We now have the following result:

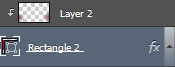
Hold down the Alt key (Windows) or Option key (Mac OS) and click between the brush layer and the rectangle in the Layers panel to create a clipping mask.
We now have the following result:

Create a copy of the rectangle layer and set its Fill to 0% .
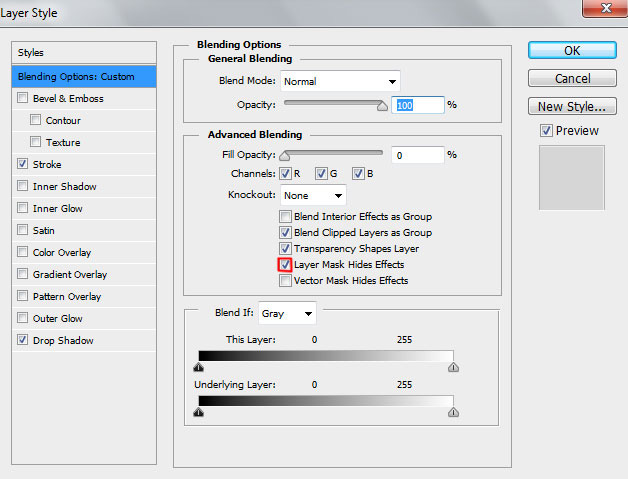
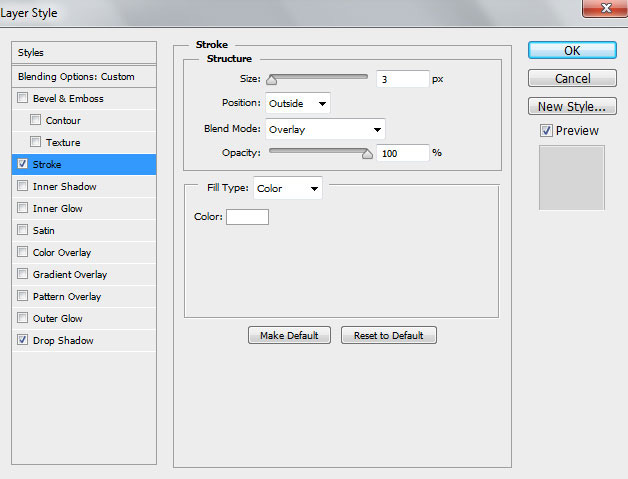
Click the Add a layer style icon at the bottom of the Layers panel and select Stroke .
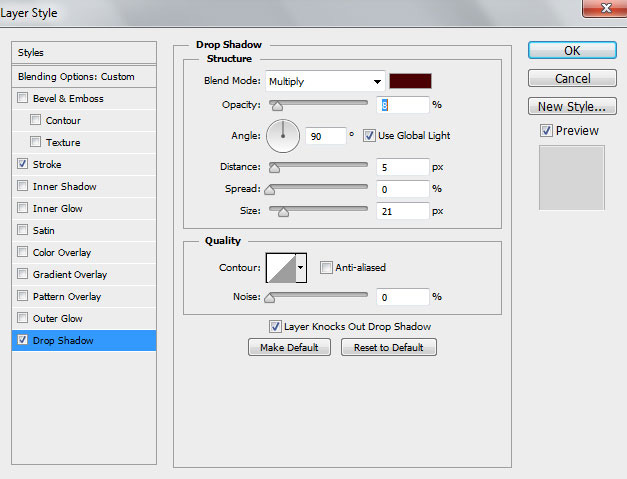
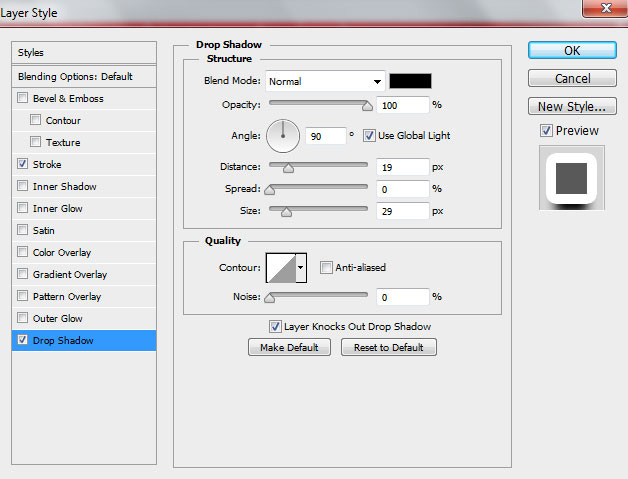
Add Drop Shadow :
We have the following result:

Insert a mask on the same layer by selecting Add layer mask in the Layers panel and choosing a black Soft Round brush.
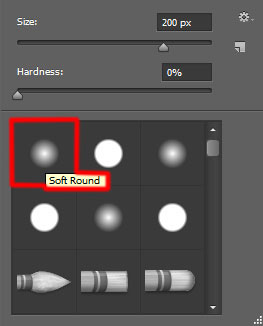
Paint within the mask to hide the edges of the rectangle in the same way as shown in the image below:

Use large snowflakes by creating a new layer and selecting the Custom Shape Tool (U) from the downloaded snowflake set. This time, choose the color #910105 for the snowflakes.
We have the following result:

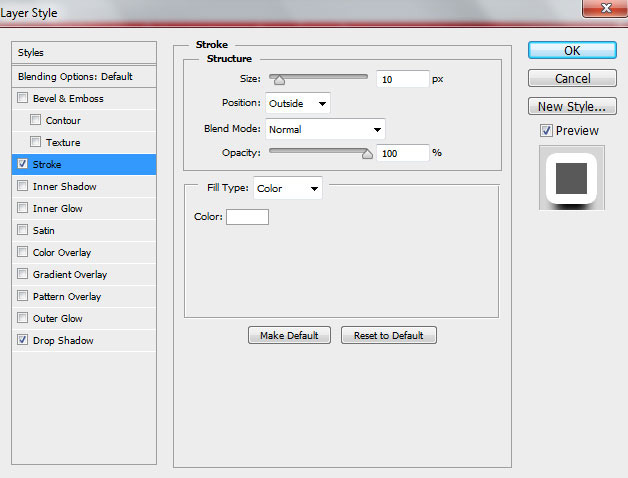
Apply Drop Shadow :
We have the following result:

Repeat the same process to add snowflakes to the background. The Blending Options > Stroke parameters must be selected according to the size of the snowflakes. The Drop Shadow parameters are the same.

Next, create the threads for the snowflake. Using the same Rectangle Tool (U) , draw the threads and place these new layers under the snowflake layer.
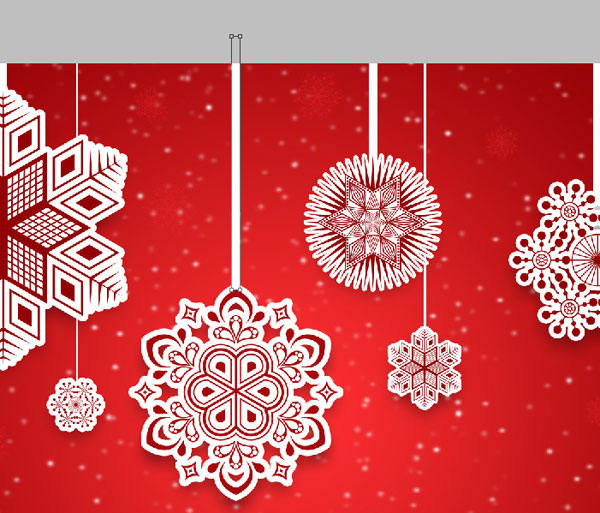
We have the following result:

Finally, insert text on the tag by selecting the Horizontal Type tool (T) . Choose the font, size, and color in the Character panel . Here, we use a font from FontSquirrel.
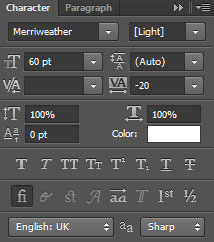
Click in the blank space and type "Merry Christmas". Press Enter to display the text.

Our Christmas cards are finished!
Download the free Layered PSD file .
You can find more information here:
- Photoshop CS6 Tutorial (Part 1): Creating Digital Images
- Photoshop CS6 Tutorial (Part 2): Creating Fashion Collage Images
- Photoshop CS6 Tutorial (Part 3): Creating Artistic Image Manipulation with Exposure Effects
- Photoshop CS6 Tutorial (Part 4): Creating a Dissolving Effect
Related Articles
 Instructions for Using Photoshop CS6 (Part 5): Create Christmas7 minutes read
 How to Create Snowflakes in Photoshop5 minutes read
 Photoshop: Create Your Own Christmas Cards6 minutes read
 Instructions for Using Photoshop CS6 (Part 7): Creating Christmas13 minutes read
 Photoshop: Create a Christmas Card with a Decorative Sphere5 minutes read
 Guide 22 Ways to Make Beautiful Christmas Cards and Very Easy5 minutes read
Reader Comments 0
Sign in with email or Google to join the discussion.