The fastest ways to take screenshots on a computer or laptop.
There are many ways to take screenshots on a Windows computer, including using keyboard shortcuts or third-party software..
There are many ways to take screenshots on a Windows computer, including using keyboard shortcuts or third-party software. Below are a few suggestions for taking screenshots.
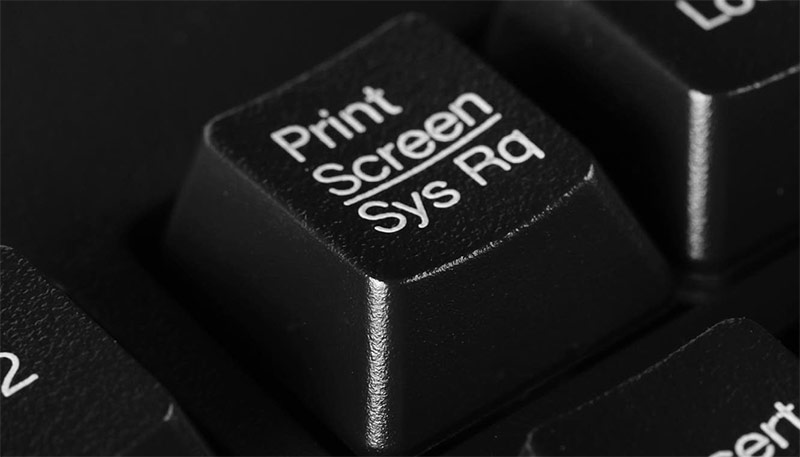
Use the Print Screen (PrtScn) key on Windows.
The Print Screen key, abbreviated as PrtScn, is the quickest way to capture your entire computer screen. When you press this key, all the content displayed on the screen is saved to the clipboard. You can then paste the image into software like Word , Paint , or email using the Ctrl + V key combination. However, the image won't be automatically saved as a file, so you'll need to paste and save it manually if you want to use it later. This is a common method and doesn't require installing any additional software.
The Windows key + PrtScn key combination
The Windows + PrtScn key combination allows you to capture the entire screen and automatically save the image. After pressing this key combination, the screen will briefly flash to indicate that the image has been captured. The image file will be saved to the Pictures > Screenshots folder on your computer in PNG format.
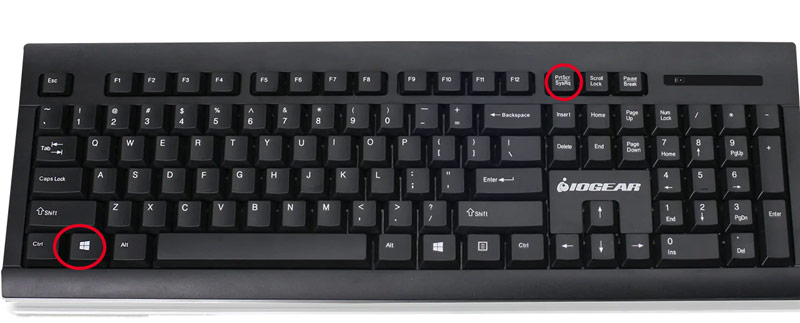
This is an extremely convenient method if you need to take many screenshots without manually pasting them, unlike the method using only the PrtScn key. The images are saved in order, making them easy to manage and retrieve when needed.
Press Alt + PrtScn to capture the currently open window.
If you only want to capture the active program window without including the entire screen, the Alt + PrtScn key combination is the appropriate choice. After pressing this key combination, the contents of the currently displayed window are copied to the clipboard.
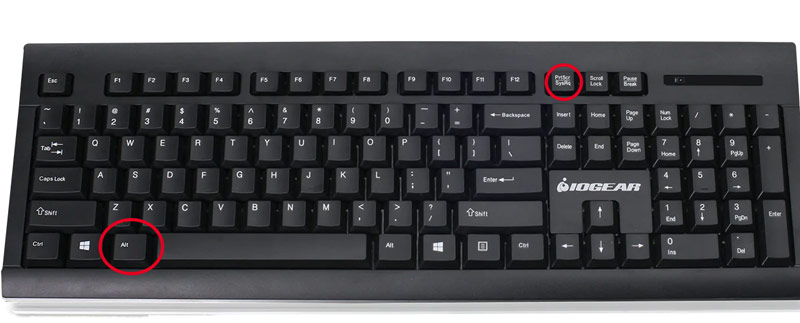
You can paste the image into Paint or Word to save it. This saves you time cropping the image after capturing it, especially useful when you need to illustrate a specific software or window. There are also some less commonly used capture methods listed below:
- Windows key + Alt + PrtScn: This key combination will take a screenshot of the active window (similar to Alt + PrtScn), but instead of saving it to the clipboard, the image will be saved directly to the "Videos" > "Captures" folder on your computer.
- Fn + PrtScn: On many laptops, especially compact or ultrabook models, the Print Screen key may be integrated with another function key. You need to press the Fn (Function) key in addition to activate it.
- Windows Key + Vol Down (Volume Down Button): This shortcut only works on Windows tablets or 2-in-1 hybrid devices. It will capture a screenshot of the entire screen and save it directly to the "Screenshots" folder.
Windows + Shift + S: Snip & Sketch Tool
When you press the Windows + Shift + S key combination , the computer will launch the Snip & Sketch tool (or the new Snipping Tool on Windows 11 ). The screen will dim, and you can choose one of four capture styles: capture a rectangular area, capture a freehand area, capture the open window, or capture the entire screen.
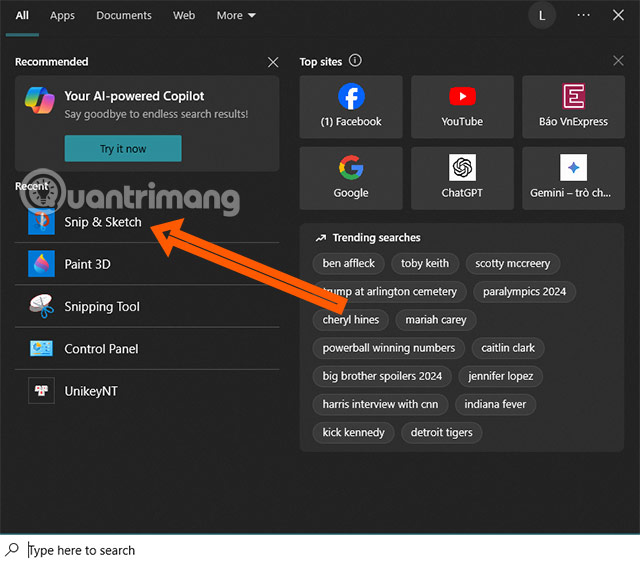
After selecting the area, the image will be saved to the clipboard, and you can make preliminary edits before saving. This is a flexible and convenient tool for office workers and students.
Use the built-in Snipping Tool in Windows.

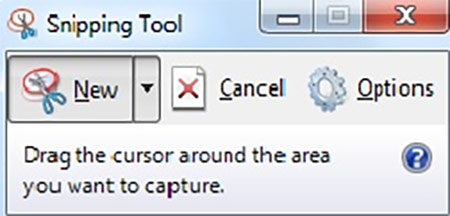
Select the Search tool and find Snipping Tool . Snipping Tool is a built-in tool in Windows versions that allows you to take screenshots in various modes. Users can choose to capture the entire screen, a specific window, or a custom area.
Additionally, after taking a screenshot, you can add notes, mark it up, and save it in various formats such as PNG and JPEG. The Snipping Tool interface is easy to use and suitable for beginners. On Windows 11, this tool has been updated with a screen recording feature.
Use the Game Bar (Windows + G) to take screenshots and record screen videos.
Game Bar is a tool designed by Microsoft specifically for gamers, but it's also very useful for general users. When you press the Windows + G key combination , the Game Bar interface will appear.

Here, you can click the camera icon to take a screenshot or the recording icon to record your computer usage. The files will be saved in the Videos > Captures folder. This tool works well on Windows 10 and 11 devices, especially with computers that have modern graphics cards.
Use third-party software.
Lightshot
Download Lightshot
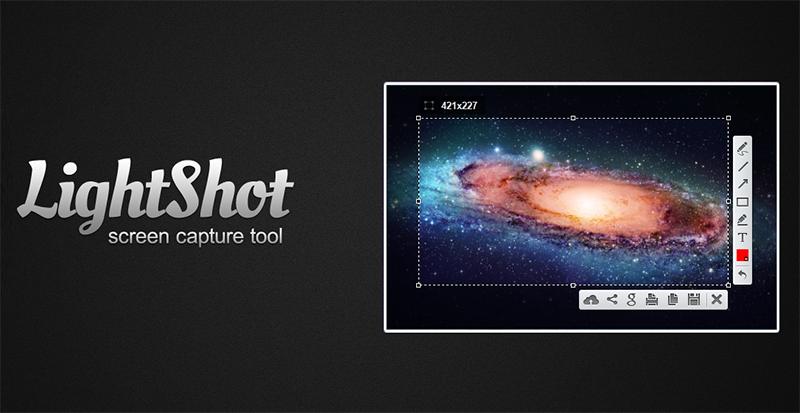
This is a lightweight and very easy-to-use tool. After installation, you simply press the PrtScn key, then select an area on the screen to capture. You can add text, arrows, or other shapes before saving or sharing the image. It's perfect for quick editing and sharing.
Greenshot
Download Greenshot
This is a free, open-source, and very powerful application. It supports various capture modes (full screen, window, area) and has a very powerful editor, allowing you to annotate, blur sensitive information, and export to many different file formats or applications.
ShareX
Download ShareX
This is a comprehensive and free tool for professional users. It can do much more than just take screenshots, including recording videos and capturing GIF animations. It has a long list of automatic post-capture options, such as automatically uploading images to cloud services (like Imgur) and copying URLs to your clipboard.
There are many ways to take screenshots on Windows, but the methods above should be sufficient for your needs. If you prefer more customization, you can use third-party software. If you don't frequently take screenshots, you can simply use the keyboard shortcuts available on your computer.