The easiest and fastest steps to take screenshots of Windows and MacBook computers
Taking a screenshot of the computer screen is one of the basic and useful operations for laptop users . If you do not know how to take screenshots of Windows and MacBook computers the easiest way, follow this article!
1. How to take a screenshot of a Windows computer
The way to take screenshots in the article can be applied to all laptops such as Dell , HP , ASUS , Acer , Lenovo , LG , MSI ,.
Screenshot of Windows XP, Windows 7/8" laptop
Step 1 : You press the Print Screen (PrtSc) key on the computer keyboard .
Depending on the computer model, the Print Screen key has different symbols such as: PrtScn , Prnt Scr , Prt Sc , .

Step 2 : Select the Windows icon (Start Menu) > Enter Paint to search and open Paint software.
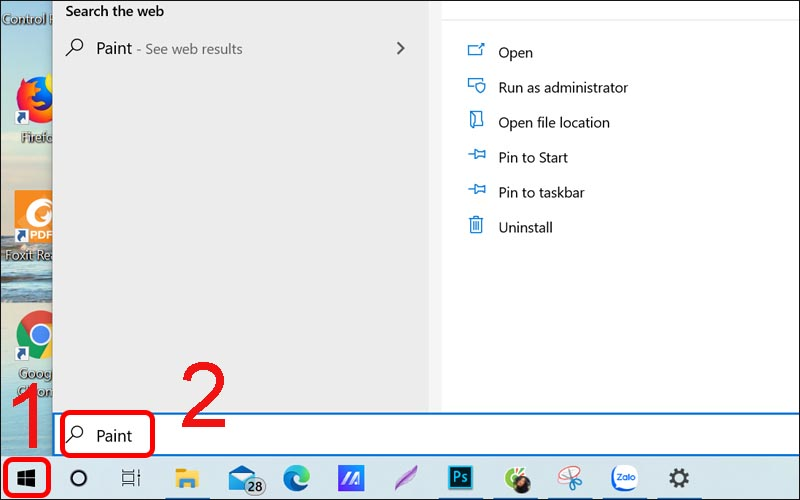
Step 3 : Paste the captured image into Paint just by pressing the key combination Ctrl + V .
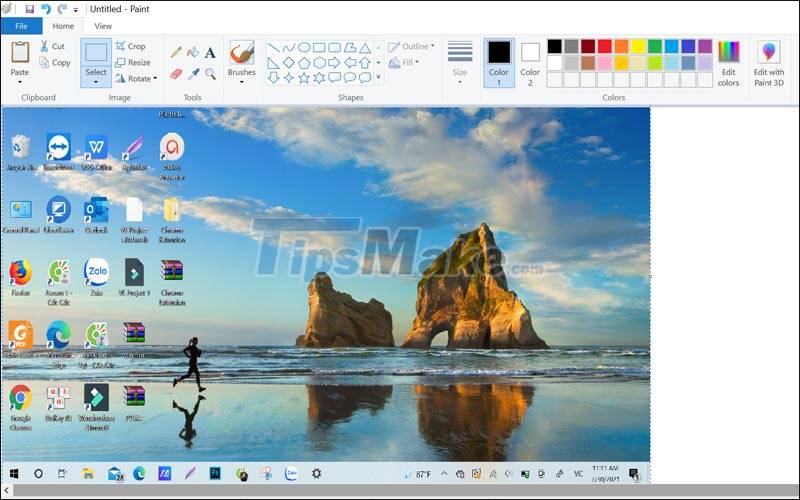
Note : You can edit photos or make arbitrary notes on the screenshot before saving!
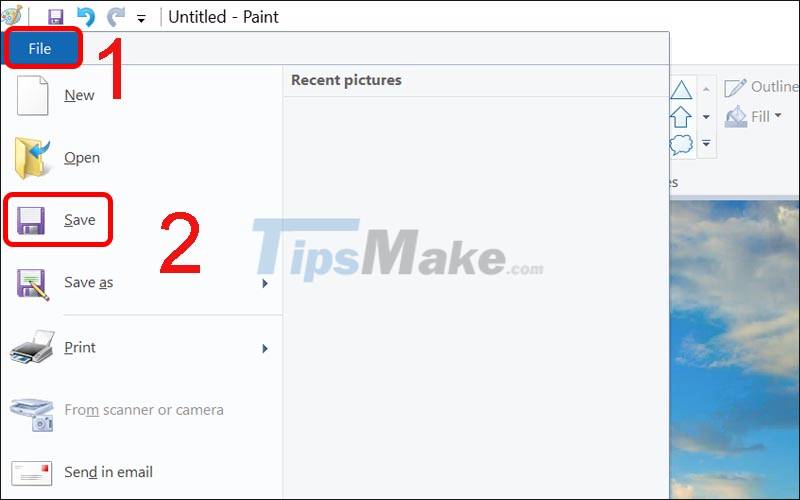
Step 4 : After finishing, you choose File > Select Save to save.
You can press Ctrl + S to quickly save the file.
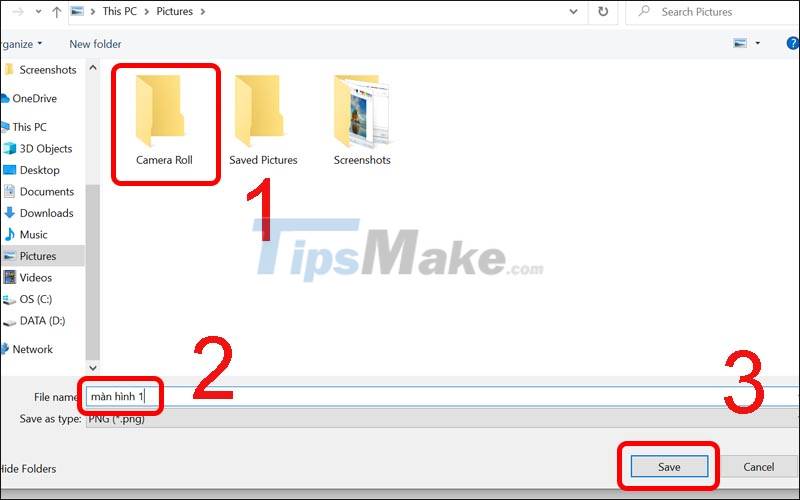
Step 5 : Finally, you choose the save location (Here I choose the Camera Roll folder as shown below) > Name the image file > Click Save to finish.
Self-saved screen capture on Windows 8, Windows 10 laptop
With laptops using Windows 8, Windows 10 operating systems , you can take a screenshot that automatically saves right away with just a simple operation. Doing:
Step 1 : Press the Windows + Print Screen (PrtSc) key combination on the keyboard.

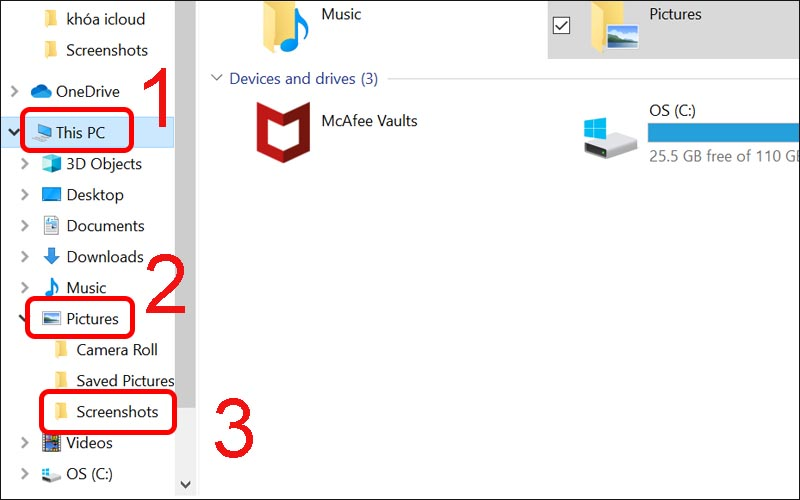
Step 2 : Go to My Computer (or This PC ) > Select the Pictures folder > Select Screenshots to review the screenshot you just took.
How to take a screenshot of any window on Windows
This way of taking screenshots allows you to capture any open window, displayed at the top of the computer screen without taking the entire image on the screen such as browser window, software window, taskbar ,.
Step 1 : Open the window you want to take a screenshot of.
Step 2 : Press Alt + Print Screen (PrtScr) key combination.

Step 3 : Paste the captured image into Paint just by pressing the key combination Ctrl + V .
You can also paste the screenshot on any editing window or chat window like Word , Messenger , Zalo , Line , Google Docs , .
Capture part of laptop screen with Snipping Tool
Snipping Tool is also a built-in tool on all versions of Windows, but most people know about its amazing screen capture capabilities. Follow along with the following steps:
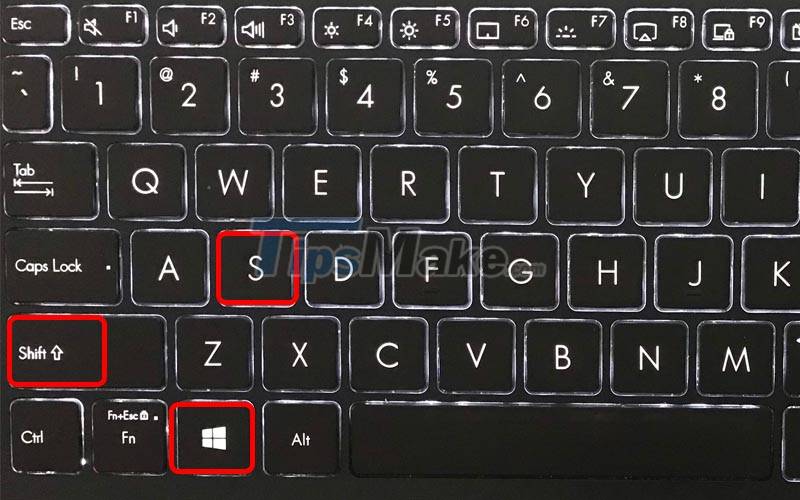
Step 1 : Open Snipping Tool by pressing Windows + Shift + S key combination .
In addition, you can open the Snipping Tool in different ways depending on the Windows operating system:
- For Windows 7 , Windows 10 : Click Start > Select Accessories > Select Snipping Tool .
- For Windows 8/8.1 : Type Snipping Tool in the search bar and then press Enter .
Step 2 : Take a screenshot in Snipping Tool.
Snipping Tool has 4 shooting modes as follows:
- Free-form Snip : Take a picture freely with the image border as the line you circle on the screen.
- Rectangular Snip : Capture the image into a rectangular frame.
- Window Snip : Take a screenshot of an open window.
- Full-screen Snip : Capture the full screen of your computer.

Snipping Tool has 4 screen capture modes
- With two types of shooting Free-form Snip and Rectangular Snip, you just need to zone the screen you want to capture, click to start and release the mouse when finished.
- If you want to highlight a certain part of the photo, just click on the pen icon on the toolbar and then zone it.
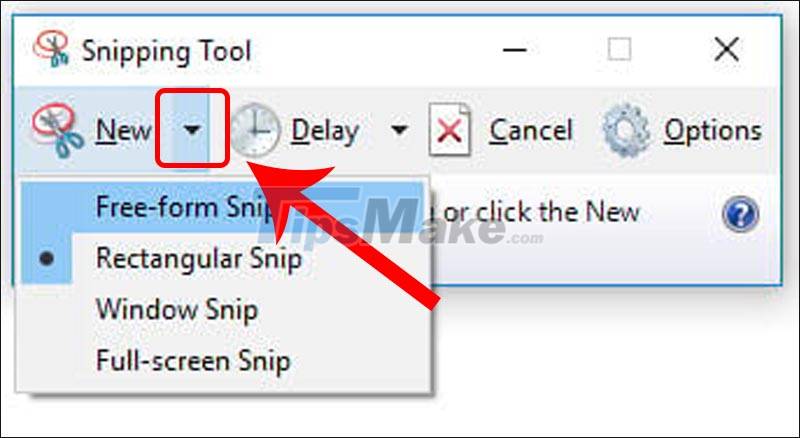
For Windows 7 : Select the capture mode by clicking the arrow to the right of the word New .
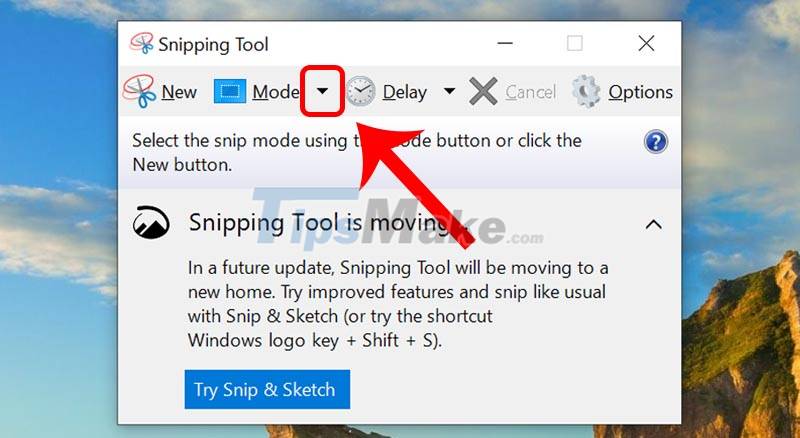
For Windows 10 : Select the capture mode by clicking the arrow to the right of the Mode item .
Step 3 : You can press Ctrl + V to paste in Paint if you want to continue editing.
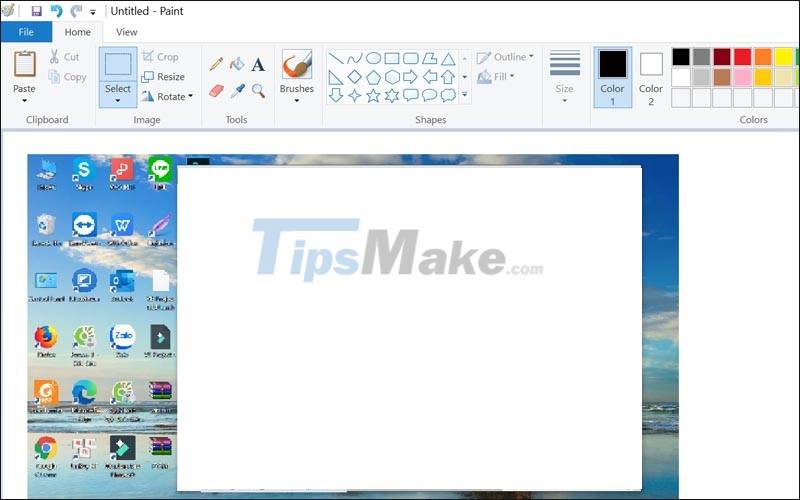
Step 4 : Press Ctrl + S to save the image.
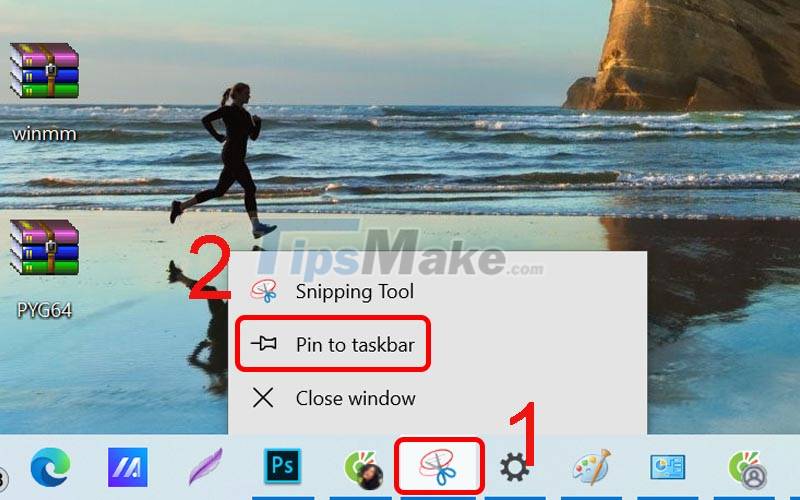
If you often have to take screenshots, you should pin the Snipping Tool on the Taskbar by right-clicking the Snipping Tool's icon on the Taskbar > Select Pin to taskbar .
2. How to take a screenshot on a MacBook
How to take a full screen screenshot of a MacBook laptop
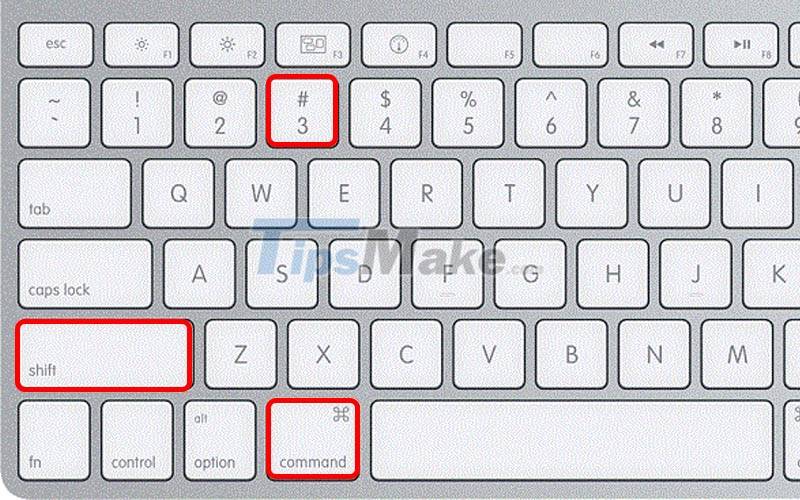
Press Shift + Command ( ⌘ ) + 3 . Now the screenshot will save automatically and display on the main screen.
How to capture part of laptop screen
Press Shift + Command ( ⌘ )+ 4 .
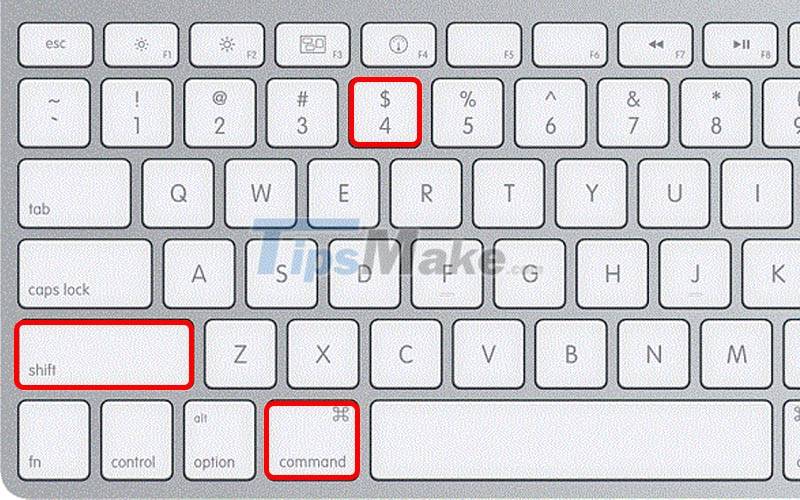
Now the mouse pointer will change to a + sign , you just need to hold down and drag and drop the cross to the end of the area to capture.

Move the drag cross to the end of the area to capture
Note :
- While dragging, hold Shift , Option or Space to change the way the selection moves.
- When you have selected the area to capture the screen, release the mouse or trackpad. To cancel, simply press the Esc key before releasing the mouse button.
- Screenshots are saved as .PNG files on the desktop (home screen).
How to take a screenshot of any window on a MacBook
Step 1 : Press Shift + Command ( ⌘ ) + 4 , the mouse pointer will change to a cross.
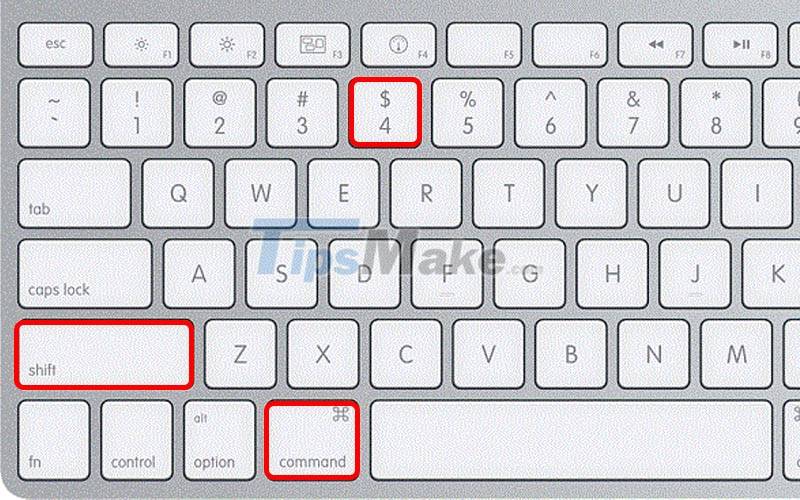
Press Shift + Command (⌘) + 4
You continue to press the Space key (spacebar), the pointer will change to a camera icon .
Step 2 : Move this camera over the window to capture > Click on the camera to take a screenshot of the window.

The pointer will turn into a camera for you to take pictures
The screenshot is saved as a .PNG file on the home screen.
3. TOP professional Windows and macOS screen capture software
Lightshot (Windows, macOS)
Lightshot is a free computer screen capture software that supports users to take screenshots quickly. With just a few simple steps, you can take a screenshot in a snap.
In addition, you can edit photos after shooting with a set of professional photo editing tools, many extremely convenient features.
Lightshot has some outstanding features as follows :
+ You can capture any information displayed on your computer screen.
+ Easily edit screenshots, create annotations with professional toolset.
+ Use the photo you just took to search on Google quickly.
+ You can share images quickly as a link.
+ You can save the captured and edited photos to your computer.
You can download Lightshot software HERE
PicPick (Windows)
PicPick is a software that allows you to take screenshots of your computer, including many useful features that help you edit the images and share them directly on social networking sites such as Facebook , Twitter , Gmail , . .

PicPick has some outstanding features such as :
+ Can capture the whole, an area or specific objects on the screen.
+ Supports many different color encodings RGB, HTML, C++ .
+ Many professional photo editing tools are built in.
+ Support batch image editing.
+ Connect to the printer to be able to print the images directly.
+ Share images via social networks.
You can download PicPick software: HERE
Skitch (macOS)
Skitch is a powerful screen capture software that can annotate images on MacBooks, which is popular with users with fast image capture speed, and supports saving images in many different formats.
Skitch Mac has some outstanding features as follows :
+ Easily take screenshots of your computer screen with a variety of shooting styles.
+ You can customize the image size when taking.
+ Easily create notes from existing photos or screenshots.
+ Freely save photos in many different formats.
+ Many professional editing tools, free to use on this software.
You can download the Skitch software for macOS HERE.
Just now are the easiest ways to help you take screenshots of Windows and MacBook computers. Hope this information is useful to you. Thank you for watching and see you in the next topics.