Send and receive Gmail messages with Outlook
For computer users, checking and managing email with a certain client application is much more convenient than the live web platform. In this article, I want to talk about managing Gmail mailboxes with Outlook software in the famous Microsoft Outlook product suite.
1. Prepare:
To check Gmail in Outlook, the first thing you need to do is turn on POP / IMAP of Gmail. For details see this article.
https://quantrimang.com/outlook-khong-the-ket-noi-voi-tai-khoan-gmail-day-la-cach-khac-phuc-121360
2. Configure Microsoft Outlook to send and receive Gmail messages:
In this test, we proceed to configure, set up sending and receiving emails on Microsoft Outlook 2010, and other Outlook versions do the same.
Step 1:
Start Microsoft Outlook, you will see the interface of the program as shown below. Click Next:

Step 2:
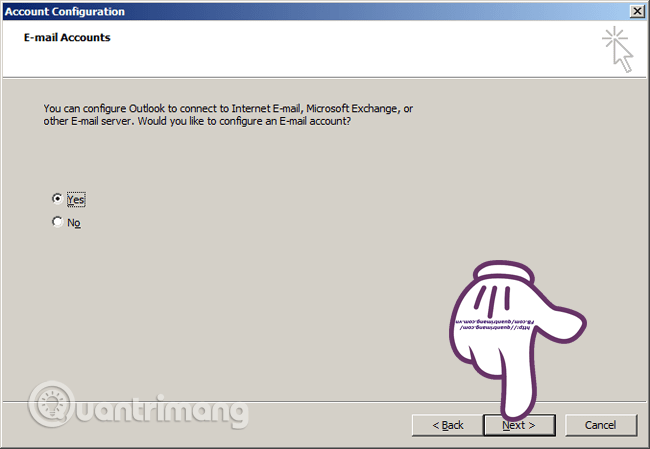
Outlook will ask you:
- You can configure Outlook to .
The idea is to ask you to create an account to manage.Select Yes, Next:
Step 3:
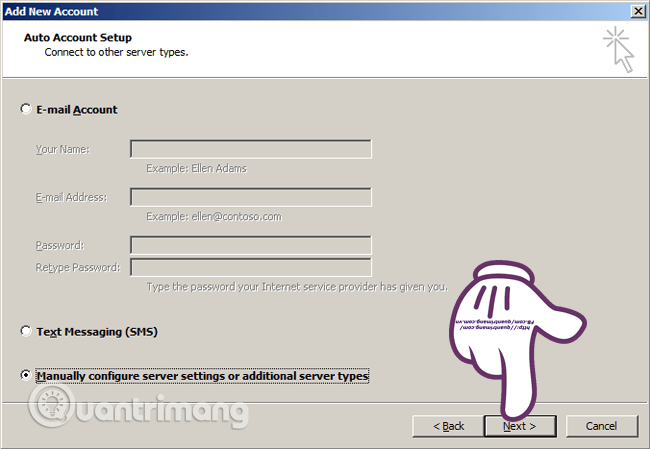
Choose Manually configure . and Next:
Step 4:
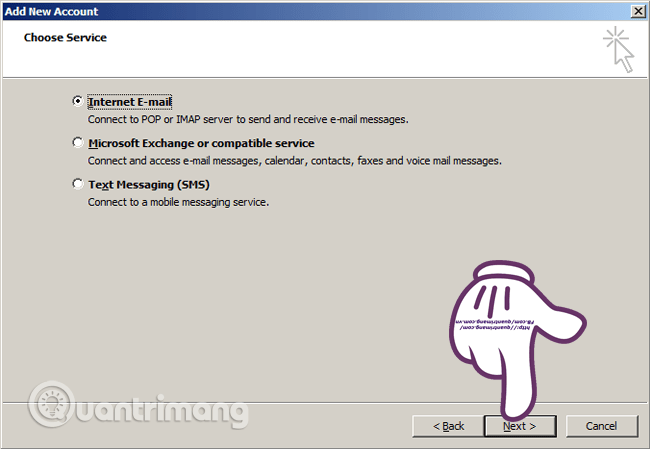
Select Internet Email at this screen. Next:
Step 5:
Fill in the account information here, as shown below:
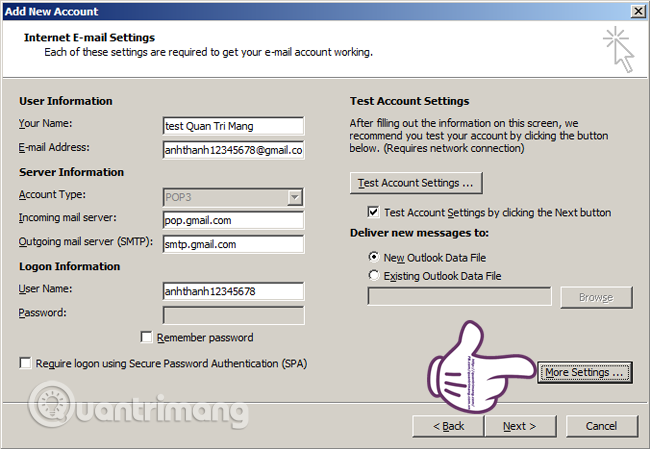
Some information to note here:
- Your Name: this section is the name displayed on Outlook.
- Email Address: Your full gmail address will, of course, be in abcxyz@gmail.com form
- Incoming and Outgoing mail server in Server Infomation section: select POP3 and power pop.gmail.com, smtp.gmail.com into the corresponding line.
Done then click on More Settings to adjust a little more.A little bit more is done!
Step 6:
With increasing capacity and built-in utilities, Gmail has become the # 1 Webmail in the world. This article will show you how to set up the parameters so that you can access Gmail in a offline way by using mail browsing software such as Outlook Express, Windows Mail, .
1. Install on Gmail's Webmail
- Go to http://www.gmail.com and log in to your mailbox.
- Go to Settings and select Forwarding and POP / IMAP ( Forward and POP / IMAP )
- Check on Enable POP only for mail that arrives from now on ( Only enable POP for incoming mail from now on ) and then click Save Setting ( Save changes )
2. Install on Outlook Express
- Open Outlook Express (OE) by going to Run and typing msimn .
- Go to Tools , select Accounts . then select the Mail tab.
- In the Internet Options dialog box , close Add and select Mail .
- In the Display name box type the name you want the recipient to see when sending the email, click Next .
- In the E- mail Address box, type your email address, click Next .
- In the E-mail Server Names section, enter the following:
- My incoming mail server is a: select POP3
- My incoming mail (POP, IMAP or HTTP) server: pop.gmail.com
- Outgoing mail (SMTP) server: smtp.gmail.com
- Click Next to Internet Mail Logon you can check the Remember password if you want to save the password.
- Next, click Next and Finish .
- You select the account you just created and select Properties .
- Select Servers tab and check My server requires authenticaltion .
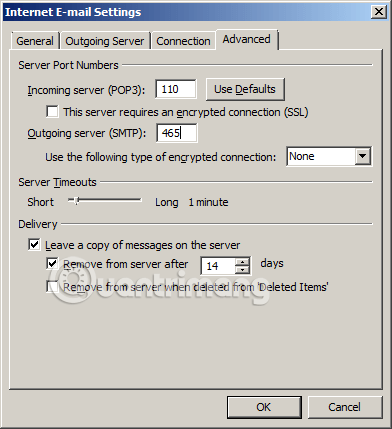
- Go to Advanced tab, check the first 2 items and enter 465 in the Outgoing mail (SMTP) box and click OK .
So you have completed the steps to install POP for Gmail. From now on you can browse, receive and send offline emails and when connected the device will send you.
Hope the article will help you!
You should read it
- ★ How to set up Gmail with Outlook, Apple Mail and other Mail applications
- ★ Make email management of email notifications using Outlook Express
- ★ Instructions on how to send mail with Gmail
- ★ How to Set Up Apple Mail
- ★ How to use Gmail for newbies - Receive & send mail, organize mail, delete sent mail, recover deleted mail