Learn to use lesson 9 computer - Set up a computer
You just bought a new computer, the first thing you have to do is set up your computer to suit your purpose.
Table of Contents
You just bought a new computer, the first thing you have to do is set up your computer to suit your purpose.This may sound like a complicated task, but in fact the setup process is much easier than you think!Most computers will be set up in the same way, so no matter what brand of computer you are using.
If you have a new computer system, the devices are still in the box, you will probably find instructions on how to set up including the manufacturer's detailed steps.Even if there are no instructions from the manufacturer or retailer, you can still set up your computer with a few simple steps.This article will guide the simple steps needed to set up a regular computer.
Set up a laptop
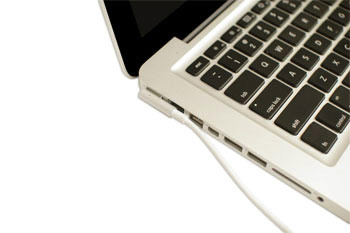
If you recently bought a new laptop, the setup process will be very easy because the laptop is an all-in-one device.
First, press the power button to start the device, if the battery is not charged, you will need to plug in the AC adapter to power the device, this way, you can continue to use the computer. portable while charging.
If your laptop comes with any peripheral device, such as a speakerphone, you can refer to how to set up a peripheral for a desktop computer below by laptop and desktop computers often use the same connection ports, so the same steps will still be applicable.
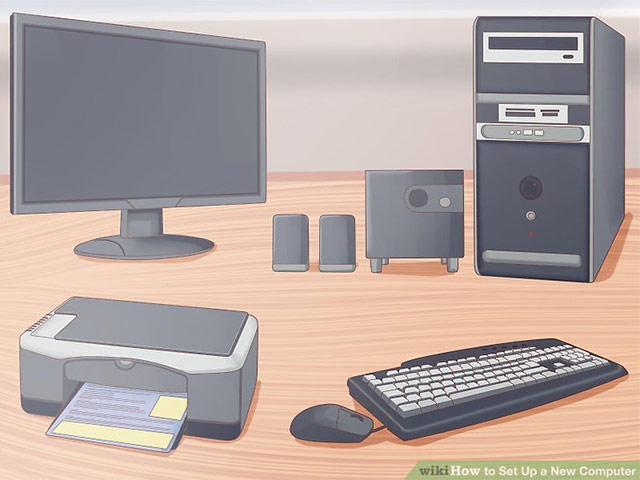
Set up a desktop system
Step 1

Remove the monitor and the CPU tree from the container.Remove the plastic coating or protective tape, then place the monitor and CPU on your desk or work area.
On a small note, make sure your CPU is placed in a dry, well-ventilated, well-ventilated area.This will help avoid overheating and fire due to low humidity.
Step 2
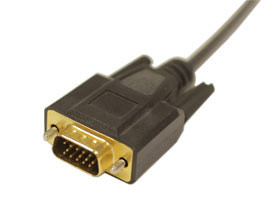
Locate the monitor cable (connect the monitor to the CPU tree).There are several types of display cables that correspond to different connection ports, so the type used on your computer may not be the same as in the above illustration.
If you have trouble finding the monitor cable as well as the port location that connects the monitor to the CPU tree, refer to the manufacturer's instruction manual or ask for help from the retailer.If you have a built-in all-in-one computer (such as a Mac), you can go to step 4.
Step 3
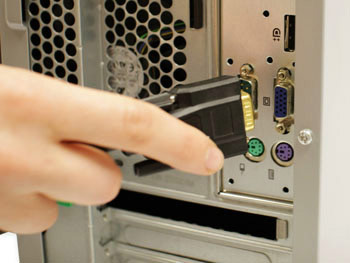
Connect one end of the cable to the monitor signal output port on the back of the computer and the other end with the monitor's receiving port.If you are using the VGA cable as shown in the illustration above, you will have to tighten the screws on the connector of the monitor cable to ensure a stable transmission of the signal.
Note: If you connect the connector several times and still do not work, do not press the power as this may damage the connector pins, so check to make sure the plug fits the port, then proceed to connect.
You can refer to the article '16 common ports on computers and their functions' to get more information about the ports on the computer.
Step 4
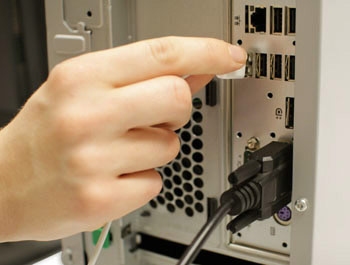
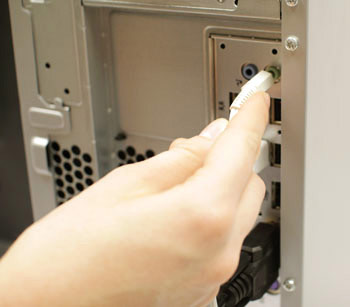
Check the keyboard and determine if it uses a USB connector (rectangular) or PS / 2 connector (circle).If the keyboard uses a USB connection, you can plug it into any USB port on the back or front of the CPU tree.If the keyboard uses a PS / 2 connector, plug it into the PS / 2 port for the keyboard (circle, purple) on the back of the CPU tree.
Summary of several ways to open virtual keyboard on Windows XP / 7/8 / 8.1 / 10
Step 5
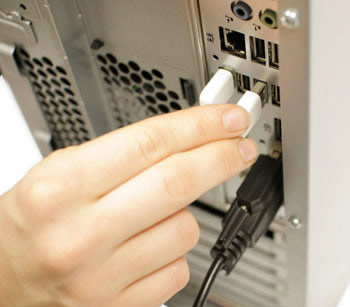
Similar to the keyboard, you will have to test the mouse and determine if it uses a USB or PS / 2 connection.If your mouse uses a USB connection, plug it into any USB port on the computer.If the mouse uses a PS / 2 connector, plug it into the PS / 2 port for the mouse (circle, green) on the back of the CPU tree .
Tip: If your keyboard also has a USB port, you can connect the mouse to the keyboard instead of connecting directly to your computer.
If you use a wireless mouse or keyboard, you may need to connect the Bluetooth dongle (USB adapter) to your computer to get a Bluetooth connection.However, many computers also have built-in Bluetooth (such as laptops), so you won't need a Bluetooth adapter anymore.
Step 6
If you use an external speaker or headset, you can connect them to the computer via the audio port (on the front or back of the CPU tree).Audio ports on many computers will be able to be color coded.The speaker or headset will connect to the green 3.5 port and the microphone will be plugged into the pink 3.5 port.And the blue port will be Line-in, which can be used with other types of devices.
Some speakers, headsets and microphones now use USB connectors instead of the usual 3.5 audio jack, so they can be connected to any USB port.In addition, many computers will also have speakers or microphones built into the screen.
Step 7
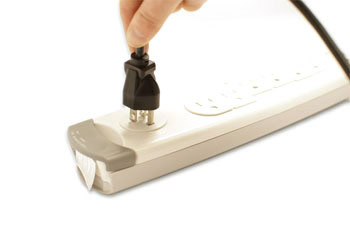
Locate the power supply cable for your computer.You plug one end of the power supply cable into the back of the computer case and then plug the other end into the power supply.You should use an extra surge protector to limit the fire due to electric shock (when struck by lightning).Once you have the power you can start the computer.
Tip: You can also use a uninterruptible power supply (UPS), which acts as a surge protector and provides a temporary power supply if the power is cut off.
Step 8
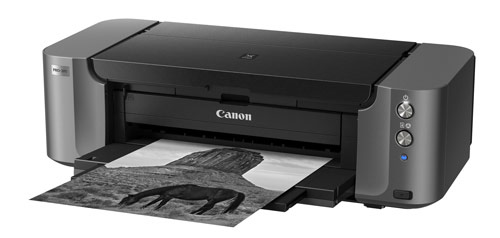
If you use more printers, scanners, webcams or other peripherals, you can connect them right now.Your computer will automatically recognize peripheral devices as soon as they are plugged in.In addition, some peripheral devices (such as printers) may require you to install the corresponding driver to be used.
In general, peripheral devices are additional options of the computer, and you can connect peripheral devices at any time without necessarily connecting all peripheral devices in the process. Original setup of the computer.
The above are simple steps to set up a computer system.Good luck!
See more:
- How to use Photoshop CS5 - Part 1: Toolbox
- Learn about local area network - LAN (Part I)
- Network basics: Part 1 - Network hardware devices
- MS Access 2010 - Lesson 2: Introduction to objects in Access
Was this article helpful?
Your feedback helps us improve.
Related Articles
 Learn to use lesson 2 computer - Basic parts of the computer7 minutes read
 Learn to use lesson 3 computer - Basic buttons and ports on the computer9 minutes read
 Learn to use lesson 20 - Learn how to use a new program7 minutes read
 Learn to use lesson computer 15 - Keep the computer clean10 minutes read
 Learn to use basic computer lesson 1 - Introduction to computers7 minutes read
 Learn to use lesson computer 16 - Protect your computer7 minutes read
Reader Comments 0
Sign in with email or Google to join the discussion.