Learn to use lesson 18 computer - Basic troubleshooting techniques
Resovle problem
In the process of using computers, each of us is more or less many have experienced problems with their devices, from basic to complex.So do you know what to do if your screen naturally can't be displayed?What if you can't close the application or hear any sound from your speakers?Whenever you encounter problems with your computer, don't worry!There are many basic troubleshooting techniques that you can use to fix problems like this.In this lesson, we will learn some basic things to do when encountering problems, as well as how to solve common computer problems that you may encounter on computer systems.

Fix computer problems
- Resovle problem
- General tips to note
- Use the delete process
- How to proceed
- Simple solution for common problems
- Problem: Do not start the computer
- Problem: The application is slow
- Problem: The application is frozen
- Problem: All programs on the computer are slow
- Problem: The computer freezes
- Problem: Mouse or keyboard stops working
- Problem: Loss of sound
- Problem: The screen is not displayed
- Solve more complex problems
General tips to note
There are many different agents that can cause problems with your computer.No matter what the cause of the problem is, troubleshooting will always be a trial and error process over and over again.In some cases, in particular, you may need to use a number of different methods before finding the most appropriate solution to the problem, of course there will also be problems that are not too complicated and not requires much effort to overcome.In general, for the troubleshooting process to be simpler, you should start using the following tips:

Outline the steps: Before embarking on a fix, you can plan each step you will take.This way, you will be able to remember exactly what you did, thereby avoiding repeating the same mistakes.Moreover, in case you can't fix the problem yourself and need the help of others, it will be much easier if they know exactly what you have tried but failed.
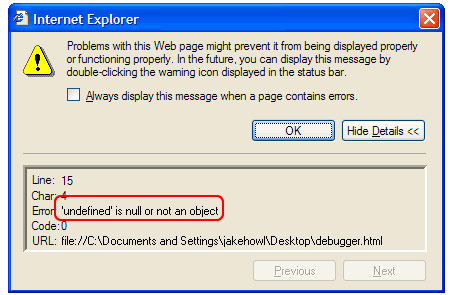
Notes on error messages: If the computer gives you error messages, remember to record as much information as possible.You can use this information to find out if other people have the same error with you, if so, how they fix the error.
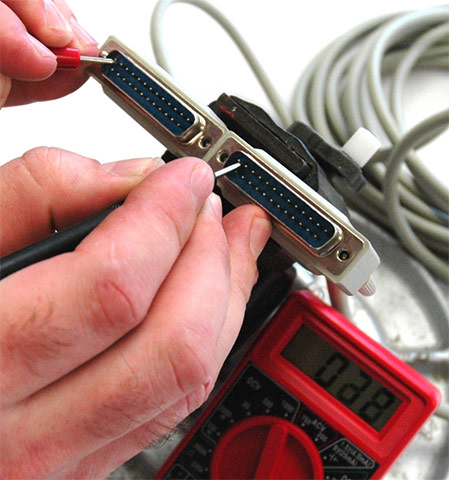
Always check the wiring system carefully: If you have a problem with a specific set of computer hardware, such as a monitor or keyboard, the first and most necessary step is to check all including related cables to make sure they are properly connected.
- 16 connection ports are commonly found on computers and their functions
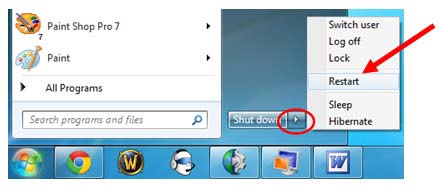
Restart the computer: When all other solutions fail, try restarting the computer is a simple way that is sometimes very effective.In fact, restarting the computer can help solve many of the basic problems that you may encounter with your computer.
Use the delete process

If you have a problem with your computer, you can find out what's wrong by using the delete process.This means that you will create a list of agents that can cause problems and then thoroughly examine them one by one to gradually eliminate inaccurate agents.Once you have identified the source of the problem with your computer, finding a solution will be much easier.
How to proceed
Suppose you are trying to print an invitation card for a birthday party, but the printer does not work.You have some ideas about the causes that can cause this problem, you list it then consider each one to see if you can eliminate any possible cause. .
Specifically, in this example, first, check the printer to determine if the printer is turned on and connected properly.If the connection is not a problem then you should check to make sure the printer's toner cartridge still has ink and that there is still paper in the tray.If all is well, you will determine that the problem you face is no longer subjective and subjective.
Now you want to make sure the printer and computer are interacting correctly.If you recently downloaded an update for your operating system, that update may affect the printer.But if you know your computer doesn't have any recent updates and the printer yesterday still works fine, so the problem won't be compatible.
You check the USB cable of the printer and see that it has come off the connection port.You remember that you accidentally removed it last night to plug in another device.When you plug in the USB cable again, the printer will start working again.Looks like this printer problem has been solved!
This is just a simple example of problems you might encounter when using a computer.In the rest of this lesson, we will talk about other common computer problems and some ways to solve these problems.
Simple solution for common problems
In most cases, incidents can be overcome by simple processing techniques, such as closing and reopening the program.It is important that you try these simple solutions before using more complex measures.If the problem is still not fixed, you can try other troubleshooting techniques.

Problem: Do not start the computer
Solution 1: If your computer cannot boot, start trying to fix it by checking the power cord to verify that it is securely plugged into the back of the computer case and power outlet. .
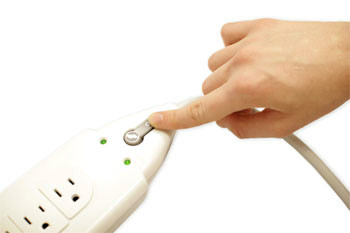
Solution 2: If there is no connection problem, make sure the socket is still working properly.To test the outlet, you can try plugging in another electrical device, such as a light.
Solution 3: If the computer is plugged into a voltage regulator, check if the voltage regulator is turned on, and check if there is a problem with the voltage regulator.
Solution 4: If you are using a laptop, the battery may be exhausted.Plug the AC adapter into the power outlet, then try turning on the laptop.If you still can't boot, you may need to wait a few minutes and try again.
Problem: The application is slow
Solution 1: Close and reopen the application.
Solution 2: Update the application.To check if the application has been updated to the latest version, click the help menu and find the update check option (check for Updates).If you don't find this option, another idea is to find information about updating the application online.

Problem: The application is frozen
Sometimes an application may fail or freeze.When these phenomena occur, you will not be able to close the window or click any button in the application.
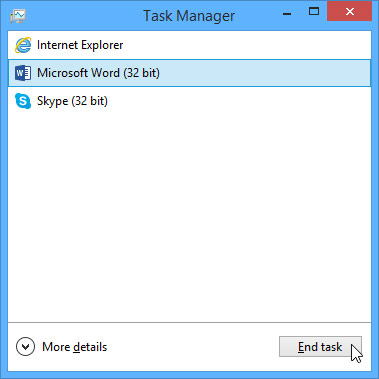
Solution 1: Force the application to stop working.On the PC, you can press (and hold) Ctrl + Alt + Delete (Control, Alt and Delete keys) on the keyboard to open the Task Manager.On a Mac, press and hold Command + Option + Esc.Then, you can select the unresponsive application and click the End task (or Force Quit on the Mac) to close the application.
Solution 2: Restart the computer.If you cannot exit an application, restarting the computer will help close all applications running on the system.
Problem: All programs on the computer are slow
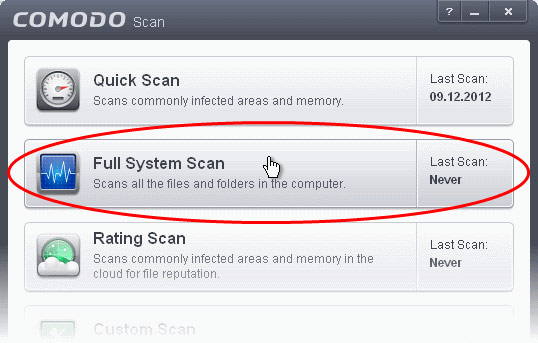
Solution 1: Use virus scanning programs.It is possible that malware runs in the background that is slowing down the processing capability of the system.
Solution 2: Your computer may be running out of hard drive space.Try to clean up the system, delete all files or programs you no longer use to see if the speed of the system improves.
Solution 3: If you are using a PC, you can run Disk Defragmenter.To learn more about Disk Defragmenter, review lesson 16 on how to protect your computer.
Problem: The computer freezes
Sometimes your computer may suddenly be completely unresponsive or frozen (frozen).When this happens, you will not be able to perform any tasks at all.
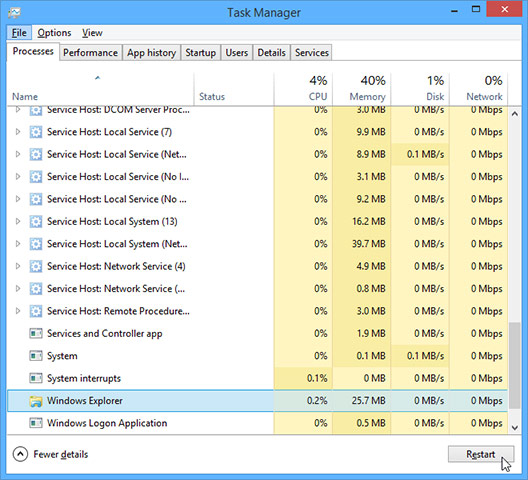
Solution 1 (Windows only): Restart Windows Explorer.To do this, press and hold Ctrl + Alt + Delete to open the task manager.Next, locate and select Windows Explorer from the Processes tab, then click Restart.You may need to click the More Details section at the bottom of the window to open the Processes tab.
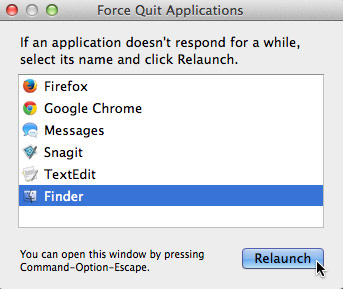
Solution 2 (Mac only): Restart the search engine (Finder).To do this, press and hold Command + Option + Esc to open the Force Quit Applications dialog box.Next, locate and select Finder, then click Relaunch.
Solution 3: Press and hold the power button to turn off the device.The Power button is usually located on the front or side of the computer CPU, usually indicated by the source symbol.Press and hold the Power button for 5 to 10 seconds to force the computer to turn off.
Solution 4: If the computer still does not turn off, you can unplug the power cord from the electrical outlet.If you are using a laptop, you can remove the battery to force the computer to turn off.Note: This solution is a booklet, should only be used after you have tried all other suggestions above and still not effective.
Problem: Mouse or keyboard stops working
Solution 1: If you are using a wired mouse or keyboard, make sure it is plugged into the computer properly.
Solution 2: If you are using a wireless mouse or keyboard, make sure that the connection on the device is turned on and that the battery on the device is still in use.
Problem: Loss of sound
Solution 1: Check the current volume level.Click the sound button in the top right or bottom right corner of the screen to make sure the sound is turned on and the volume level is audible enough.
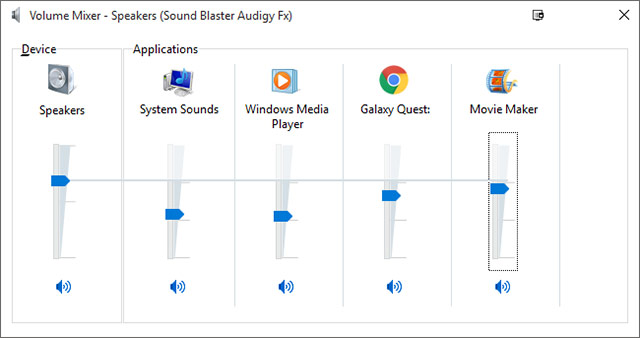
Solution 2: Check the sound player settings.Many audio and video players will have separate sound settings.Make sure the sound is turned on and the settings are correct.

Solution 3: Check the wiring system.Make sure the speakerphone is plugged into the power outlet, and the connection jack is plugged into the correct audio port (port 3.5 or USB port).If your computer has a color-coded port, the audio output port will usually be green.
Solution 4: Connect the headset to the computer to find out if you can hear the sound through the headset.
Problem: The screen is not displayed
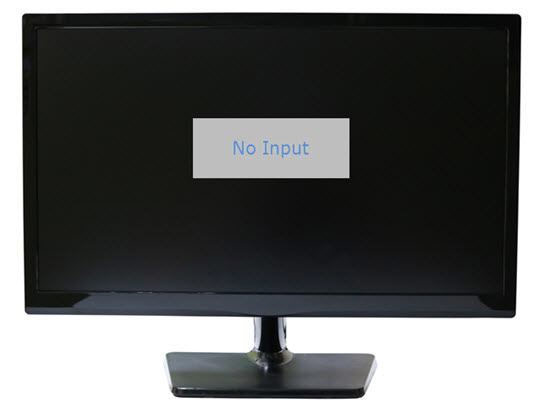
Solution 1: Your computer may be in Sleep mode.Click or click any key on the keyboard to wake up the device.
Solution 2: Make sure the monitor and CPU tree are plugged into the power outlet and turned on.
Solution 3: If you are using a desktop computer, make sure the monitor cable is properly connected to the CPU and the monitor's receiving port.
Solve more complex problems
If you still haven't found a solution to your problem, you can ask for help from others.However, you should first try searching for information on the Internet first.Maybe other users have also encountered similar problems and solutions to these problems are often shared a lot on online news and technology forums.Also, if you have a friend or family member who knows a lot about computers, they can also help you.

Remember that most computer problems from simple to complex have solutions, though it may take some time to explore and experiment.For difficult problems, you may need a more drastic solution, such as reformatting your hard drive or reinstalling your operating system.If you think you need to use such a solution, it's best to consult with people with expertise first because if you don't have a lot of computer knowledge, testing solutions This may only make the situation worse.
Here are some common problems on your computer as well as the basic solutions, in the next article we will learn how to use the built-in help tools on your computer.Good luck!
See more:
- Instructions to fix Windows error does not boot
- If the computer crashes, press this key combination
- Tracing 'guys' makes Windows boot slowly
You should read it
- ★ Top 10 'disasters' and how to deal with them
- ★ Learn to use lesson computer 11 - Find out about the operating system
- ★ Learn to use lesson 12 - How to connect a computer to the Internet
- ★ Learn to use computer lesson 13 - Get familiar with the Internet
- ★ Learn to use lesson computer 15 - Keep the computer clean