Learn How to Deal with a Computer Checking Media Error
The 'checking media presence' problem often occurs when users start their computer. This is mainly because the device is trying to boot from a source that the computer cannot access. This is a quite serious situation for PC and laptop users. The solution is a bit complicated for this case. Below are some solutions for you when your computer has a checking media presence error.
Instructions on how to fix the computer checking media error
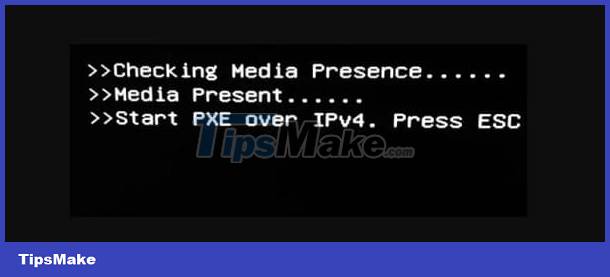
A laptop reports a media checking error that occurs when your laptop or computer cannot find a bootable device. Or there are boot files missing from the drive. At this time, the error message screen often has words like: 'No Media Present', 'Media Present', 'starting PXE' over IPv4. for example. To fix checking media presence error in Windows 10, below are the measures you should apply.
Rearrange the Boot Menu
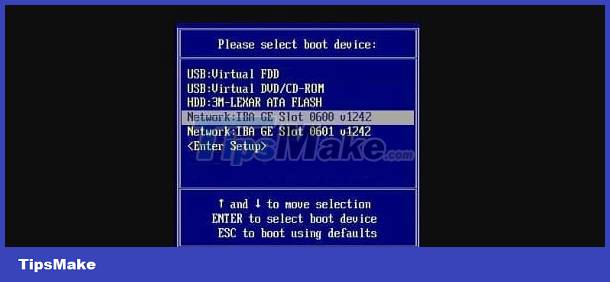
As you know, there are many different options for starting your computer. For example, when the hard drive is in the first row of the boot order. The computer will boot from the hard drive first, then move to other options if that fails. Therefore, rearranging the Boot Menu is also a useful solution in this case.
- Step 1: You need to boot into your computer's BIOS. Note that depending on each model as well as the type of mainboard, the way to enter the BIOS is also different.
- Step 2: Go to the Boot Menu to see bootable devices (bootable devices) and the order of these devices.
- Step 3: Put the drive the user wants to boot to the first position.
- Step 4: Save this setting and press exit.
Disable Network Boot
This is also an effective solution to fix checking media presence error.
- Step 1: First, you also need to boot into the device's BIOS.
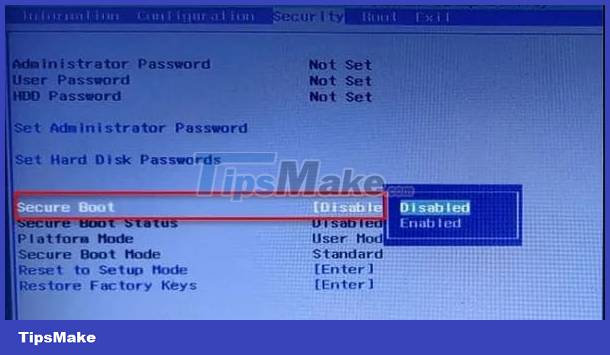
- Step 2: Use the arrow keys to move to the Security tab.
- Step 3: At the Secure Boot option > You need to disable this option.
- Step 4: Once Secure Boot is disabled, users switch UEFI mode to Legacy.
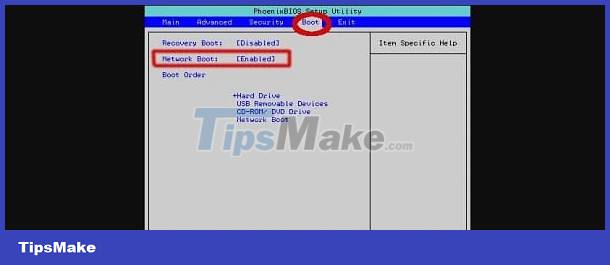
- Step 5: Then, find Network Boot in BIOS settings and turn it off. (In some interfaces it may be in advanced settings)
- Step 6: Save these settings and restart the computer.
How to fix checking media presence media present start PXE over IPv4 error
- Step 1: Go to the computer's BIOS.
- Step 2: Use the arrow keys to move to the Security tab.
- Step 3: Disable Secure Boot.
- Step 4: Continue disabling Legacy Boot.
- Step 5: Save these settings and exit BIOS.
Some other measures to fix it
- Users should check the hard drive or SSD carefully. Because it is possible that the cause is due to too much dirt and damage, leading to loss of connection. If the hard drive is damaged, it is better to replace the device with a new hard drive. Don't forget to copy data carefully to avoid losing important data.
- Updating the BIOS is also an effective solution. However, this is a rather complicated trick. You should research carefully before doing so, backing up your data because some errors during the update process can cause data loss. Do not turn off or restart the device during the update process. Do not let the device run out of battery or turn off the power suddenly.
- If all of the above measures do not work, users should quickly take the device for warranty service. Or consign your computer to reputable, quality repair centers. A professional technician will check and help you handle it immediately.
Above are solutions to fix Checking Media errors on your computer. Hope these tips help you solve it successfully.
You should read it
- Lesson 19: Error control features
- How to fix video playback errors on VLC Media Player
- How to scan a hard drive with Error Checking
- How to turn off spell-checking spelling corrections in Vietnamese on Chrome
- How to fix the error VLC Media Player does not play videos on Windows 11
- How to fix VIDEO_DXGKRNL_FATAL_ERROR on Windows 10
 Computer has BitLocker Recovery, what should I do to fix it?
 The computer keeps turning on and off without the screen on, what should I do?
 Learn how to fix when the iPad keyboard jumps to the middle of the screen
 Immediately fix the error of sleep not appearing on Windows 10 + 11 screen
 Quickly fix the problem of laptop touchpad not working
 How to Fix Lost Mouse Pointer on Laptop Screen?