Table of Contents
This guide provides a clear overview of rainmeter, including how to Download and Install Rainmeter, how to Set Up Rainmeter. Use it to understand the topic, compare the available options, and make a more informed decision.
In this article, learn how to customize your PC screen with Rainmeter, giving everyone's computer a fresh, beautiful, and unique look.
How to Download and Install Rainmeter
Step 1 : Click the Download Rainmeter button here to download the latest version of the application.
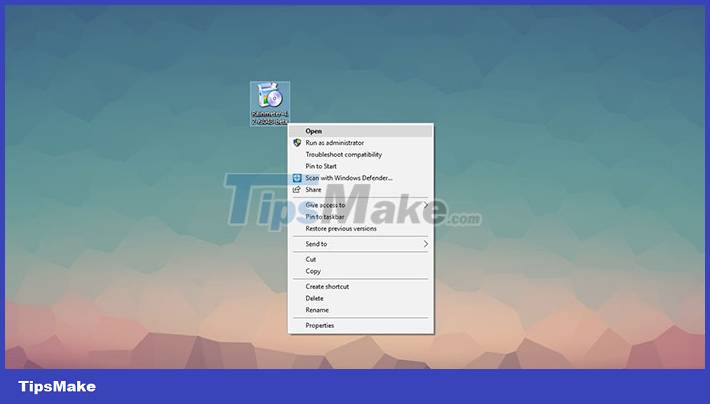
Step 2 : Open the downloaded file, right-click and select Open to install.
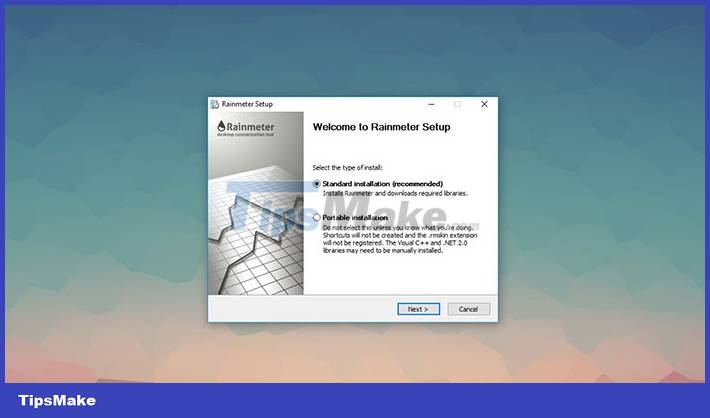
Step 3: Once it has opened the file, it will navigate to the Rainmeter Setup window. Select Standard installation , click Next and wait until it is completely installed on the computer.
Step 4 : Once installed, Rainmeter will automatically load a widget on the desktop. To open the settings, people need to left-click on the Rainmeter icon in the Windows notification area on the taskbar.
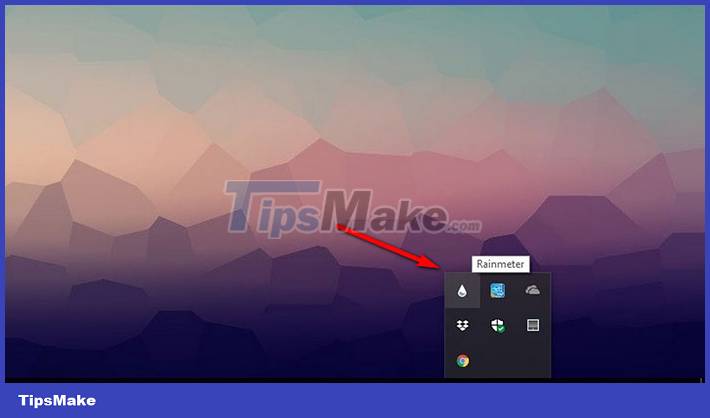
Step 5 : From the Windows menu, users can also find the Rainmeter application via the search tab. Otherwise, users can also right click on the Rainmeter icon and it will bring up the Manage tab to go to the Manage Rainmeter settings.
How to Set Up Rainmeter
From Rainmeter's Settings , users can click the Skins tab, then browse through Active Skins to be able to manage any widgets that appear on their desktop.
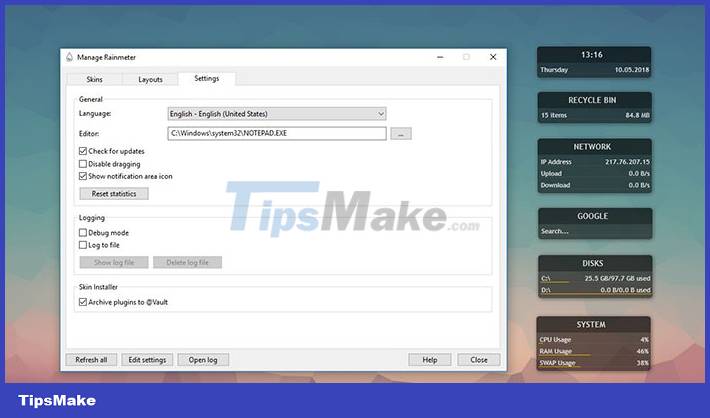
For Rainmeter newbies, the best advice when navigating to Settings is to keep the default settings.
How to Download and Install Skins for Rainmeter
Step 1 : Go to VisualSkins.com and browse the available Skins to download the file. In addition, people can also find on deviantArt and GitHub.
Step 2 : Once the skin file has been downloaded, find and click Open it to install. The skin file will automatically be added to the Rainmeter menu settings.
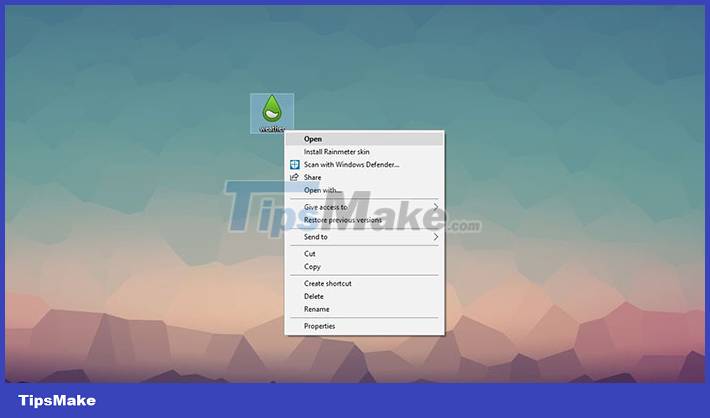
Step 3 : Find the name of the skin you just downloaded in the menu, open the folder and simply download or remove the skin depending on your needs.
How to Customize Skins in Rainmeter
Step 1 : Click Edit from the Skins tab in Manage Rainmeter .
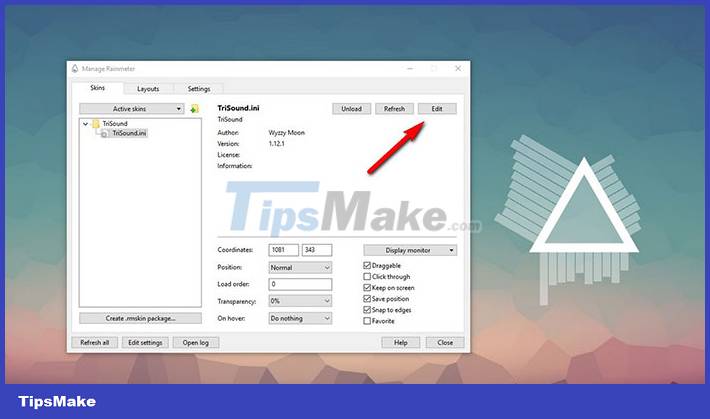
Step 2 : Users can edit the skin via notepad as shown below. People can see a lot of variable definitions or code to edit the way they want.
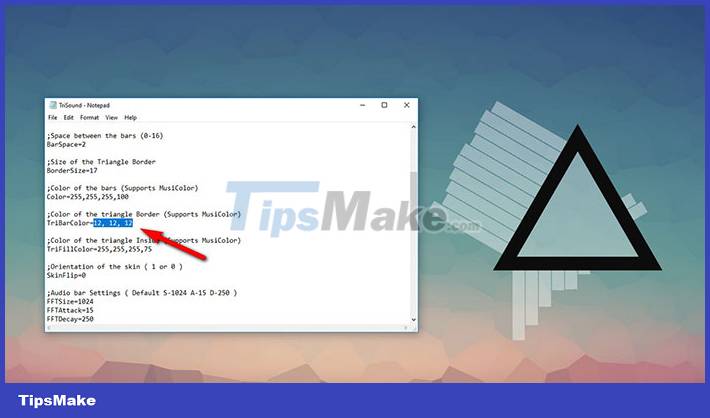
User can change color (in RGB format) or font, position. After finishing editing, save the file and click Refresh.
How to Uninstall and Remove Skins
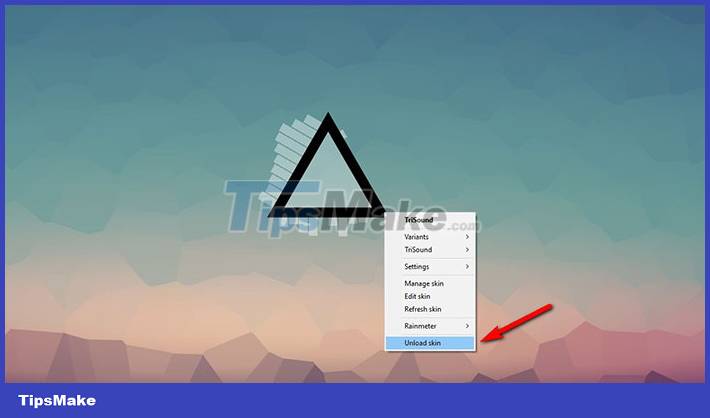
Step 1 : Click Unload Skin from the Skin menu or from the Rainmeter application menu. Users can also hover over any widget and right-click to remove the skins.
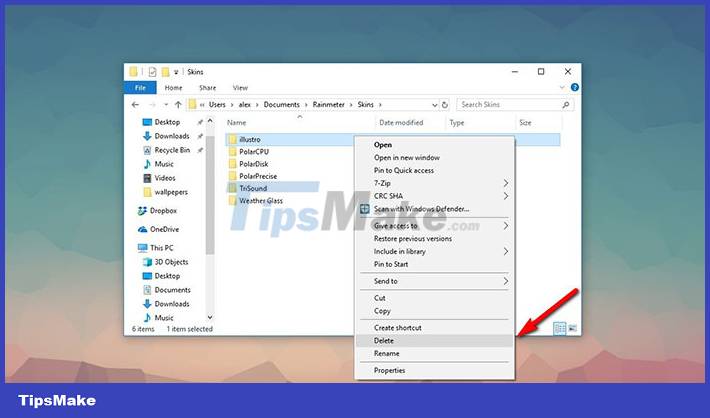
Step 2 : Alternatively, people can delete the skins folder to remove it completely from the Rainmeter menu settings, refer to the picture below or can navigate by the directory path C:/Users//Documents/Rainmeter/ Skins .
Conclusion
Understanding Rainmeter makes it easier to compare options, avoid common mistakes, and apply the information in this guide more effectively. Review the relevant requirements before making changes or choosing a solution.
FAQ
What is Rainmeter?
Select Standard installation, click Next and wait until it is completely installed on the computer.
Why is Rainmeter important?
Understanding Rainmeter helps you evaluate features, compatibility, performance, and potential limitations before you choose a product or follow a procedure.
What should you consider when using or choosing Rainmeter?
Consider your specific goal, compatibility requirements, available features, cost, security, and the practical recommendations described in this guide.
Related Articles
 How to Use Rainmeter Widget to Create Widgets for Windows 104 minutes read
 Skin: How to Use Rainmeter2 minutes read
 3 Steps to Arrange Desktop Screen with Rainmeter9 minutes read
 Rainmeter - Design Your Own Desktop Screen5 minutes read
 How to Customize iPhone Lock Screen4 minutes read
 How to Completely Customize Your Windows Desktop Using Rainmeter7 minutes read
Reader Comments 0
Sign in with email or Google to join the discussion.