Table of Contents
This updated guide explores instructions to change the blue color of the area on Windows with practical details, clear explanations, and useful takeaways. When you draw an area on Windows, the default color of the drawn area is light blue. In case you do not like the default blue color of the drawn area on Windows, you can completely change it to another color that you want.
How to Change the Color of the Selected Area on Windows
Step 1:
First you need to get the RGB color code of the color you choose . Then, you type regedit in the Run dialog box.
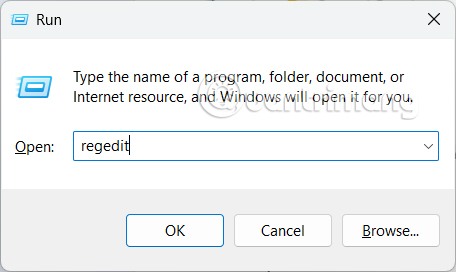
Step 2:
Display the Registry Editor interface, we access the path below.
HKEY_CURRENT_USERControl PanelColors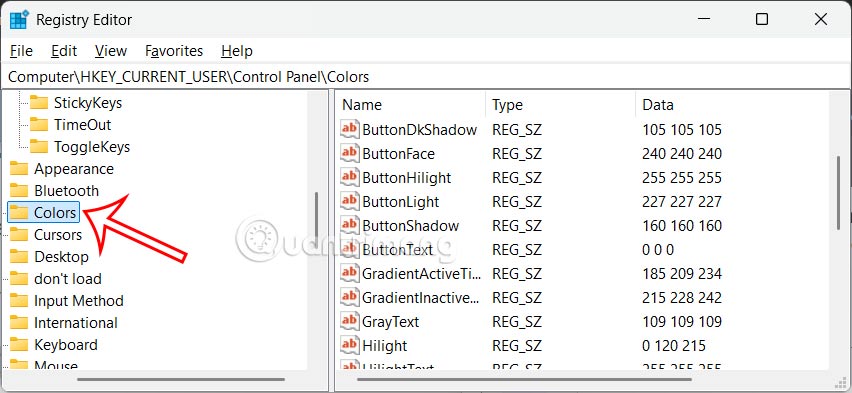
Step 3:
Look at the content next to it and double-select the Hilight value to change the color of the border on Windows.
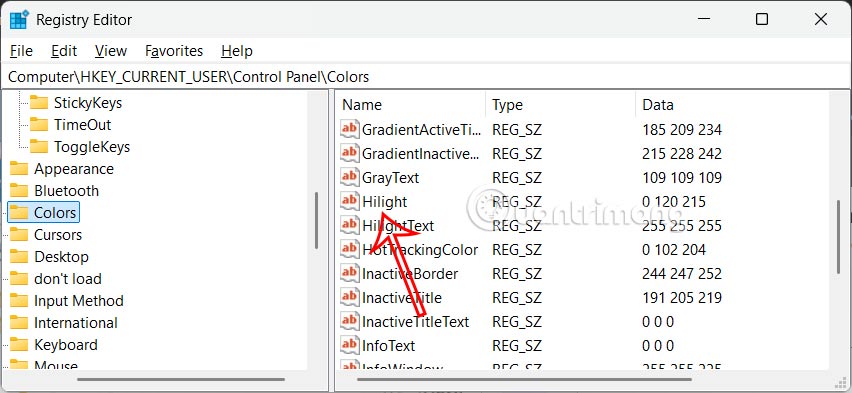
Step 4:
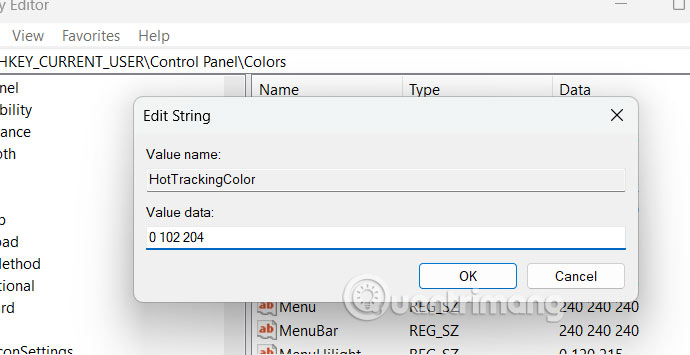
Now you need to enter the new color code into the interface and then press OK to save. The result is that the border color of the area will change.
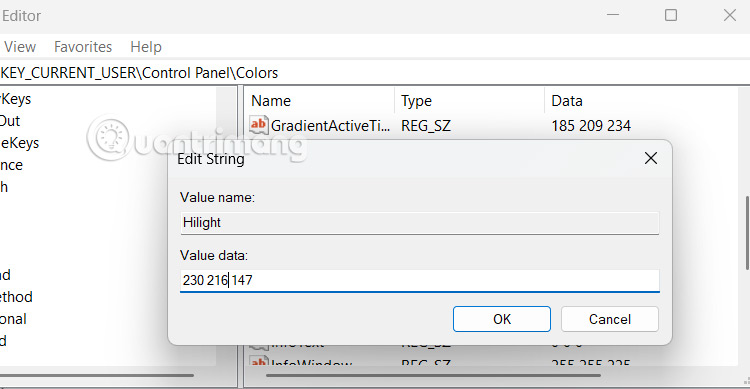
Step 5:
Continue clicking on the HotTrackingColor value to change the color inside the area.
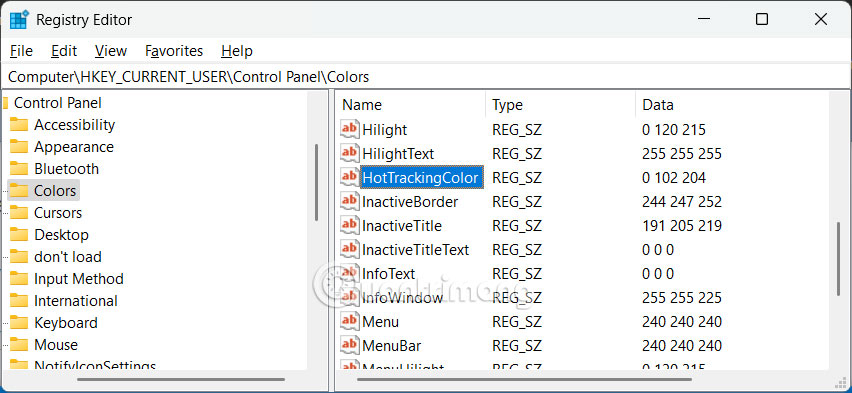
Here the user also enters the color code to change the color inside the circled area.
Finally you restart your computer for the changes to be applied.
FAQ
What is the main takeaway about Instructions to Change the Blue Color of the Area on Windows?
The key is to understand the core idea, compare the available options, and apply the practical guidance that matches your situation.
What should beginners know about Instructions to Change the Blue Color of the Area on Windows?
Start with the essential steps and terminology. Avoid changing advanced settings until you understand how they affect performance, privacy, cost, or compatibility.
How can I use this information in practice?
Follow the relevant section in order, test one change at a time, and confirm the result before moving to the next step or recommendation.
Related Articles
 Surgery Can Permanently Change Your Eye Color to Blue2 minutes read
 Instructions to Change Mouse Cursor Color on Windows 113 minutes read
 How to Change iMessage Bubble Color in iPhone5 minutes read
 Instructions to Change the Font Color of Icons on Windows3 minutes read
 How to Change Windows Start Menu Color: Step-by-Step Guide4 minutes read
 How to Change Chat Box Color on ChatGPT3 minutes read
Reader Comments 0
Sign in with email or Google to join the discussion.