Table of Contents
If Windows 11 feels slow, begin with the changes that are both safe and measurable: install updates, identify the resource bottleneck, reduce startup load, and free storage space. Visual effects and power settings can help on some PCs, but they should come later. Avoid unreviewed “debloat” scripts because removing services or built-in components can break updates, security features, and recovery tools.
Before changing settings: find the bottleneck
- Restart the computer, then reproduce the slowdown with the same apps open.
- Press Ctrl + Shift + Esc to open Task Manager.
- In Processes, sort by CPU, Memory, Disk, and Network in turn.
- Note which app or process stays near the top. A brief spike is normal; sustained high use points to the area that needs attention.
- Install pending Windows and driver updates, restart, and test again.
Do not end an unfamiliar Windows process simply because it uses resources. Search its exact name or check the app's publisher first. Persistent 100% disk use, repeated crashes, unusual fan noise, or storage errors may indicate a failing drive or another hardware problem rather than a setting.
1. Free storage space safely
Windows needs free space for updates, temporary files, caches, and virtual memory. Open Settings > System > Storage to see which categories use the drive. Select Temporary files, review every category, and remove only data you no longer need. Be careful with Downloads, Recycle Bin, and previous Windows installations because deletion may be difficult or impossible to undo.
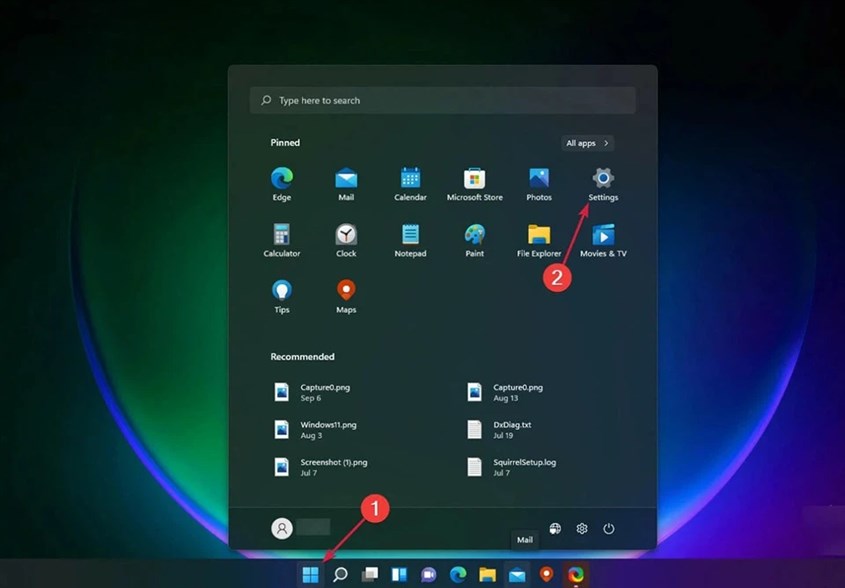
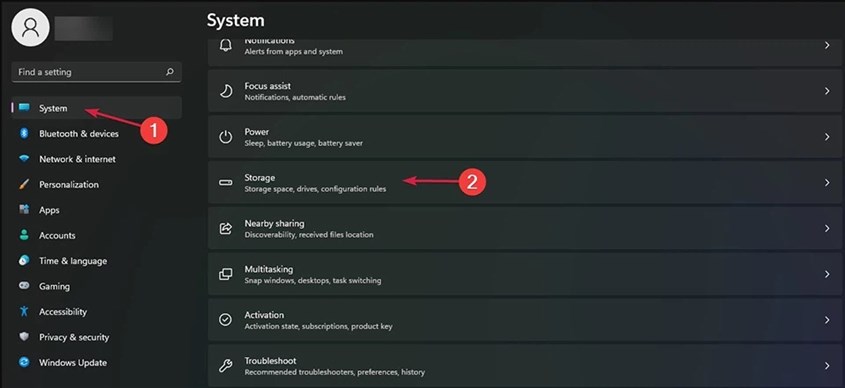
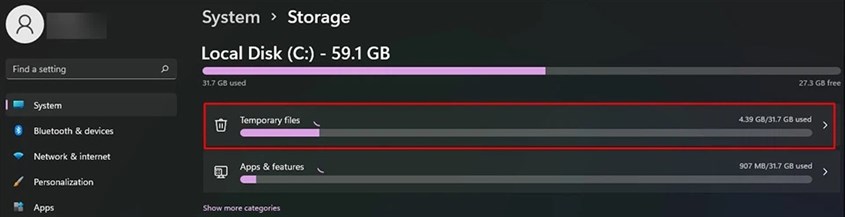
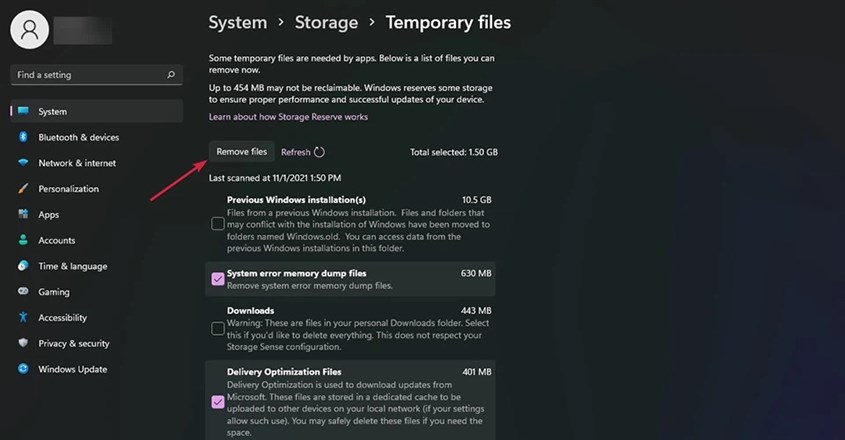
For ongoing cleanup, enable Storage Sense under the same Storage page. Open its settings to choose when it runs and whether it may clear Recycle Bin or Downloads files. Microsoft explains the available controls in its Storage Sense guide.
2. Uninstall software you no longer use
Unused applications consume storage and may add background services, scheduled tasks, or startup entries. Go to Settings > Apps > Installed apps, sort or search the list, open an app's three-dot menu, and choose Uninstall.
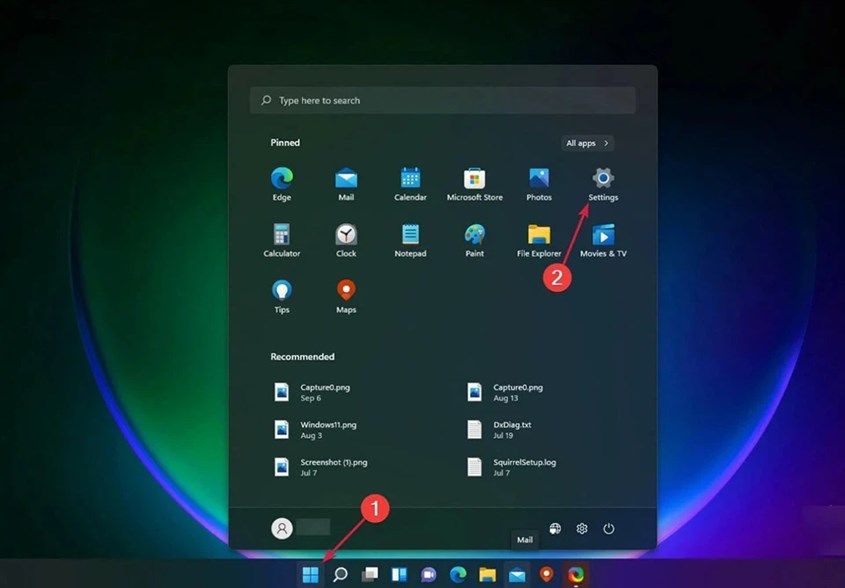
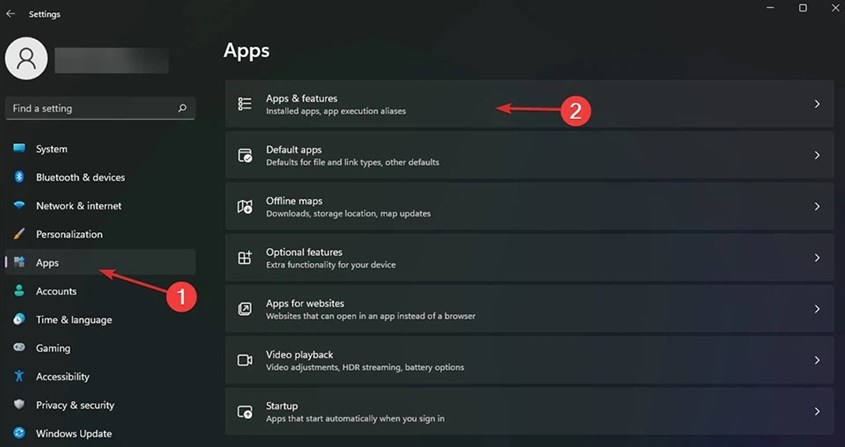
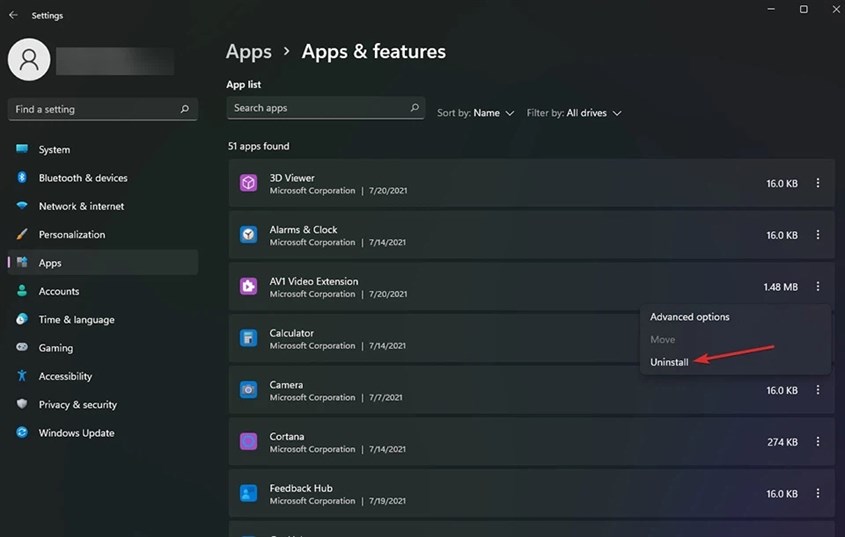
Remove only software you recognize. Hardware utilities, audio components, touchpad packages, VPN clients, and business security tools may be required even if you rarely open them. If uncertain, check the publisher and the PC manufacturer's support page.
3. Reduce startup load
Programs that launch at sign-in can make booting slower and keep using memory afterward. Open Settings > Apps > Startup and switch off nonessential items, or open Task Manager and select Startup apps. Pay attention to the reported startup impact.
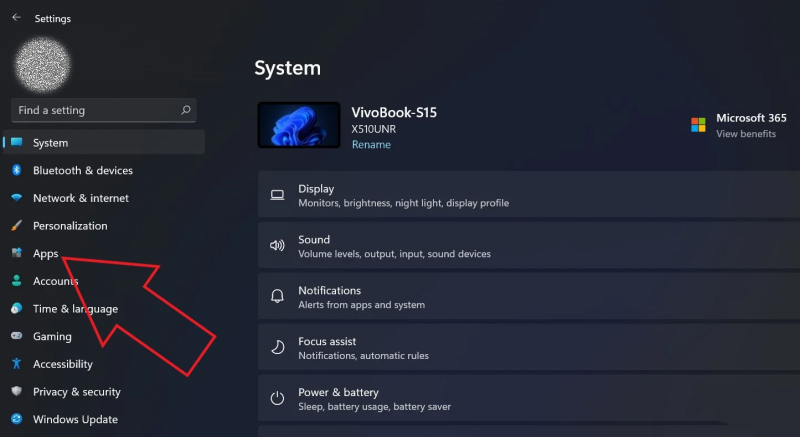
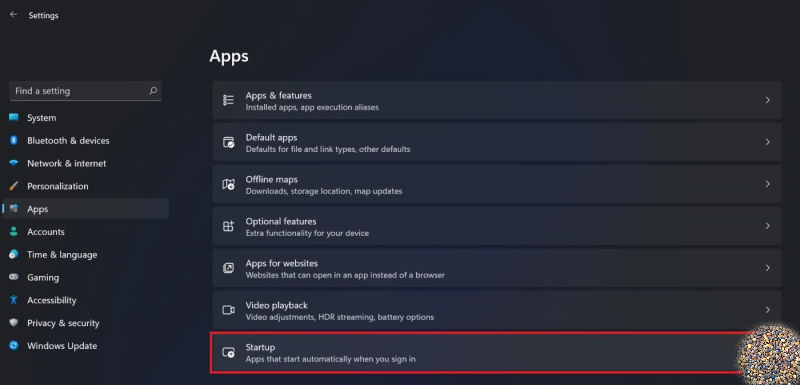
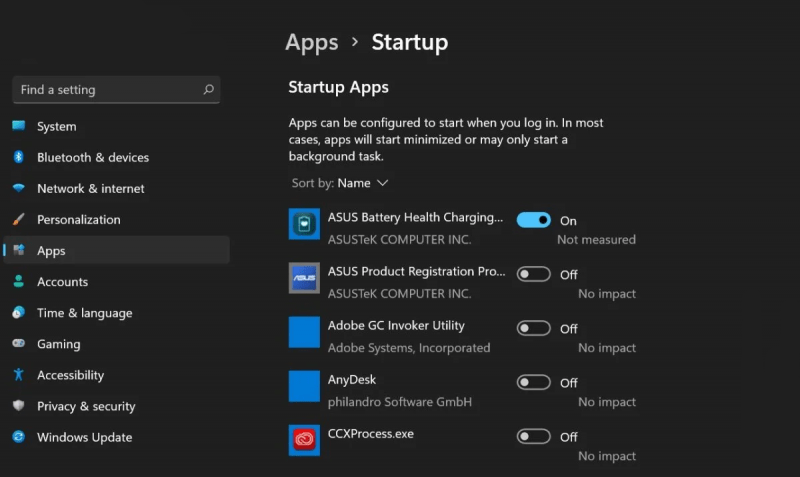
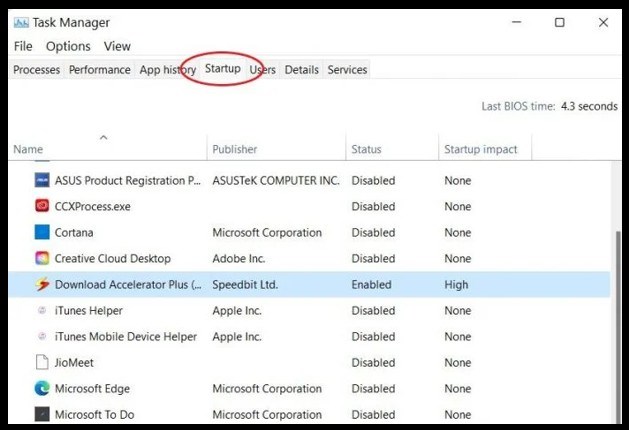
Good candidates include chat clients, game launchers, and updater tray apps you use occasionally. Keep security software, accessibility tools, storage synchronization you rely on, and hardware control utilities enabled. Disabling a startup entry does not uninstall the app; launch it manually when needed.
4. Keep Windows and applications updated
Updates can fix performance bugs, memory leaks, driver problems, and security vulnerabilities. Use Settings > Windows Update, then check the PC or component manufacturer's support page if a display, network, or audio problem persists.
For applications recognized by Windows Package Manager, open Terminal and preview available updates:
winget upgradeAfter reviewing the list, update a specific package or use:
winget upgrade --allSome apps use their own updater and will not appear. TipsMake's WinGet tips explain package pins and more controlled update workflows; Microsoft's WinGet upgrade reference documents the current command options.
5. Optimize the correct type of drive
Search Start for Defragment and Optimize Drives. Windows uses the appropriate optimization for the detected drive: it can consolidate fragmented data on a mechanical hard drive and issue storage-appropriate optimization such as TRIM for an SSD. Do not use third-party tools to repeatedly perform traditional defragmentation on an SSD.
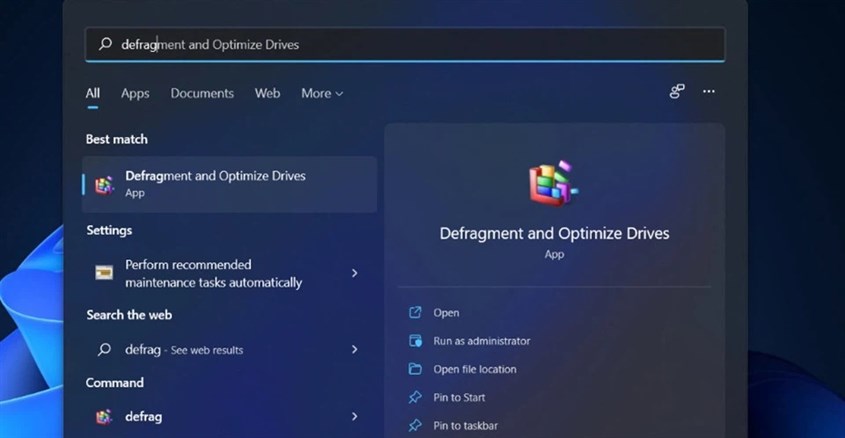
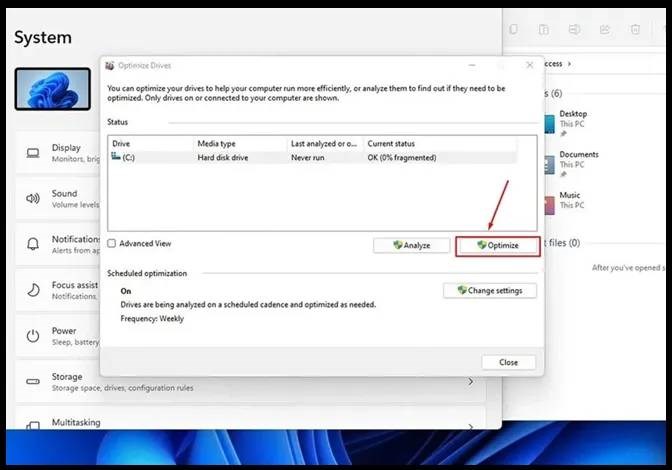
Leave scheduled optimization enabled unless your administrator or storage manufacturer instructs otherwise. TipsMake has a separate explanation of how Windows optimizes HDDs and SSDs.
6. Reduce visual effects on modest hardware
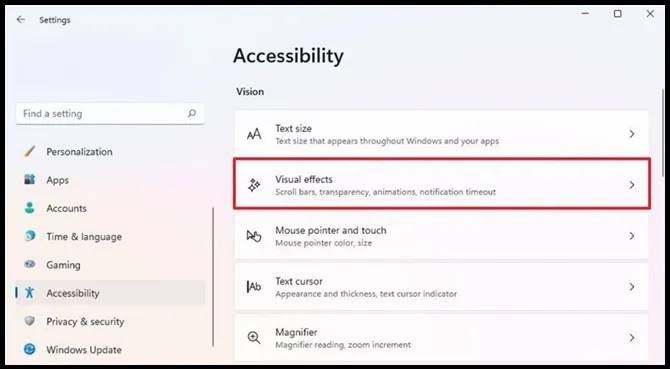
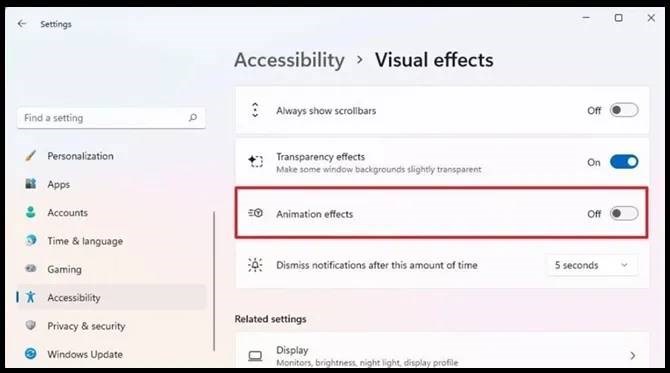
Animations and transparency consume some graphics and memory resources. On a low-powered or older PC, open Settings > Accessibility > Visual effects and turn off Animation effects or Transparency effects. Test each change; the improvement may be small on modern hardware.
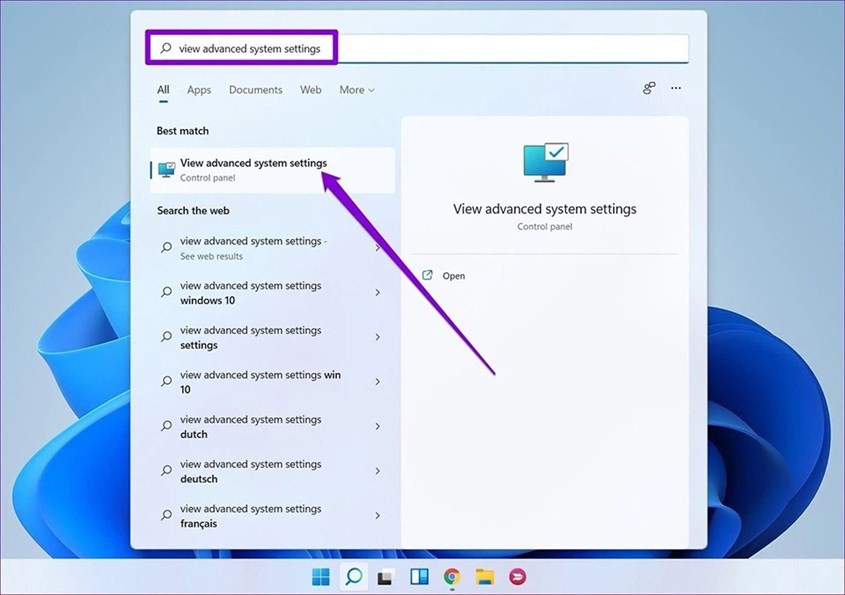
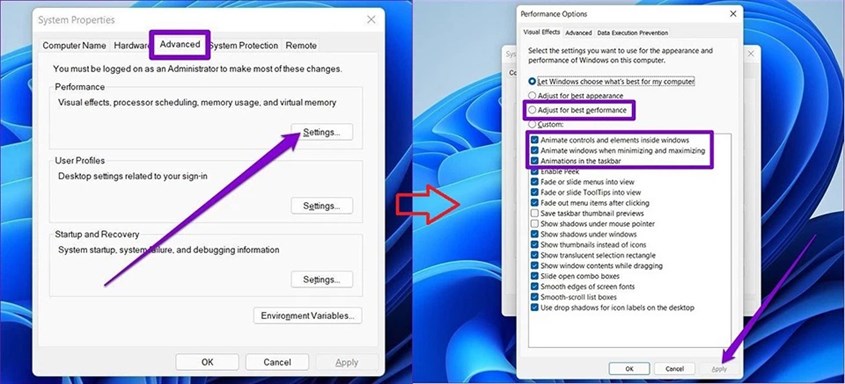
For finer control, search for View advanced system settings, open Performance Settings, and choose individual effects. “Adjust for best performance” disables nearly all of them and can make text or navigation less pleasant, so a custom selection is usually better. See TipsMake's guide to Windows visual effects for the available options.
7. Choose an appropriate power mode
On a laptop, a performance-focused power mode can improve responsiveness while increasing heat, fan noise, and battery use. Open Settings > System > Power & battery > Power mode and compare Balanced with Best performance while connected to power.
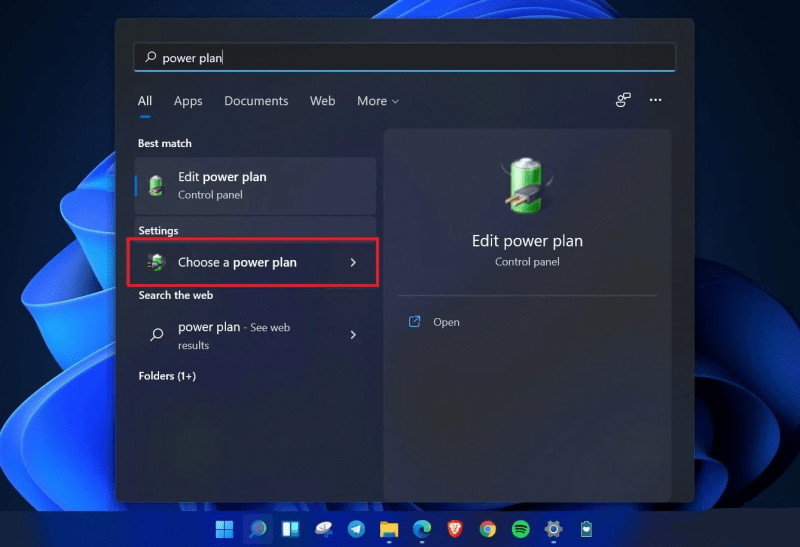
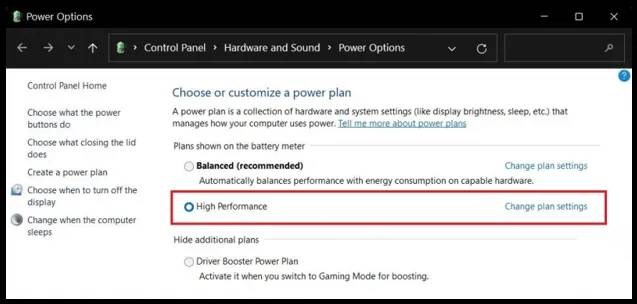
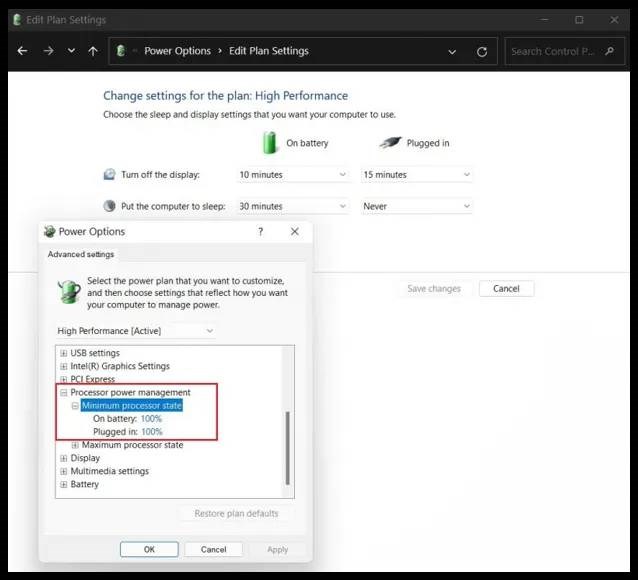
Do not force the minimum processor state to 100% as a general optimization. It can keep the CPU from idling efficiently without fixing the real bottleneck. If the system throttles under load, clean blocked vents, use it on a hard surface, and check temperatures and manufacturer diagnostics.
8. Control notifications without disabling useful alerts
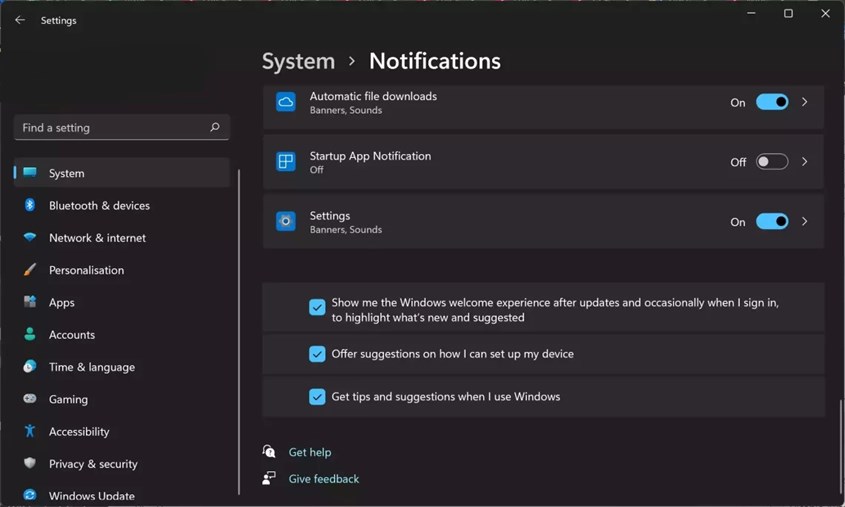
Notifications rarely cause a major performance problem by themselves, but reducing them can improve concentration. Go to Settings > System > Notifications and disable noisy apps individually. Keep important security, backup, calendar, and work alerts.
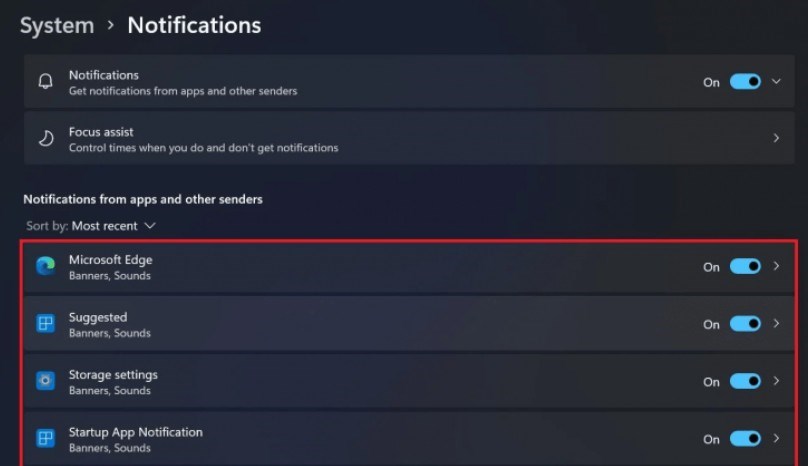
On the Notifications page, expand Additional settings to turn off Windows setup suggestions and general tips if they are not useful.
9. Leave Game Mode on unless troubleshooting
Game Mode is intended to prioritize a game and reduce some background activity. It does not normally need to be disabled on a work PC. If a specific game, capture tool, or application has a repeatable problem, test Settings > Gaming > Game Mode both ways and keep the setting that produces the better result.
10. Use built-in security without running duplicate scanners
Microsoft Defender Antivirus is sufficient for many home users when Windows is supported, updated, and configured normally. A reputable third-party security suite may still be appropriate for business policy or specialized features, but avoid running two real-time antivirus engines simultaneously because they can conflict and add overhead.

Do not disable real-time protection as a speed tweak. If scanning repeatedly slows a trusted development workload, use documented, narrowly scoped exclusions only after assessing the risk; never exclude the entire system drive.
Useful Windows 11 shortcuts for freezes and audio
- Ctrl + Shift + Esc: open Task Manager.
- Windows + Ctrl + Shift + B: reset the graphics driver when the display is black or frozen. The screen may blink and a tone may sound.
- Windows + Ctrl + V: open the volume mixer on supported Windows 11 builds.
- Ctrl while viewing Task Manager: pause the continually changing process list, which makes a process easier to select.
Some Windows 11 versions also offer End task from an app's taskbar button after it is enabled in Settings > System > Advanced > For developers. End Task can discard unsaved work, so use it only for an unresponsive app.
Advanced option: Dev Drive for development files
Developers with large source trees and package caches may benefit from a Dev Drive. It uses ReFS and integrates with Microsoft Defender performance mode, but it is designed for source repositories, build output, and package caches—not as a general speed booster or a place to install all applications.
Microsoft currently requires a supported Windows 11 build, administrator access, at least 50GB of free space, and at least 8GB of RAM, with 16GB recommended. Creating or resizing storage has data-loss risk, so back up first and follow Microsoft's Dev Drive setup guide.
When hardware is the limit
If Task Manager shows frequent memory pressure and heavy paging during normal work, more RAM may help—provided the PC supports an upgrade. Replacing a mechanical system drive with a compatible SSD often makes booting, launching apps, and file access noticeably more responsive, but exact gains depend on the old drive and workload.
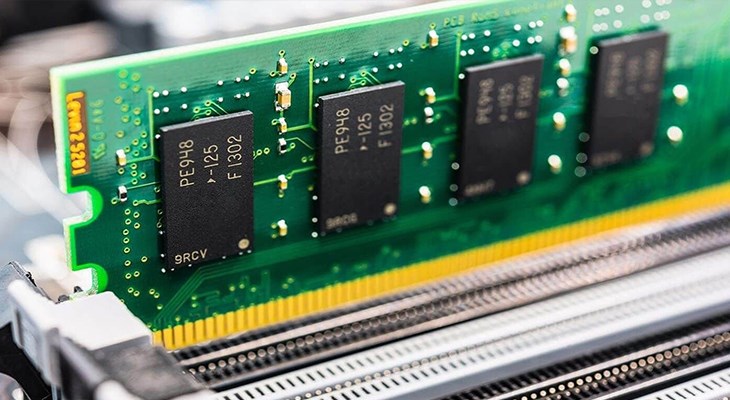
Check the manufacturer's service manual for supported memory, storage interface, physical size, warranty terms, and disassembly steps. Back up important data before opening the computer or migrating a drive.
A sensible optimization order
- Back up important files and restart.
- Measure CPU, memory, disk, and network use in Task Manager.
- Install Windows, driver, and application updates.
- Free storage and remove unused apps.
- Disable unnecessary startup entries.
- Test visual effects and power mode only if needed.
- Run Windows Security scans and manufacturer diagnostics if symptoms persist.
- Consider an SSD or RAM upgrade only after identifying the hardware bottleneck.
Change one category at a time and retest the same workload. That makes it possible to identify what actually helped—and to reverse a setting that created a new problem.
Related Articles
 7 Best Tips for Optimizing Your PC When Playing Games8 minutes read
 Clean up and Optimize Windows with System Ninja5 minutes read
 Useful Computer Tips and Tricks Everyone Should Know20 minutes read
 How to Use Your SSD Effectively: Optimizing Speed and Lifespan8 minutes read
 11 Tips to Extend Computer Life11 minutes read
 RAM Prices Are Skyrocketing: Tips for Running a Smooth PC Without Upgrading8 minutes read
Reader Comments 0
Sign in with email or Google to join the discussion.