Instructions on how to upgrade Windows 10 Home to Pro
Windows 10 debuted in 2015 and today Windows 10 is leading the list of the most popular computer operating systems, followed by Windows 7. Like its predecessor, Windows 10 also divided the operating system. Your actions into categories such as Home, Pro, Enterprise .

Here, let's find out how to upgrade Windows 10 from the Home version to the Pro version!
1. Upgrade Windows 10 Home to Windows 10 Pro in Windows Settings
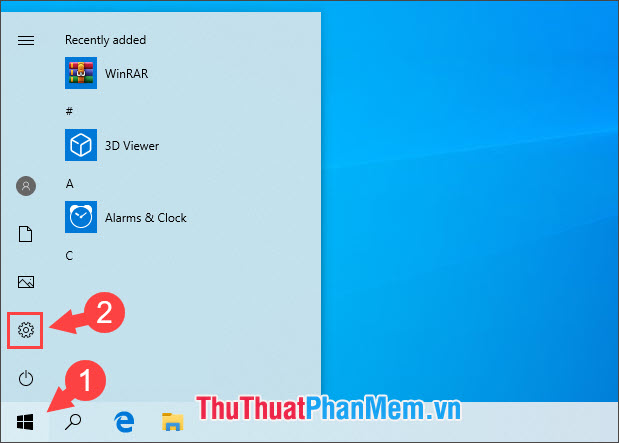
Step 1: Click on Start (1) => Settings (2) .
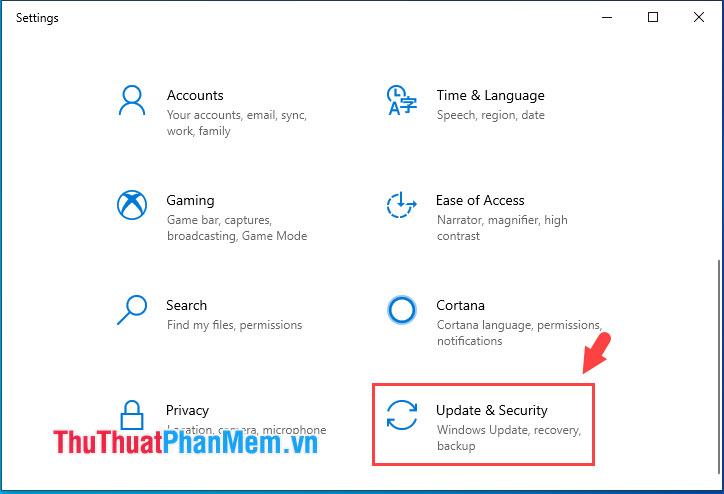
Step 2: Choose to Update & Security section .
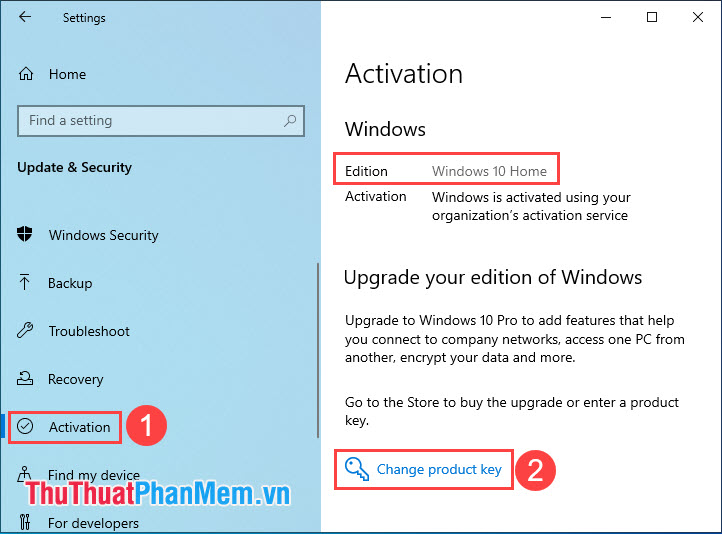
Step 3: Go to Activation (1) . Here, you can see the Windows 10 version in the Edition on the right side is Windows 10 Home . Next, click on Change product key (2) .
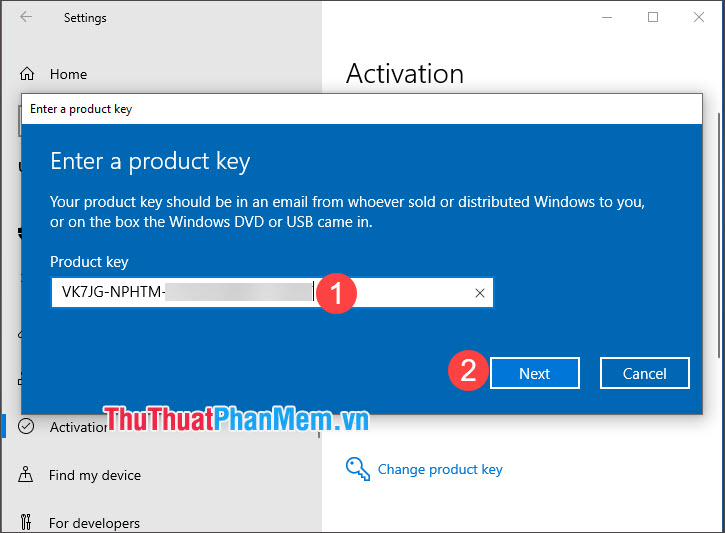
Step 4: Enter the Windows 10 Pro key into the box (1) => Next (2) .
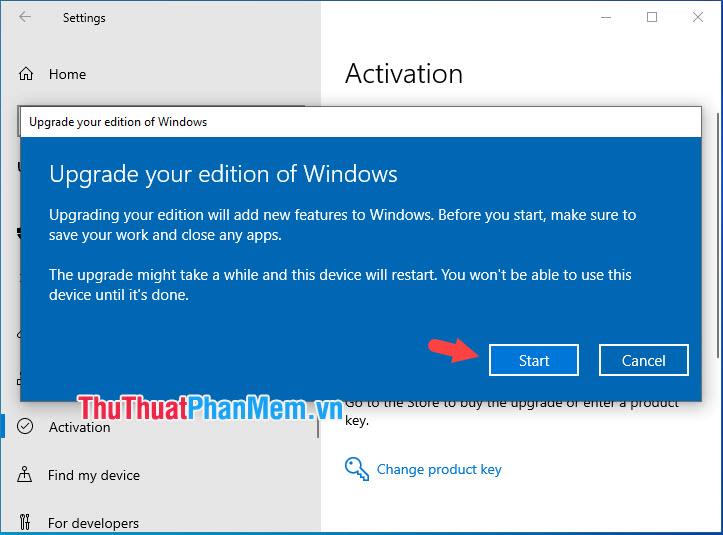
Step 5: Click on Start to begin changes.
Your Windows will be upgraded soon, so wait for a few minutes until % complete reaches 100% complete .
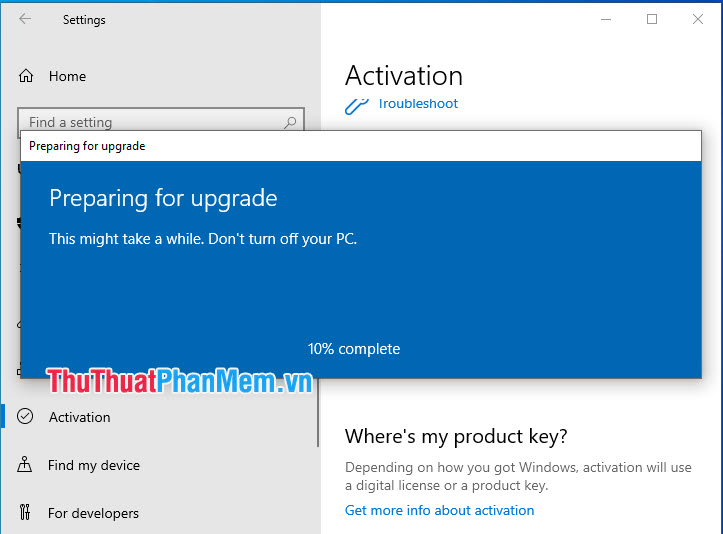
After that, Windows will automatically reboot and add some new features that the new Pro version has.

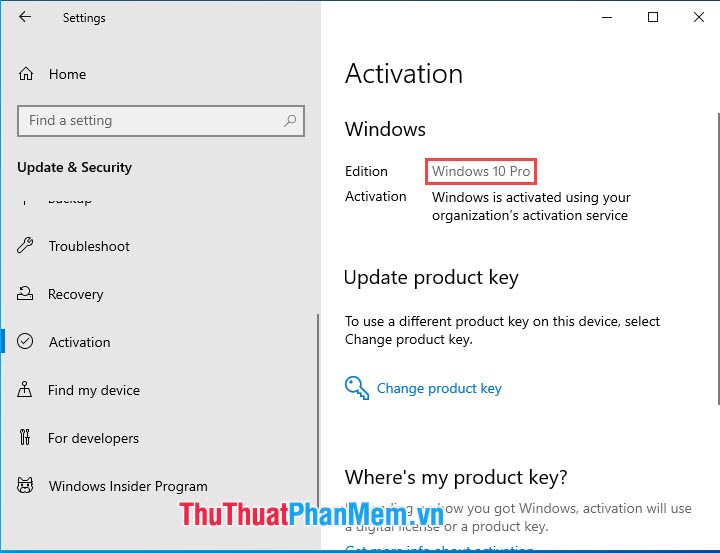
Step 6: After rebooting the computer and returning to the main screen, please check again. If your version of Windows has been on Windows 10 Pro as shown below is successful.
2. Upgrade Windows 10 Home to Windows 10 Pro in Command Prompt
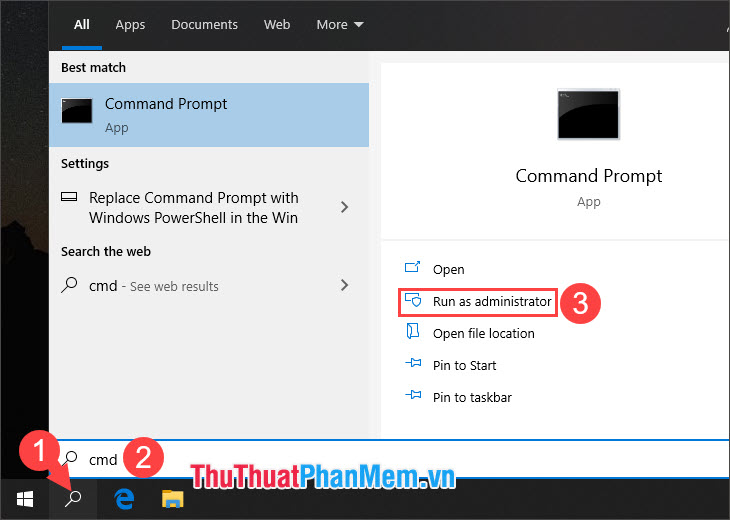
Step 1: You click on Search (1) or using the key combination Windows + S . Next, you search for the keyword cmd (2) => Run as administrator (3) .
If a message appears, click Yes .
Step 2: Enter the following command.
Dism / Online / Get-CurrentEdition
We will see the current Windows version in the article is Home in the Current Edition section .
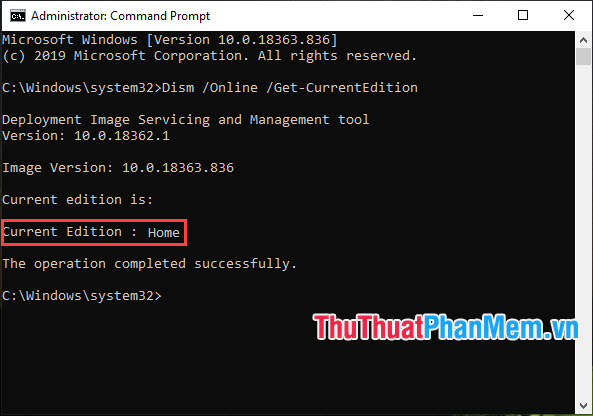
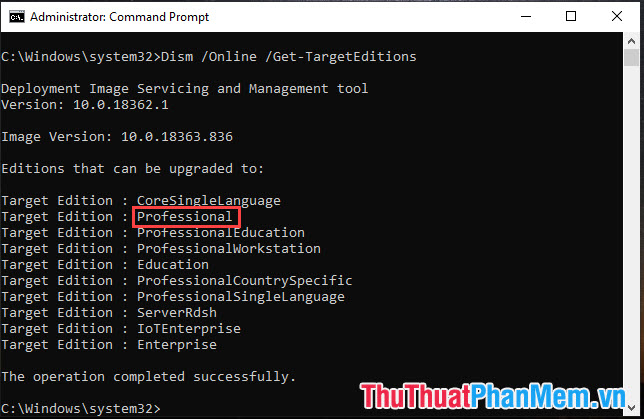
Step 3 : You perform the following command to check the upgrade capability of Windows 10 Home.
Dism / Online / Get-TargetEditions
Thereby, you can see that Windows 10 Home can go to the Pro ( Professional ) version.
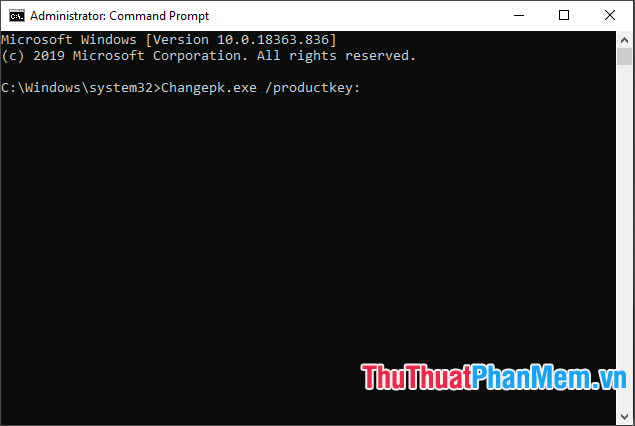
Step 4: You perform the upgrade with the following command.
Changepk.exe / productkey:
Step 5: Activation dialog box will appear, enter the Windows 10 Pro key in the box (1) => Next (2) .

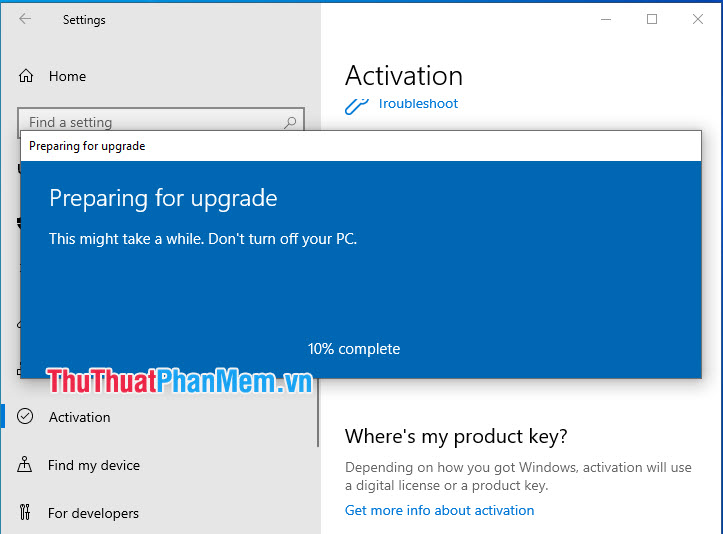
Next, click on Start to confirm the upgrade.
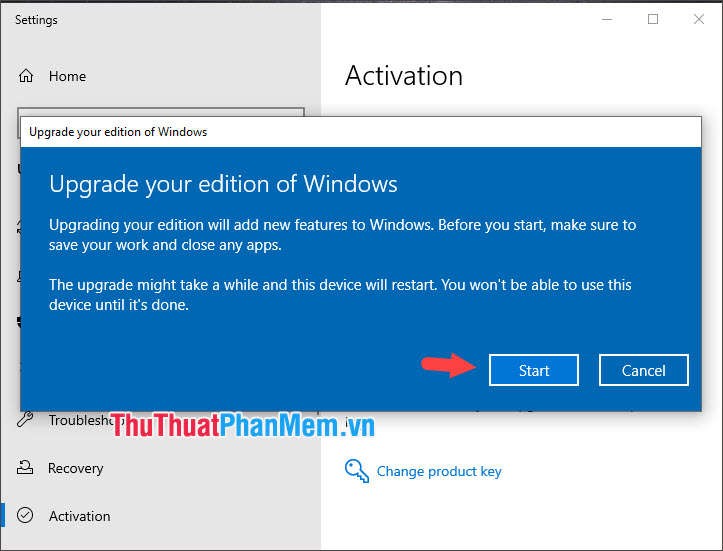
After that, the upgrade process will take place, you should wait from a few minutes to a few dozen minutes for the computer to update the advanced version.
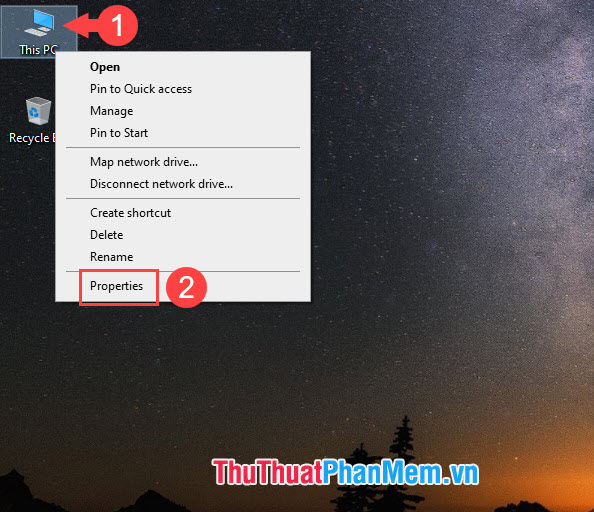
Step 6: After booting up, you should check Windows. You can check by right-clicking on This PC (1) => Properties (2) .
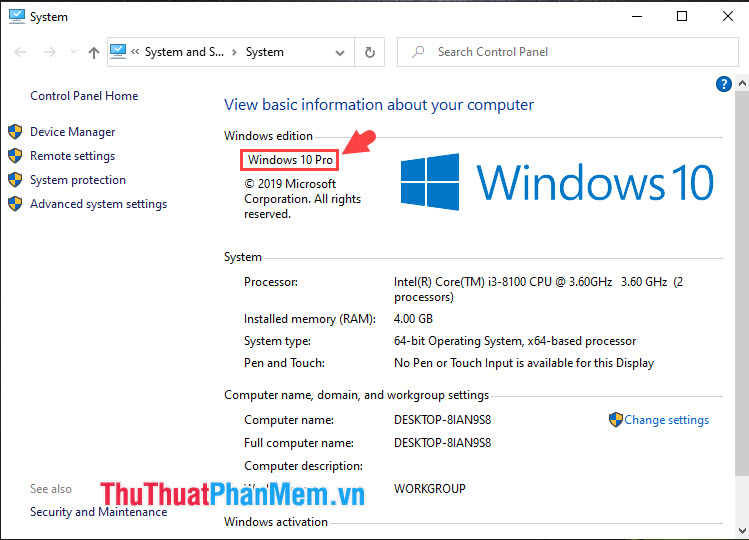
When you do, you will see the status of using Windows 10 Pro as shown below is successful.
With the guide in the article, you can use the computer effectively and quickly with the improved and more secure version of Windows 10 Pro. Good luck!