Instructions on how to build a computer at home simply and quickly
In this article, I will guide you in detail how to assemble a computer system simply and quickly. Please follow along.
- I. Prepare tools and disassembly
- II. Computer assembly steps
- 1. Remove the computer case
- 2. Install a cooling fan
- 3. Install the motherboard shield and gasket screws
- 4. Install the CPU
- 5. Install RAM
- 6. Install the CPU cooling cooler
- 7. Install the hard drive
- 8. Install the computer power supply
- 9. Install push button and peripheral communication port
- 10. Insert the graphics card
- 11. Plug the power cable into the component
- III. Open the BIOS check the system
- IV. Install Windows
I. Prepare tools and disassembly
Disassembly work of course will require a variety of tools to make your support easier. The tools that you need to prepare are as follows:
- - Screwdrivers come in many different sizes.
- - Tweezers curved head and straight head to pick up small components such as screws, chips, wriggle in narrow slots that can not reach hands.
- - Plastic drawstring to fix the bundles.
- - Prepare a USB, CD, . containing the Windows 10 installer .
- - Have a monitor, keyboard , mouse, and speaker available for testing after mounting.
- - A box or tray to store snails to avoid misplacement.
2. Steps to assemble the computer
1. Remove the computer case
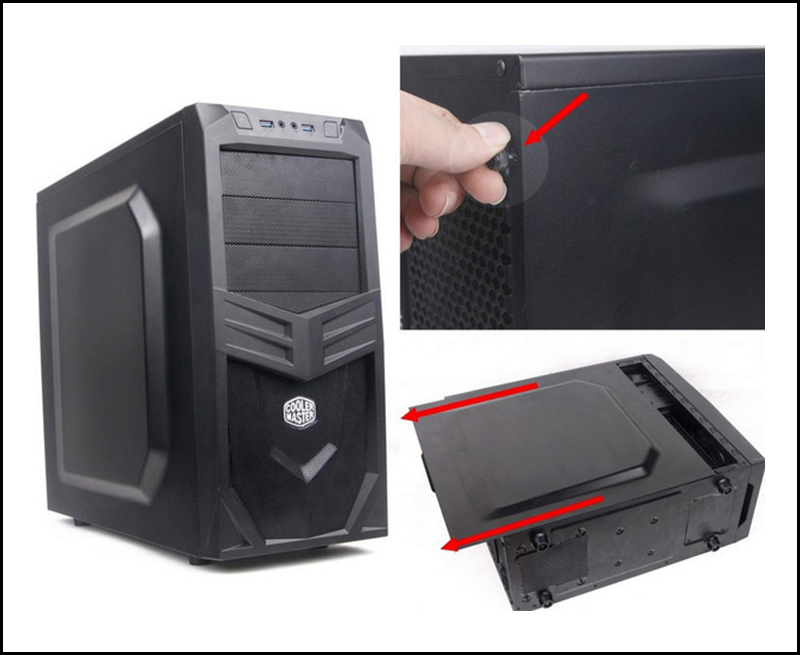
The computer case when you buy it will be fixed briefly by the manufacturer with the screws. Use a screwdriver to remove these screws, remove the case, and place in a flat place. The screws are put in the snail box to avoid being lost.
2. Install a cooling fan
The rule when installing a fan is to make sure the amount of air entering the chassis is more than the amount of air coming out of the tank, which will keep the internal temperature at the lowest level.
Usually, the front of the fan will only be labeled with the brand's logo. The back is labeled with the fan's specifications and there are plastic bars connecting the frame to the center of the fan. Another way to distinguish the front and back is that the side of the fan will have 2 arrow symbols, 1 vertical arrow indicates the direction of the fan's rotation, the other arrow will indicate the direction of the air circulation.
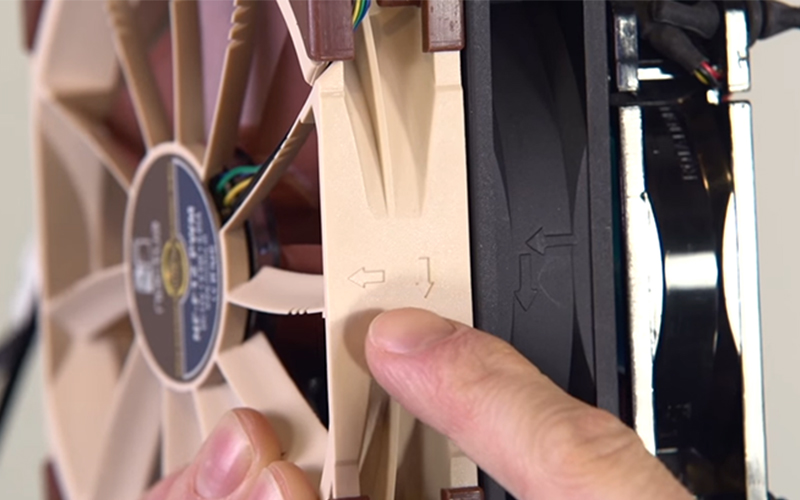
You need to install it so that the back of the fan is facing inside the chassis, the front facing out. The air will go from the front to the back in the direction of the arrow indicating the direction of the air circulation.
3. Install the motherboard shield and gasket screws
The motherboard shield comes with the motherboard, is rectangular in shape and has holes of different shapes. This shield will be installed in a rectangular slot on the back of the chassis. The motherboard after being installed will be inside the case, next to the shield. The holes in the shield will correspond to the motherboard connectors.
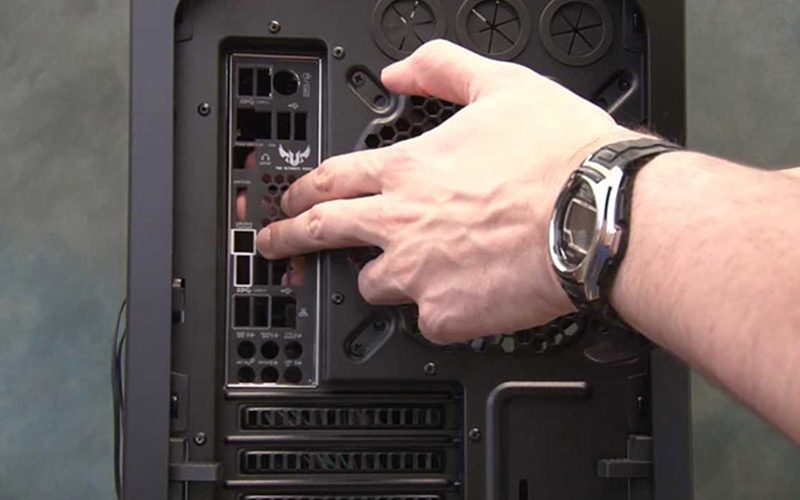
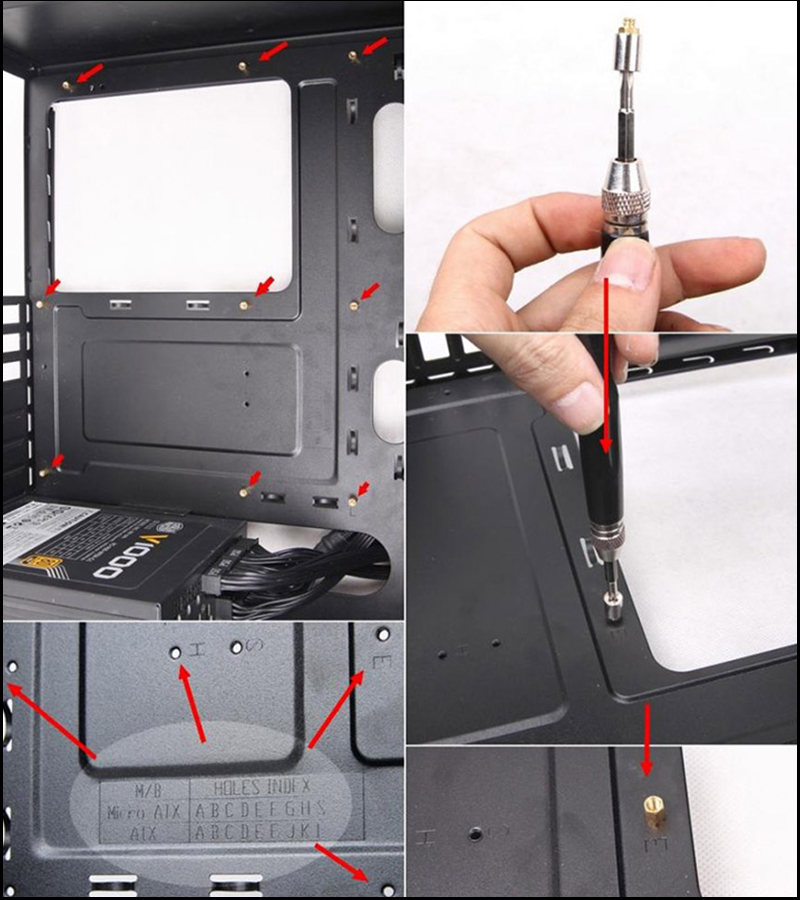
Next, you will install the gasket screws around where the motherboard will be located. The gasket helps and prevents the motherboard from making contact with the case, which can easily lead to short-circuiting when the power is plugged in.
4. Install the CPU
The main place to install the CPU is to install it on the motherboard. You open the cover by gently pressing down on the latch and pushing the metal lever to the right and then pulling up the cover. You put the CPU in to match the existing frame.
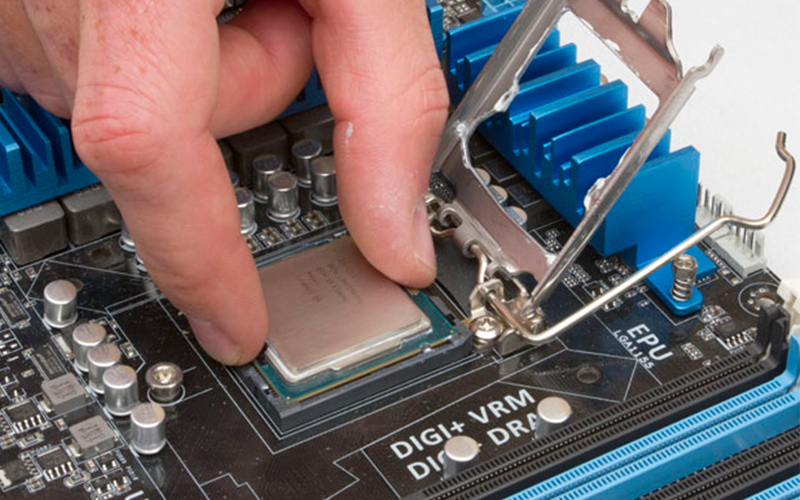
On the CPU there will be triangular symbols in the corners, as well as indents on the sides. You need to place the CPU in the chassis so that the triangular and concave markings match the markings on the motherboard.
After you have placed the CPU in, you close the cover, the way to close the cover will be the opposite of how to open the cover.
5. Install RAM
On the RAM sticks will have 1 edge are the pins used to plug into the motherboard. You hold the RAM stick upright and press lightly down the slot so that the pin fits into the slot. You pull the latch on both ends of the slot to fix the RAM stick.
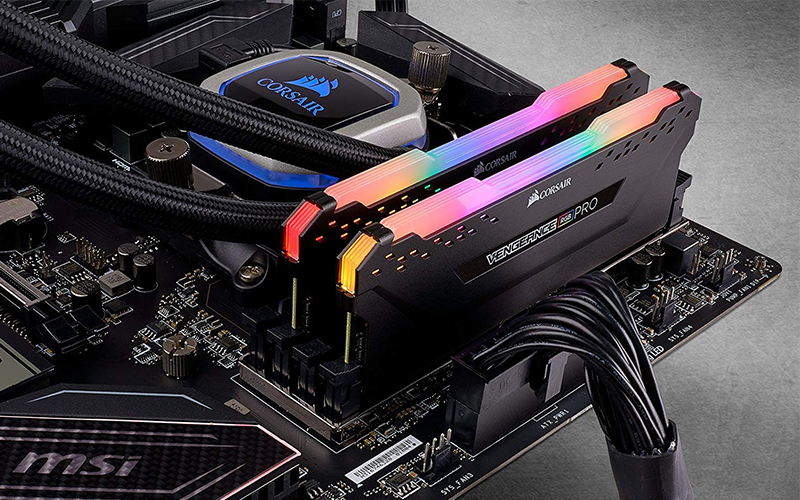
Note when plugging in RAM:
+ If only 1 stick of RAM is installed, it should be plugged in the slot farthest from the CPU. When you use heavy tasks the CPU heats up, the high temperature affects the RAM.
+ If you want to plug 2 RAM sticks and motherboard has up to 4 slots, please plug them alternately. This will enable Dual Channel technology, which is a technology that doubles the transfer speed between RAM and system memory.
6. Install the CPU cooling cooler
You should be careful at this step as this is the most difficult step in building your own computer. After the CPU has been fixed to the chassis, you place the heatsink so that the 4 pins fit the 4 holes around the CPU. You lock the heatsink by symmetrically pressing each pair of heatsink fan legs down. When you hear a "click", the fan base is fixed.
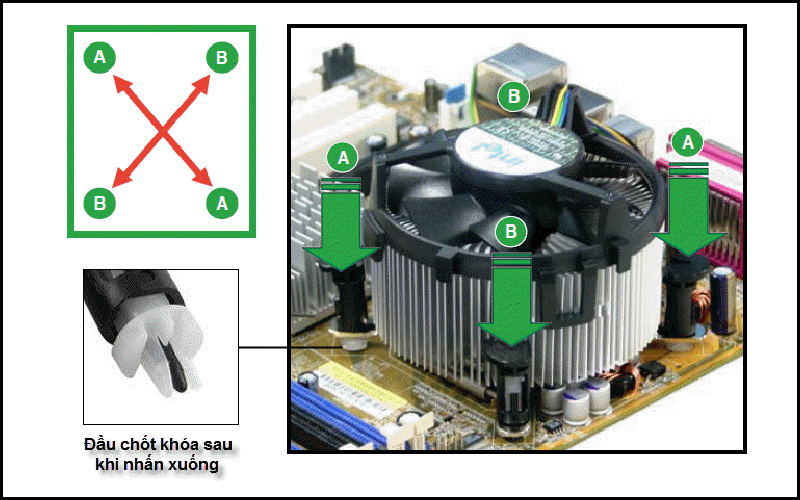
Next, you plug the heatsink power cord into the 4 CPU fan pins on the motherboard to make the heat sink work.
7. Install the hard drive
The motherboards today support many different types of HDDs, SSDs. For HDD, you leave the drive horizontally, the circuit part is facing down and then put it in the corresponding tray, fixing the screws.
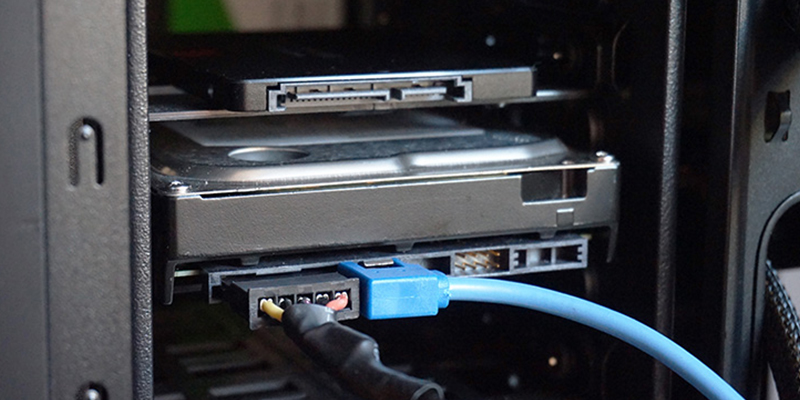
SSDs also have a similar mounting method, but the screw hole is located on the body of the hard drive, so you should pay attention to the location of the drive to facilitate the SATA cable .
8. Install the computer power supply
The power supply unit is quite heavy so it is usually located at the bottom of the chassis. You place the heat sink of the source to face down the bottom of the barrel, helping the source to absorb more air.
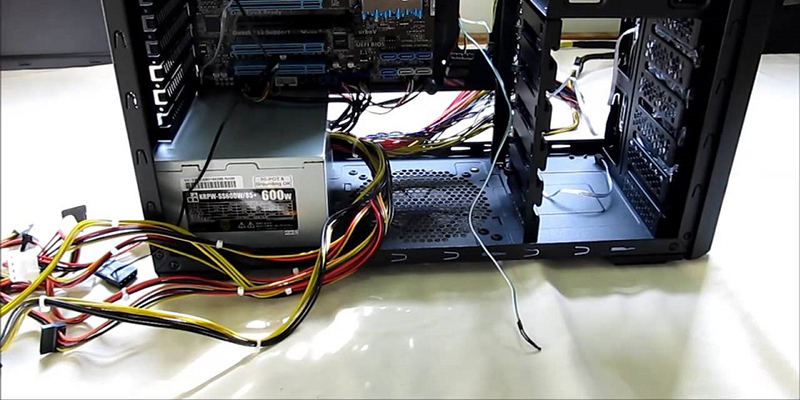
The power pin of the power cord will face the back of the chassis, you install the screw to fix the power to the chassis.
9. Install push button and peripheral communication port
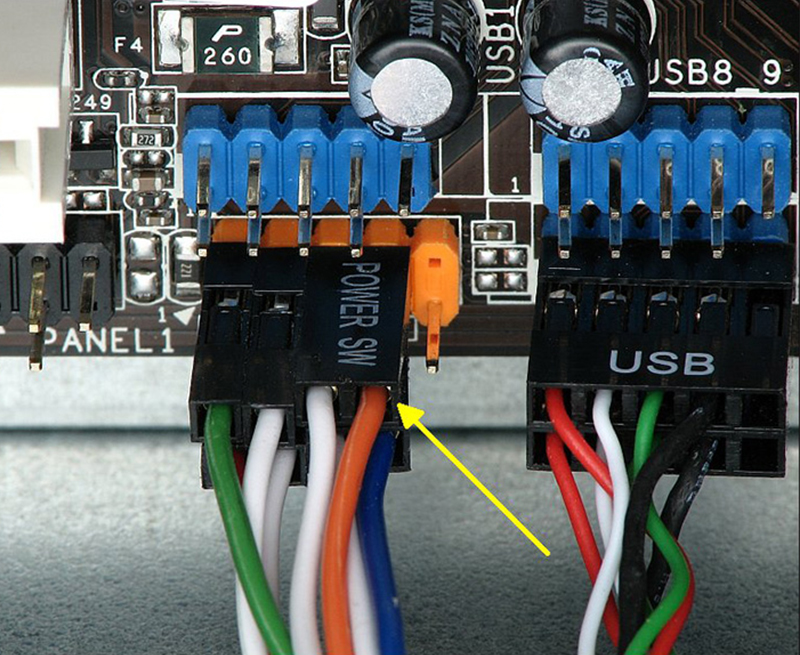
When attaching the push buttons and peripheral ports, you should be very gentle and careful not to bend the pins. The HDD LEDs and the Power button have the positive and negative pins that need to be correctly inserted into the positive and negative pins on the motherboard.
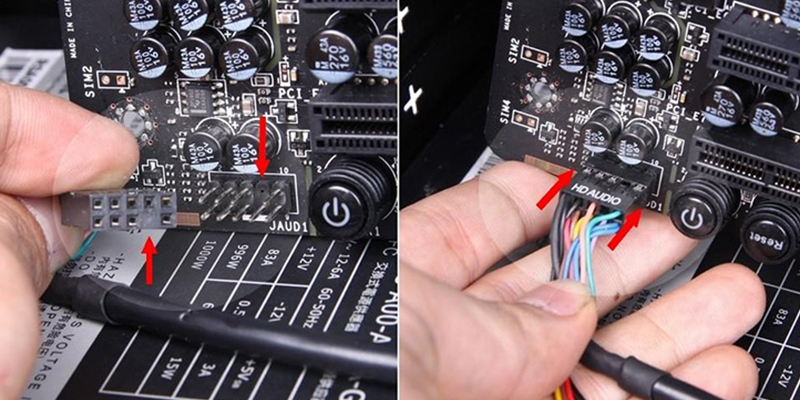
The audio jack is usually located on the lower left side of the motherboard. On the plug and the plug will be missing 1 position, when plugged in you just need to align these 2 missing positions together.
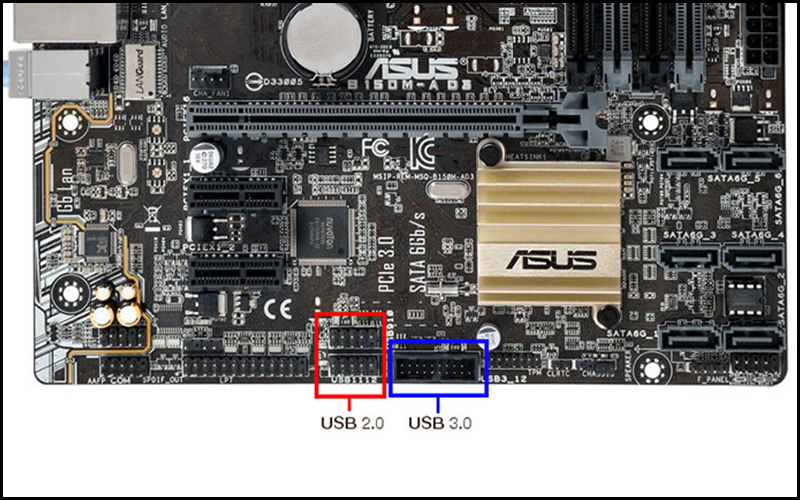
For the USB cord, including USB 2.0 and USB 3.0. The only difference is that the USB 3.0 connector will be larger than the USB 2.0 end and have protruding tabs to hold the USB cord firmly. The USB pin is the same as the audio jack, there is a missing position so you need to align it and then plug it in.
10. Insert the graphics card
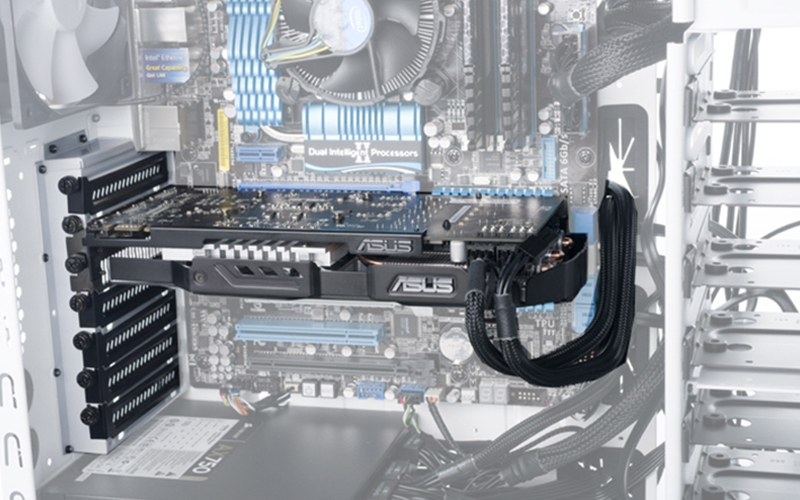
You need to look on the motherboard to see where the PCle slot is located, this is where the graphics card ( GPU ) is located. You take the graphics card and put it in the PCle slot , the card's contact leg is the recessed part that will be compatible with the top edge of the PCle slot.
11. Plug the power cable into the component
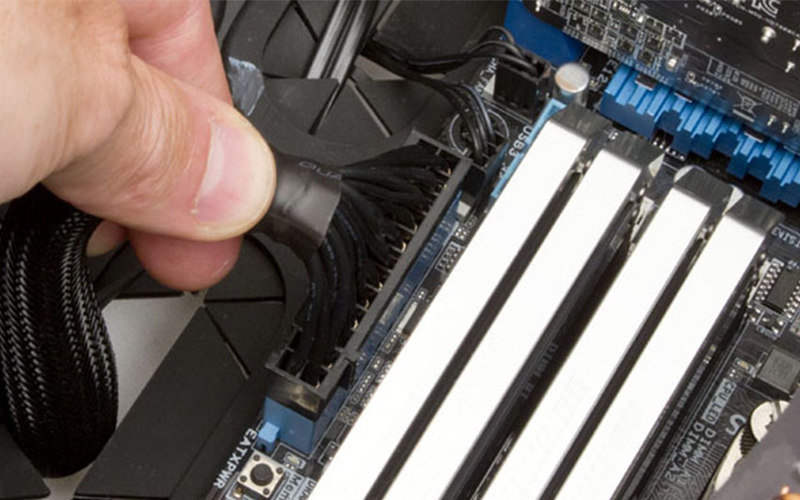
You define the pin between the source and the motherboard, that is the 24-pin plug, you plug it in so that it fits. The 8-pin pin between CPU and power is the same.
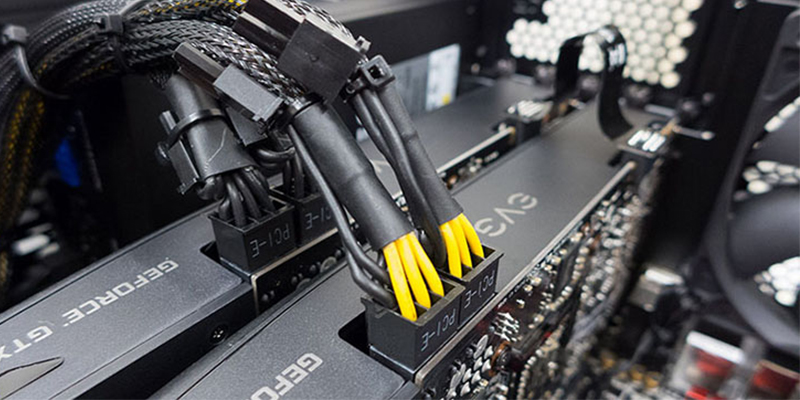
For GPU, the plug will have the word PCle at the end of the wire. You plug one end of the wire into the GPU, the other end plugs into the power in the right direction as when you plug pin 24 and pin 8.
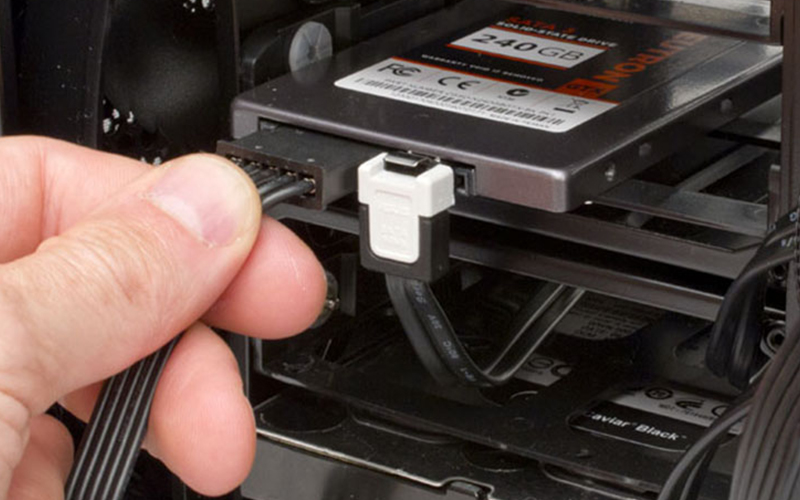
Next is plugging between the hard drive and the motherboard. You take one end of the SATA cable plugged into the hard drive and the SATA port on the motherboard.
III. Open the BIOS check the system
Thus, you have completely assembled the components of the computer into the chassis. At this point, drill and attach the barrel cover, but double-check that the power cables, data wires, .
You use a cable to connect the computer to the monitor, mouse, and keyboard. If you do not know how to connect between a computer and a monitor, please refer to the article below:
Plug in the power and press the Power button to open the computer> Press the Delete key to enter the BIOS interface> Select System Setting. You test against the following criteria:
- - Check the CPU cooling fan, PSU and radiator fan.
- - Check CPU temperature, allowable temperature is usually 40 - 50 degrees Celsius.
- - Check the speed of RAM.
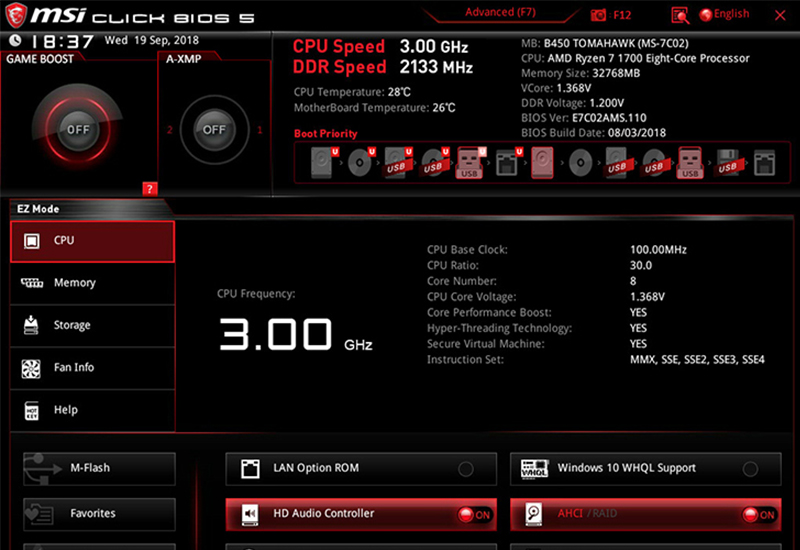
To end the test, press F10 to save and exit.
IV. Install Windows
If this is the first time you install Windows 10 yourself, you can refer to the article below for more details and better understanding of how to do it.
After you have installed Windows 10 and the machine is working well without any problems, clean up the assembly area, assemble the case into the chassis.
Above are the steps to guide you can install the computer at home. Thank you for watching and see you in the following articles.