Instructions for setting up a network on Windows 10 version 1903
Some Windows 10 version 1903 users are experiencing network issues after updating. If you are in this situation, follow the instructions below to fix the problem and re-establish your network connection..
After updating to Windows 10 version 1903, many users encountered network setup errors even after installing all the necessary drivers. This is a minor bug in this version and can be fixed quickly.
Instructions for setting up a network on Windows 10 version 1903
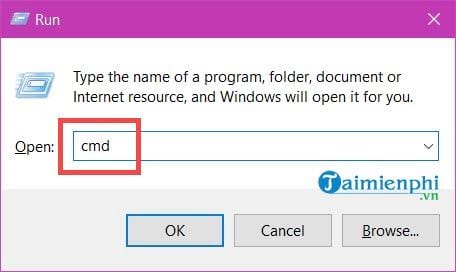
Step 1: Open the RUN tool by pressing Windows + R , type cmd , but instead of pressing OK , press Ctrl + Shift + Enter to open Command Prompt with administrator privileges.
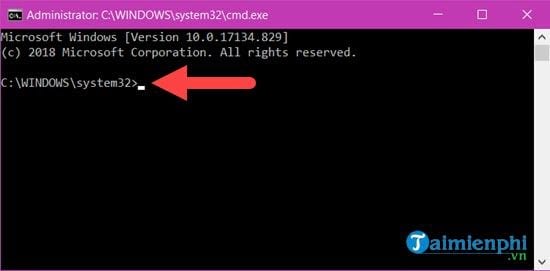
When a black window appears with the line C:Windowssystem32> , it means you have successfully opened Command Prompt with Administrator privileges.
Step 2: From here, we will work with commands to help set up the network.
First, type netsh winsock reset and press enter.

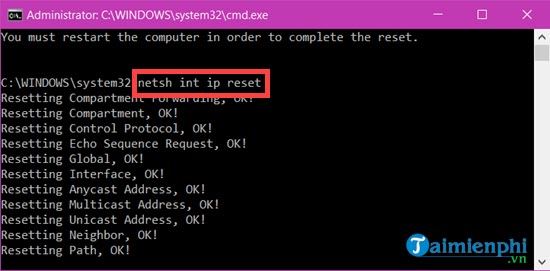
Next, type netsh int IP reset and press enter.
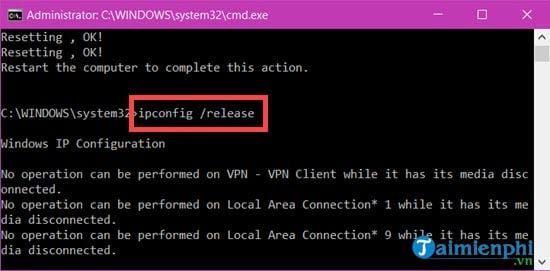
Enter the command ipconfig /release and press Enter to release the computer's current IP address.
- Type ipconfig /review and press Enter. This command requests the system to assign a new IP address to your computer.

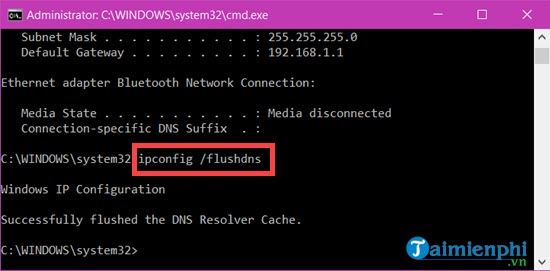
- Enter the command ipconfig /flushdns and press Enter to clear the DNS cache, which will refresh your network connection.
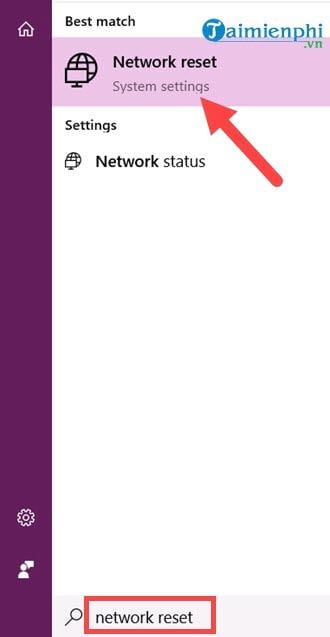
Step 3: Even after clearing the DNS cache, you still need to reset your network. Open the Start Menu and type network reset.
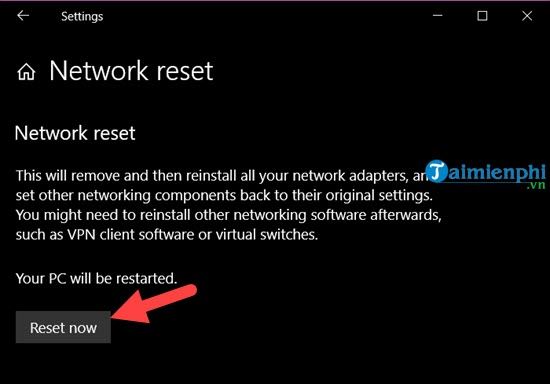
Step 4: Here, click on "reset now" to restart the network system immediately.
Confirm YES again to reset the network.

Step 5: After receiving a notification that the network will be reset in 5 minutes, you can wait or restart your computer immediately to apply the changes without waiting.

Restarting your computer will complete the network setup process, and the connection should work normally again. This concludes the guide.
Hopefully, the above guide will help you quickly resolve any errors you encounter. If you need more information, please refer to our comprehensive list of Windows 10 May 2019 update errors for suitable solutions.