Instructions for making movies with iPhone
Because of the importance of the communication function, it can be said that the device is the closest device to you. Following the trend of technology, smart phones like the iPhone are equipped with many additional extras needed, including integrated camera and video capture functions. The quality of video recorded from the new iPhone series (iPhone 5, 5s, 5c, 6 and 6 Plus) is of good quality, high resolution. Combining some basic spinning techniques with iOS editing tools can help you create professional videos on your iPhone, without using specialized camcorders or computer tools.
- Things to know before upgrading to iOS 9
- Instructions on how to upgrade to iOS 9
- Instructions for deleting messages on iPhone
Tips to shoot beautiful movies on iPhone
In order to get a good finished movie, you need to create a good video input first. To do this with iPhone, you use the following basic "tricks" ( applied to movie shooting with the default Camera application ).
- Start the camera quickly to not miss the moment you want to record. You just need to press the iPhone power button and press over the camera icon at the bottom right of the screen and swipe upwards. This is the fastest way to start the camera on the iPhone, because this smartphone doesn't include a hard camera button on the camera body.
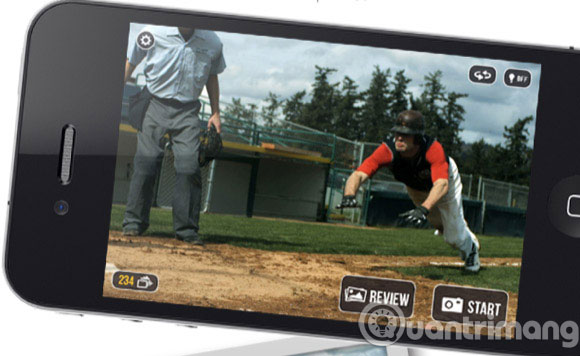
- During recording, try to keep the iPhone stable so that the image is beautiful and not blurry. In particular, if you do not use iPhone 6 Plus with the built-in optical image stabilization ( OIS - Optical Image Stabilization ), it is necessary to pay attention to this, especially when shooting in low light or in low light conditions. night. It will be very annoying if the recorded video is blurred, blurry, vibrating.
In some cases you want to have a video with very stable frames, it is best to equip a tripod (tripod) dedicated to the iPhone. The price of these accessories ranges from 200 to 800 thousand VND (depending on the brand).
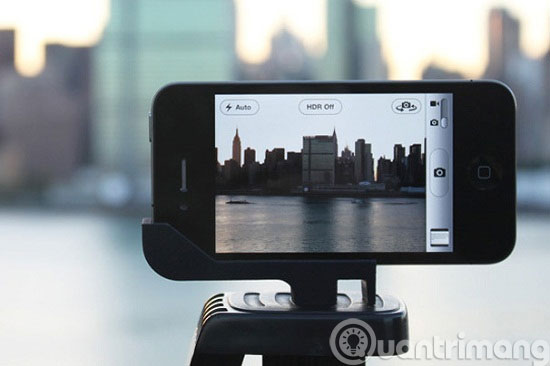
- You should record movies in landscape mode. This makes the video saved in standard size, beautiful display with wide screens ( Wide Screen ). iPhone or other smart phones can support video recording in the vertical, but if video recording is vertical, when displayed on the computer, the screen will be minimized, both sides of the frame will be Black looks very bad. In addition to aesthetics, video recording in horizontal mode will make editing more comfortable as it will not worry about cutting off fine details in the frame.
- Next, you need to pay attention to continuous manual focus when shooting movies with iPhone. The iPhone camera app itself is equipped with autofocus ( Auto focus ), but if it is left automatically, it will sometimes get the wrong subject, focusing will be slow and worse will make the video becomes blurred because it is impossible to focus in Auto mode. Better yet, you should be proficient in handling the camera ( you can hold the camera with your thumb and middle finger, focus with your index finger ). The focus when shooting movies on iPhone is quite simple, just touch the object you want to focus on. Note that while the focus is on the camera, you should not move or move the camera very slowly.
- Exploiting the focus lock function integrated on iPhone to get the most professional video. This function is really useful for small, close-up shots that the iPhone's autofocus itself cannot work effectively. Therefore, you focus on an object at the nearest distance, then press on the screen for about 2 seconds, when the screen shows AE / AF LOCK, then you activate the lock function definition success. This focus lock function also works when you record videos with fixed objects, landscapes, and movies with professional transition effects ( fade-in, fade-out, bokeh rotation, backlight . . ).
- The thing to note next is that you use to adjust the exposure for the camera of iPhone ( exposure ). This is really necessary and makes the frame more natural in each situation. By default, Exposure parameters are kept to an optimal level so that the image is most visible, if you want the frame to be darker or brighter, touch the subject you want to focus on, continue to drag up and down the sun icon. to change accordingly.
- You should keep the layout of the frame satisfying the basic requirements of photography, especially the 1/3 rule. Imagine and divide the photo frame into 3 parts for horizontal and vertical, then watch for the main subject to be in the third of the image. You should not put the subject you want to rotate in the middle of the frame, so it will be very unprofessional and sometimes annoying for viewers.
- Sometimes you will need iPhone's digital zoom function to make the video more unique. The digital zoom will cause the image to break, so consider the situation of shooting and enlarging the subject to a moderate level. You can also add a set of lenses designed specifically for smartphones to get far and special shots. CamKix lens sets can be selected ( about 1 million VND for the entire set including Telephoto Lens / Fisheye Lens / Macro Lens ). If possible, you can consider and buy the professional lens kit iPro Lens System Trio Kit with 2X Tele, Super Wide and Macro Lens , which costs about 169 USD.
- Although the new iPhone series incorporates high-sensitivity noise-canceling microphones for better sound recording, you should not rely on it without regard to the audio element for the video. When holding the device, you should pay attention and not cover the microphone slot, so aim the microphone toward the sound. In some cases (interview, recording near the subject), plug in an integrated Earpod headset when buying an iPhone and aiming the microphone on the headphone cord towards the subject for recording.
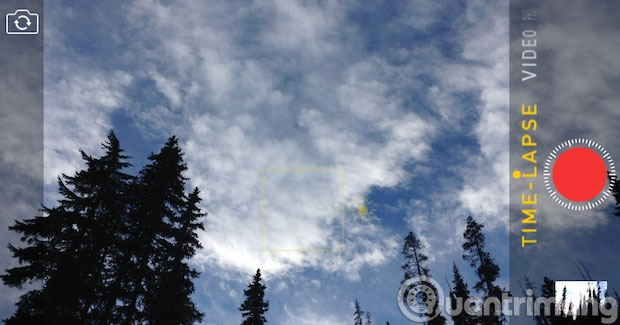
- Exploiting the special movie shooting features on iPhone. iPhone 5 and above is equipped with Time-Lapse recording function to save the fast-forward time shot, suitable for scenes of flying clouds, sunrise, sunset, blooming flowers . For iPhone 5s or more, Apple integrates a slow-motion movie recording function ( Slow Motion at 120fps to 240 fps ). You can use this slow movie recording feature to shoot the running scene of children, pets, sports scenes .
- If you feel that the video recording function on iPhone is not enough for you to be satisfied, you can install additional utilities from the App Store. These include applications like Spark , MoviePro, CameXtra2, VideoPix .
How to build professional movies
After you have "raw material" ( video clips ), the next thing you have to "process" (edit) into a complete video. There are many video editors for iOS from professional to professional versions, for example, if you want to combine individual videos together, add background music, you can use the VideoJoiner tool downloaded from the App Store. If you want to add effects, add captions with simple operations and share on social networks, you can download and use VivaVideo , Magisto .
Here we use iMovie for illustration
First, run the iMovie application and adjust the screen to horizontal to make it more comfortable. When you start editing with iMovie, press the + above the right corner to create a new Project. In the New Project interface, there are two options: Movie ( combining video clips, images and inserting music to create a short movie ) and Trailer ( creating a simple trailer in Hollywood movie style ), you click Movie to start movie editing.
The next step, you choose a topic available to suit your video, such as Travel (travel), Simple (simple), News (news form) . and select Create .
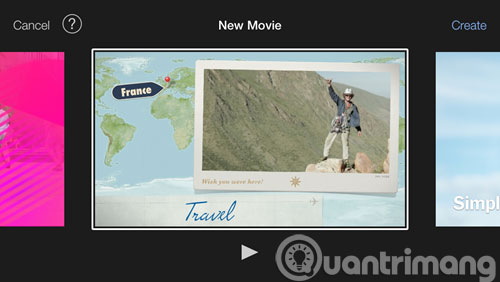
In the video editing interface, click on the video icon to add recorded videos to the editor, noting that in addition to videos, you can still add captured images, insert sounds - background music for videos . If you want to add any video or background music, choose and press the down arrow icon. Here, you can set the mode to add videos in full screen format, small frame format overwrite the original video . Because this utility has an undo function, you should work freely, if If you don't feel like it, you can press the arrow icon back to the right to undo.
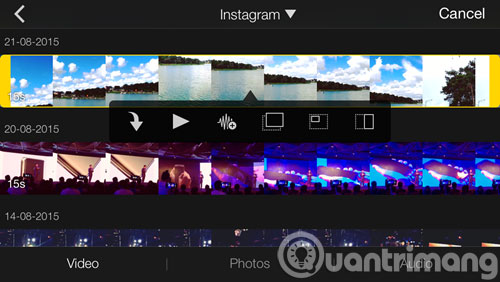
If you feel that the video and audio are not enough to make a complete movie, you can click the microphone icon to record or select the camera icon to record more.
iMovie for iOS also supports video cutting function, you can touch the video in the Timeline frame ( containing the edited video ) to show more toolbars, you click on the scissors icon > select Split to crop the video. If you want to delete any video, just touch the video and select Delete . When you want to duplicate any video, select Duplicate and to extract the audio from the video, select Detach . The way to delete the audio track is similar to the way to delete the video, you just need to scroll down, select the audio you want to delete and select.
In addition, the toolbar also has a fast video rewind function, click on the clock icon > drag the slider to the turtle icon direction to slow down and drag towards the rabbit icon to fast forward. The volume level adjustment function of the audio available in the video is quite useful, you can reduce the sound level of the video to low so that the background music is not drowned out by selecting the speaker icon and dragging the slider to appear later. there.
If you want to add captions or comments to the video, click on the T icon and type the content, you can also adjust the font as you like, but note that some fonts do not support Vietnamese Unicode code mark.
To make the video more vivid, you can add color filtering effects to the video by selecting the Filters icon and selecting one of the available filter templates ( B&W, Blast, Blue, Camo, Dreamy . ) .
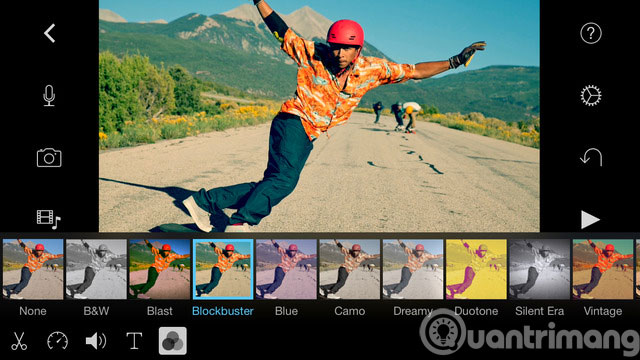
Another function you need to keep in mind is the gear icon (Project Settings) on the right side of the iMovie interface to help you reset the color filter mode (Filters) for the entire video, select the theme for the video (Theme). , background music (Theme Music), the function to adjust the way of first and last transitions . You should check this option before saving the edited video.
After completing the editing process, press the "<" icon to return to the save and share video interface. To preview the edited video, select the Play icon (triangle), to save the video, press the Share icon in the middle and select Save Video . Here, you can also share on Facebook, YouTube .
So you have finished recording and editing videos entirely with iPhone. This can be applied to other iOS devices like the iPad or iPod Touch. However, there may be some functions available on the iPhone but not on the other two devices due to Apple restrictions.
Have a nice weekend!
You should read it
- ★ How to download movies on iPad or iPhone
- ★ Top 10 Scariest Horror Movies in Halloween season that will make you have nightmares
- ★ How to Copy Music, Images, and Movies from Your Computer to an iPhone on Windows
- ★ How to Download Hindi Movies
- ★ Chisel iPhone 8 to forge rings, think crazy action but when you see the price of people not admiring