Instructions for installing hass.io on Raspberry Pi 3
Home Assistant is a software that helps act as a support center for controlling smart home devices and automated features..
Although more and more competitors, including formidable competitors like Odroid XU4, Raspberry Pi are still one of the single-board computers that many people choose. Besides many unique ideas taking advantage of this compact computer such as making media servers or game consoles . the benefits of compact, low power consumption make it a suitable choice for home users. minh.
Home Assistant is a software that helps act as a support center for controlling smart home devices and automated features. It's available for a Raspberry Pi version called Hass.io, a Raspbian-based Hassbian version. In addition, the Home Assistant can also be installed on other OSs such as CentOS, Red Hat Enterprise Linux, Fedora, Windows . as long as it supports Python environment from 3.5.3 and above.
Instructions for installing hass.io on Raspberry Pi 3
The necessary equipment
- Raspberry Pi (Pi 3 or Pi 3 B + recommendation)
- MicroSD card, size 32GB or more
- Power source (minimum 2.5A)
- SD card reader (most laptops are available, or USB readers can be used)
- Ethernet cable (option, hass.io can use WiFi)
- Raspberry shell (optional, but recommended)
The software needed
- Hass.io, download the version of Raspberry here
- Etcher to write Hass.io image on SD card here
- Editing tools, such as Visual Studio Code
Steps to install hass.io on Raspberry Pi
When you have fully prepared the device and downloaded the necessary software, please install hass.io on Raspberry 3.
Step 1:
Insert the SD memory card into the computer (or via the card reader), then open Etcher. Here you select the IMG file of hass.io software downloaded and decompressed earlier and flash hass.io to the card.
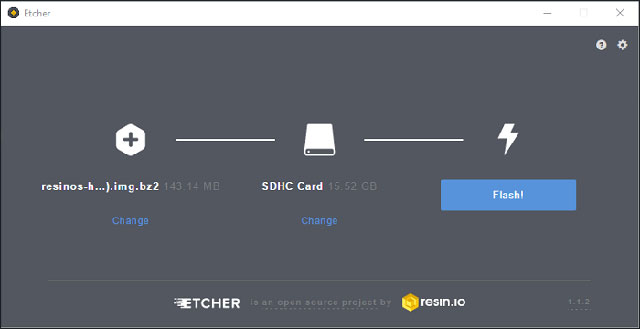
Flash hass.io to SD card
Step 2:
Open system-connections is in resin-boot on the new SD card created with the text editing tool. Change ssid to the WiFi network name you want to use and set psk as the password for the network. Then remove the card from the device.
Step 3:
Insert the SD card into the Raspberry Pi 3, if you use an Ethernet network cable, connect the cable, then plug in the power and turn it on.
Step 4:
When the Raspberry Pi machine turns on, it will connect to the Internet and download the latest version of the Home Assistant. This will take about 20 minutes.
Step 5:
When hass.io installation is complete, access http:///hassio.local: 8213 on your computer using a browser. The Home Assistant's Home screen appears showing that you have successfully installed it.
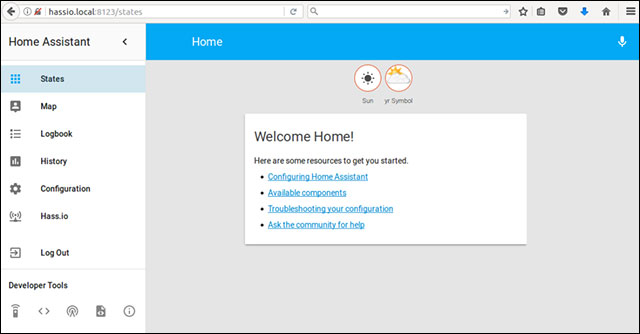
Home screen after successful installation hass.io on Raspberry 3
See more:
- How to start Raspberry Pi 3 from USB
- 5 great apps that make your Raspberry Pi really useful
- The best 10 operating systems for single-boad (SBC) computers