Instructions for installing and using VPN on Windows 11
Windows 11 has a built-in VPN feature that helps you protect your privacy and enhance your security while browsing the web. Join TipsMake to discover how to set up a VPN on Windows 11 to improve your online experience.
Connecting to a VPN is the ideal solution for secure and private browsing and accessing geo-blocked websites. The steps to configure a VPN on Windows 11 are quite simple.
Table of Contents:
1. How to install VPN on Windows 11.
2. Connect to VPN on Windows 11.
3. Disconnect VPN on Windows 11.
4. Delete VPN connection on Windows 11.
Instructions for installing and using VPN on Windows 11
However, before proceeding with the installation steps, you need to install Win 11 first.
1. How to install VPN on Windows 11
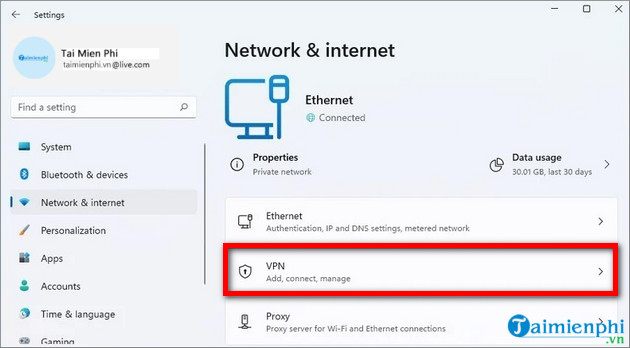
Step 1: First open the Settings window by pressing Windows + I.
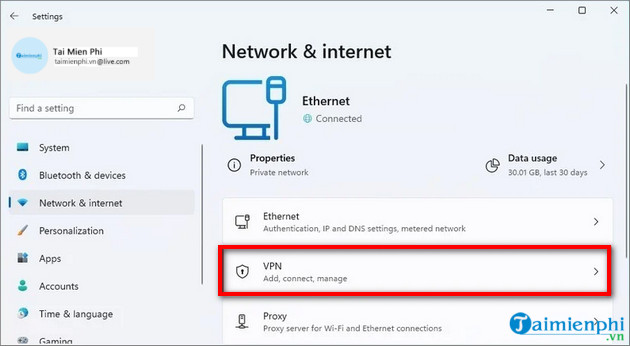
Step 2: Next, find and click Network & internet, then click VPN in the right frame.
Step 3: In the VPN connections section, find and click the Add VPN button.

Step 4: In the VPN provider menu, select Windows (built-in).
Step 5: Next, in the Connection name menu, enter the name of the VPN connection you want to connect to.
Step 6: In the Server name or address field , enter the VPN server address, such as vpnserver.com or 122.122.122.122.
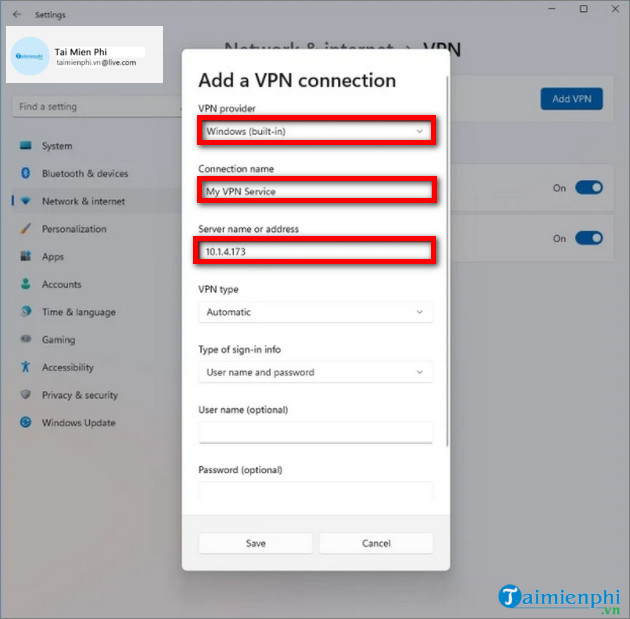
Step 7: In the VPN type menu, select the Automatic option or the protocol required to connect to the specific VPN server.
Step 8: In the Type of sign-in info menu, select the authentication method.
Note: This option depends on your VPN service provider's settings.
Step 9: Finally confirm the username and password, if you choose the User name and password option.
Step 10: Click the Save button to save the changes.
Once you complete the steps, you can connect to the VPN from the Settings app or the Taskbar.
2. Connect to VPN on Windows 11
Method 1: Connect VPN on Windows 11 from Settings
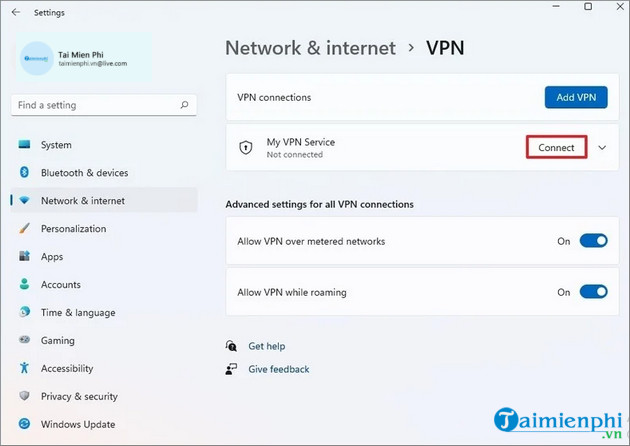
Step 1 : Open Settings by pressing Windows + I, then click Network & internet.
Step 2: Next, click VPN in the right pane and then click the Connect button .
Follow the steps above to connect your Windows 11 computer to the VPN server.
Method 2: Connect VPN on Windows 11 from the Taskbar
Follow the steps below to connect to VPN on Windows 11 from the Taskbar:
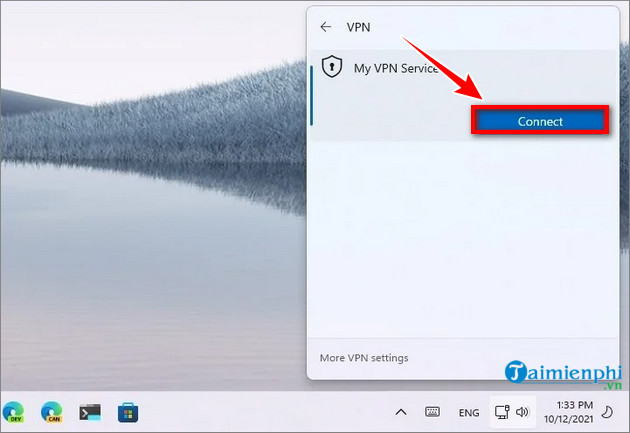
Step 1: Click on the network icon on the Taskbar, then click on the VPN button .
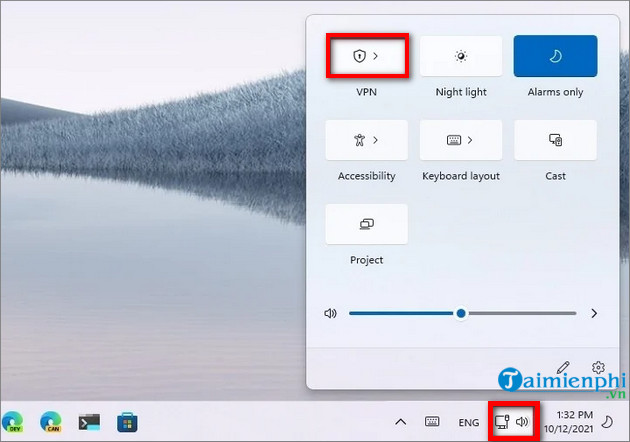
Step 2: Select the VPN connection you want to use and click the Connect button .
3. Disconnect VPN on Windows 11
Method 1: Disconnect VPN on Windows 11 from Settings
Step 1 : Open Settings , then click Network & internet.
Step 2: Next, click VPN in the right frame and then click the Disconnect button to disconnect.
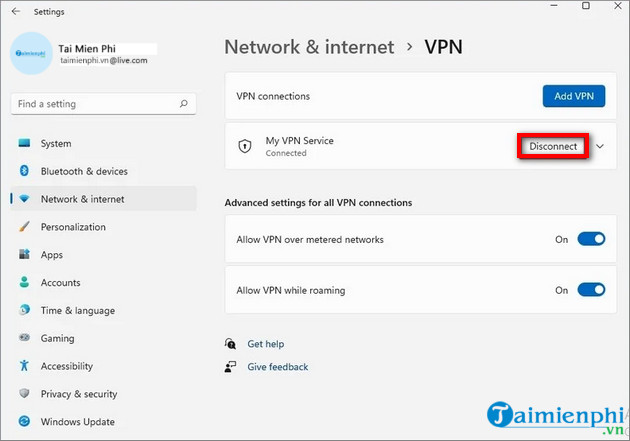
Step 3: Finally, click the Confirm button to confirm and you're done.
Method 2: Disconnect VPN on Windows 11 from the Taskbar
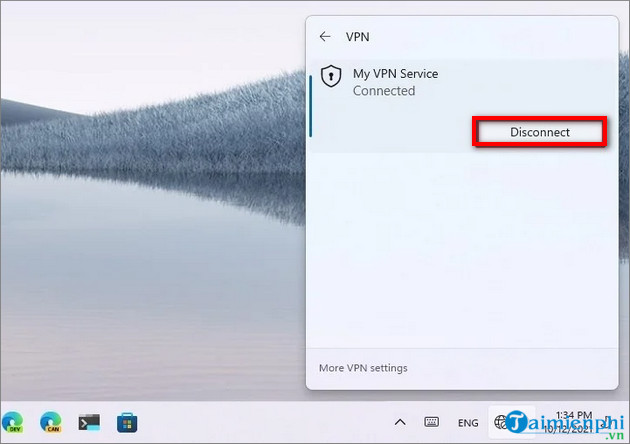
Step 1: Click on the network icon on the Taskbar, then click on the VPN button.
Step 2: Select the VPN connection and then click on the Disconnect button.
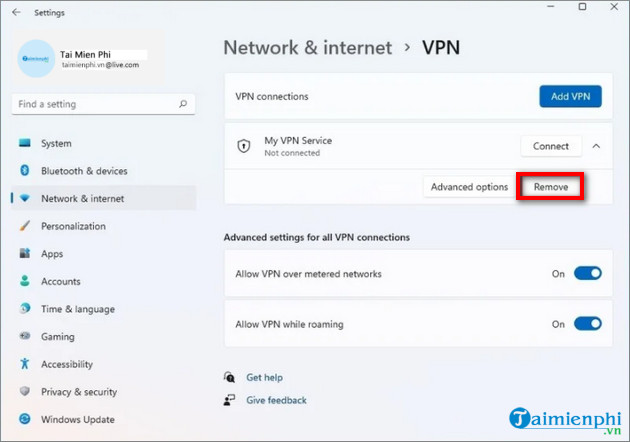
4. Delete VPN connection on Windows 11
Step 1: Open the Settings app (by pressing Windows + I), then find and click Network & internet.
Step 2: Next, in the right pane, find and click VPN.
Step 3: Click on the VPN connection to access the settings.
Step 4: In this step, find and click on the Disconnect button (if available) then click on the Remove button to delete the VPN connection and you're done.
Hopefully, the instructions for installing and using VPN on Windows 11 that TipsMake has just introduced above will help you master Windows 11 more easily. You can also refer to how to fix the error of losing Wifi on Windows 11 here to fix the error if any.
In addition, if you have any questions or need further answers, readers can leave their comments in the comment section below the article.
- Instructions for installing screensavers on Windows
- Instructions for installing GIT and configuring GIT on Windows 10
- Instructions for installing Windows 11, installing Windows 11 using ISO file
- Instructions for installing the Window 10X emulator on Window 10
- Detailed instructions on how to install Windows 7 for beginners
- Instructions for installing Windows XP with USB step by step from A to Z
- Instructions for installing Node.js
- Guide to installing Windows 7 Codec Pack without errors
- Instructions for checking and installing more RAM for laptops as quickly as possible
- Instructions for installing two Windows operating systems on one computer
- Thanks to Windows 11, the part that nobody cared about before suddenly became in short supply, increasing the price many times
- Microsoft continues to raise hardware requirements Windows 11: Requires 8th generation Intel chip, Ryzen 2000 or later
- Download Ghost Windows 11 Pro Full Soft v1.0 Best New Standard 2021
- Download Ghost Windows 11 Pro No Soft v1.0 2021
- Run Android on a computer without installing emulator software with Windows 11
- Minimum and recommended computer configuration to run Windows 11
- Windows 11 officially launched: Copy many features from macOS, run Android apps, update for free
- Steps to use Windows PC Health Check, check whether the computer can install Windows 11 or not
- What is WDDM 3.0? Features enabled by WDDM
- How the feature was removed on Windows 11
-
 11 million Android devices infected with malware from Google Play
-
The 5 best VPN software currently available offer free trials and money-back guarantees.
-
How to download and use X-VPN for free on Android, iPhone, and PC.
-
The fastest way to download and install APKCombo VPN on your PC.
-
Setting up a VPN on iPhone and iPad is extremely simple.
-
What is a VPN? Why do you need one, and in what situations should you use it?
 11 million Android devices infected with malware from Google Play
 The 5 best VPN software currently available offer free trials and money-back guarantees.
 How to download and use X-VPN for free on Android, iPhone, and PC.
 The fastest way to download and install APKCombo VPN on your PC.
 Setting up a VPN on iPhone and iPad is extremely simple.
 What is a VPN? Why do you need one, and in what situations should you use it?