Instructions to enable God Mode on Windows 11
If you want to explore and manage the operating system quickly and effectively with God Mode, let's learn how to activate it on Windows 11 in the article below with TipsMake..
Enabling God Mode on Windows 11 gives you quick access to all the operating system's settings and controls, saving you time and effort.
How to enable God Mode on Windows 11
Step 1: Copy the name below, highlight the whole thing and press Ctrl+C
Step 2: On the Win 11 Desktop screen, right- click and select New => Folder , create a new folder on the computer.
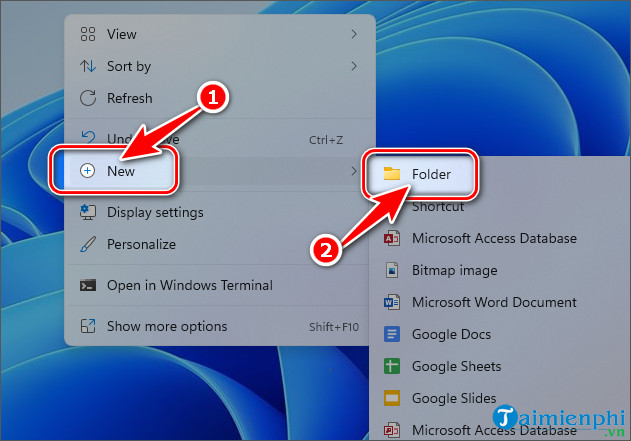
Step 3: Press Ctrl+V or Paste the name copied in Step 1 => press Enter .
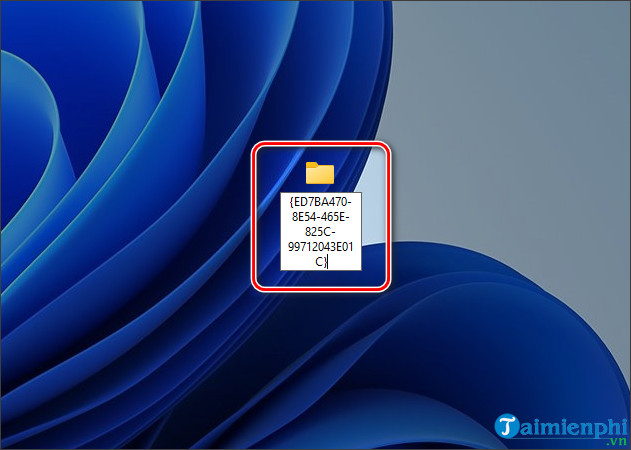
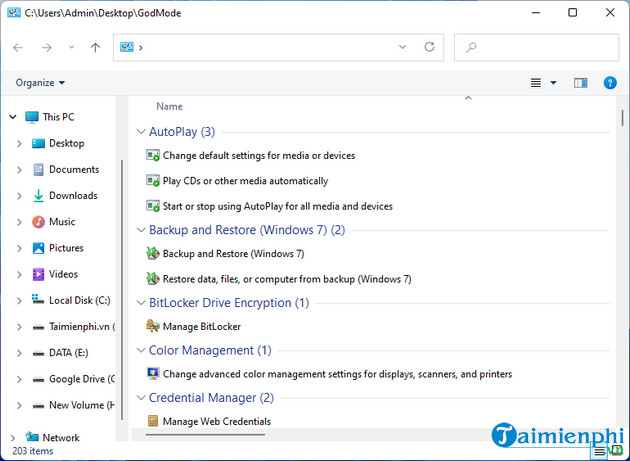
Step 4: Immediately after that, the folder name will be hidden, and when you open the folder, you will see more than 200 settings options organized into categories like Backup and Restore, Security and Maintenance, Power Options.
- Return to the main screen, press F5 on the keyboard, the God Mode Folder icon on Windows 11 will be updated.

Windows 11 users can now easily access all system settings without having to dig through multiple menus. God Mode displays settings options in the classic File Explorer style, making it easier to find hidden advanced settings.
Reasons to enable God Mode on Windows 11
- Allows quick access to Windows administrative tools and settings
- Saves time searching for controls in the Start Menu
- Provides many useful options for different tasks