Instructions for creating websites with WordPress from A to Z (Part 1)
Although WordPress and other content management systems make creating a new website much easier than before, it is still not a simple task, especially for those who do not have any Any knowledge about programming. There are many things to note even for experienced developers that can easily forget some important things.
This article has two parts: the first section describes off-site jobs (outside of WordPress administrators) and the second part includes on-site jobs (done from WordPress administrators).
- How to change the font in WordPress
Depending on the type of website, there are other tasks, such as if you want to set up a website for an e-commerce store, these two items will not be enough. However, they contain all the basic operations for creating any WordPress website.
Off-site jobs when creating websites with WordPress
- 1. Register domain names
- 2. Buy plan hosting
- 3. Install WordPress
- 4. Install SSL certificate
- 5. Create an email account
- 6. Set up an FTP connection
- 7. Register site with search engine
- 8. Set up a Google Analytics account
- 9. Other jobs
1. Register domain names
First, you will need an available domain. Hosting providers allow to register a new domain name with the hosting package. Usually this is the best option for a new website.
However, you can also convert an existing domain name from a domain registrar or if you want to host a domain name at another registrar, you can also update the nameserver yourself.
- Ways to change website domain names on WordPress
2. Buy plan hosting
When buying a plan hosting, basically, you are hiring memory for your website on a server that is owned and maintained by the hosting company. Hosting servers also provide many related services to help manage the site, so you should review these services before deciding to buy a plan.
For most new WordPress sites, a Linux plan on a shared server will be the best choice.
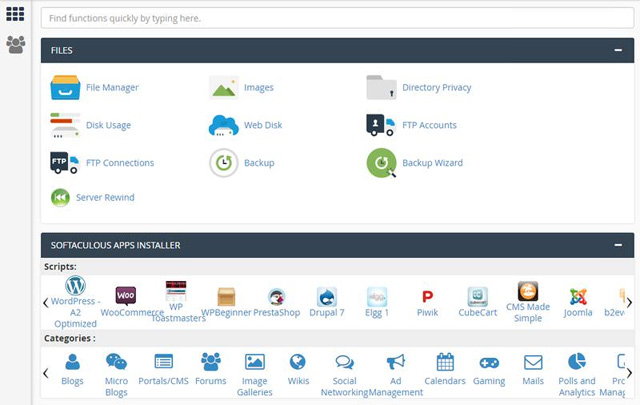
After purchasing plan hosting, you can access cPanel, a dashboard can manage hosting accounts, access databases, create email accounts and perform other website related tasks.
3. Install WordPress
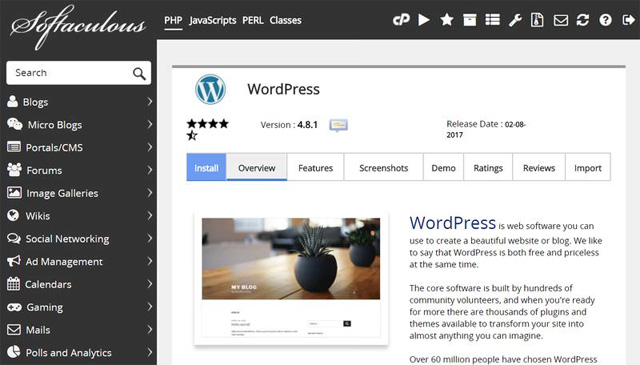
You need to install WordPress software on the website. Most hosting providers offer automated installers, which means you can run WordPress automatic installer at the same time as buying plan hosting.
If you do not want to use the automatic installer, you can also install WordPress via the Softaculous application installer in the cPanel dashboard or other software. Choose WordPress and follow the instructions.
4. Install SSL certificate
Although an SSL certificate is not required on the site, you should use it. Firstly, because users trust a safer website and secondly, browsers have started pushing unencrypted websites.
Having an SSL certificate installed on the page means it will use secure HTTPS protocol instead of HTTP. So your URL will be https://www.yoursite.com instead of http://www.yoursite.com .
Fortunately, most hosting providers now offer a free Let's Encrypt SSL certificate, often enough for small websites. You can install and manage it from the Security> SSL / TLS menu in cPanel.
5. Create an email account
You need at least one email address for the WordPress website for administrative purposes, for example to receive security notifications. Although a third-party email service provider, such as a Gmail or Yahoo address, may be used, consider setting up an email address with your domain name.
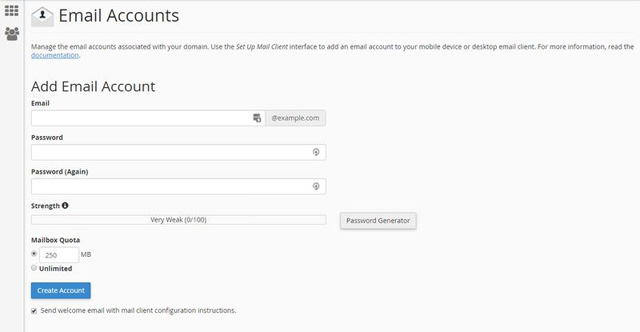
To create an email account, navigate to Email> Email Accounts in cPanel and fill out the " Add Email Account " form .
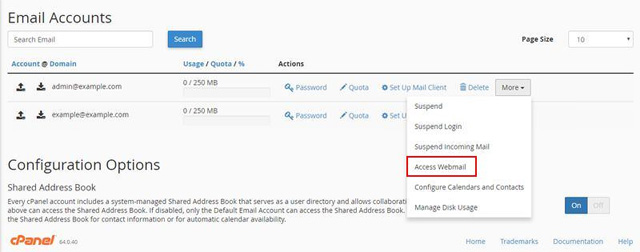
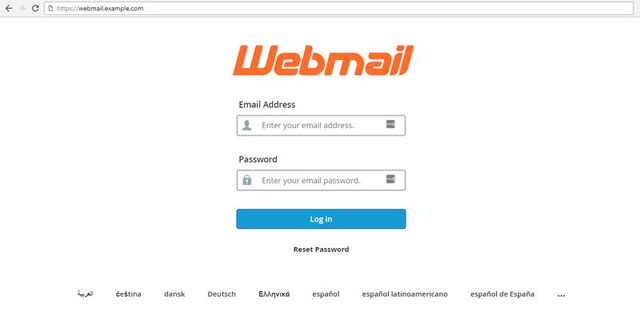
To access the new email address, scroll down to the same email account creation page, click the More button, and select the "Access Webmail" option .
Your mailbox also has a unique URL, usually http://webmail.yoursite.com/ or http://yoursite.com/webmail/. You can see it in the URL bar after logging in to your account. If you just want to check email, you can quickly access the mailbox from this URL, no need to login to cPanel.
6. Set up an FTP connection
To access the files stored on the server, you will need an FTP connection. Since WordPress is an advanced content management system, you can perform most tasks from its dashboard table.
However sometimes you need to upload or download files or folders to or from the server. For example, when the plugin is broken, it is not allowed to exit the WP administrator, the simplest thing can be done is to disable the plugin on the server. Another case is when you want to change the .htaccess file, wp-config or configuration files that are not available from WP administrator.
To access the site via FTP, you need an FTP account. Hosting accounts usually have two built-in FTP accounts, one for root access and one for logs. You can access the FTP account settings page by clicking Files> FTP Accounts in cPanel.
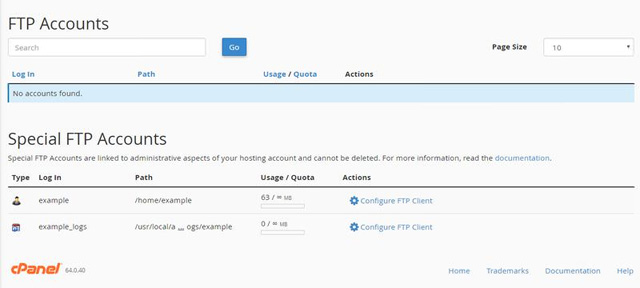
In many cases, just use the root account (as in the example above), but note that the root account has access to all files. If there are non-administrator users who need to access the server for some reason, you can create limited FTP accounts for them to access the folders they need (but not much). In addition, you can create additional FTP accounts on the same page.
If you click on the "Configure FTP Client" option , it will open a drop down tab that stores all the data needed to configure the FTP client. For example, hosting providers provide configuration files for three different FTP clients: FileZilla Client, CoreFTP and Cyberduck.
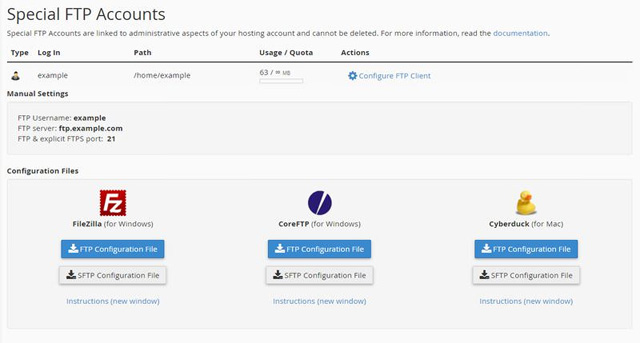
You need to install one of these FTP clients on your computer and follow the instructions (can be found on the screen under configuration files). Also can use SFTP instead of FTP. SFTP will send the encrypted file between the server and the computer. This is a safer solution but also harder to set up (need to create security keys). After connecting the server via FTP, you will find WordPress installed in the public_html directory.
7. Register site with search engine
If you want your website to be present on search engines, you need to register them by sending Google via Google Webmaster Tools and Bing or Yahoo via Bing Webmaster Tools . Some people sign up for their site on Google only, but Bing Webmaster Tools should not be ignored.
To use Google Webmaster Tools , you need to have a Google account. Log in to the website and on the main screen, click the " Add a property " button and enter the website URL.
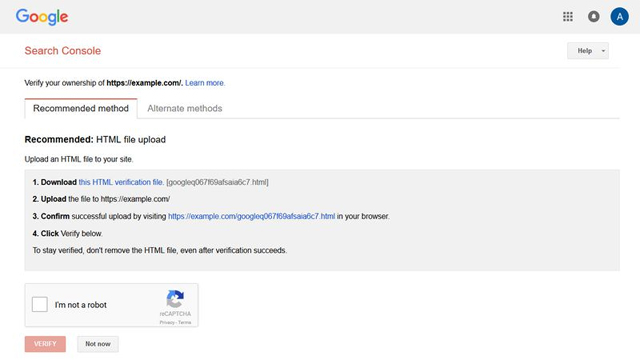
Now you need to verify that the website belongs to you. To do so, download the provided Google HTML verification file and upload the file via FTP to the server in the public_html directory. When done, click the " Verify " button.
For best results, add the following four versions to the URL:
- http://www.yoursite.com
- http://yoursite.com
- https://www.yoursite.com
- https://yoursite.com
Add all of them as separate properties, finally set the preferred domain according to the instructions on the google support page. If using an SSL certificate, select one of the HTTPS URLs.
Registering a website with Bing Webmaster Tools is similar. You need a Microsoft account, then log in to Bing Webmaster Tools, add the website URL and upload a verification file to the server via FTP. Note that Bing verification file is not HTML but XML file.
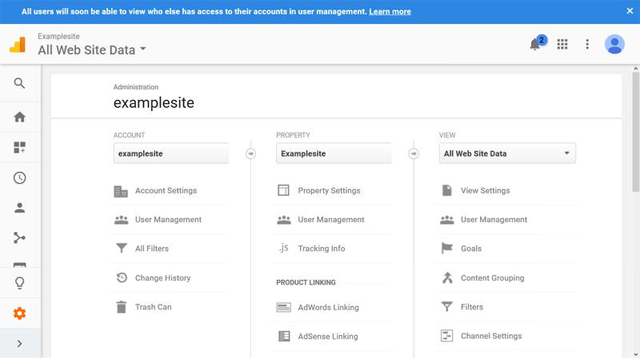
8. Set up a Google Analytics account
The site also needs some kind of analysis so you can understand better traffic. Although there are a number of analytics tools available on the web, the biggest analytics tool is Google Analytics, but many websites use more than one analytics tool.
To use Google Analytics with WordPress, you will need a plugin (see this section in the second part of the article). But first, you need to create your account. The best way if you use the same Google account used for Google Webmaster Tools because you can link these two services together.
In the Google Analytic Dashboard, you can view all kinds of statistics based on data such as real-time user access, traffic sources, referral, country and more. You can also create a variety of other configurations to get the statistics that provide the information you need.
9. Other work evil
This article has introduced the most important off-site tasks to do when creating a new WordPress site, but this is not a complete list. In cPanel, you will find several other options for managing websites. It depends on the hosting provider that provides features for users. Some of the choices will vary depending on the provider, however there are many common types.
Most hosting providers have backup management tools and some can even automatically back up. The features depend on your type of hositing account. Backup note can be done from cPanel and with a WordPress plugin, choose the solution that is right for you (but don't forget it).
- Instructions for creating web pages in Wordpress from A to Z (Part 2)